
Installing Standard LSF on a Subset of HP XC Nodes


Procedures
Prepare the setup files
1. Log into the head node of the XC cluster as root. Do not log in though the cluster alias.
• Change directory to /opt/hptc/lsf/top/conf and rename the existing setup files:
# mv profile.lsf profile.lsf.xc
# mv cshrc.lsf cshrc.lsf.xc
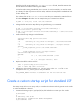
Obtain standard LSF and install it into the
existing LSF "tree"
These instructions assume that the user is familiar with the procedures to install standard LSF, which
basically consist of configuring the install.config file and running ./lsfinstall -f
install.config.)
1. The required minimum settings for the installation config file are as follows (adjust as necessary
for your system):
LSF_TOP="/opt/hptc/lsf/top"
LSF_ADMINS="lsfadmin"
LSF_CLUSTER_NAME="hptclsf"
LSF_ADD_SERVERS="xc1 xc2 xc3 xc4 xc5 xc6"
2. Set the hostnames of your "fat" nodes in the LSF_ADD_SERVERS entry.
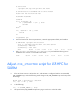
Correct the setup files
2. Correct the setup files as follows:
3. The new installation of standard LSF will create new setup files. Rename these files as follows:
# mv profile.lsf profile.lsf.notxc
# mv cshrc.lsf cshrc.lsf.notxc
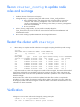
4. Create softlinks of the original files to the XC versions as follows:
# ln -s profile.lsf.xc profile.lsf
# ln -s cshrc.lsf.xc cshrc.lsf
5. The setup files for standard LSF (the newly installed ones) need to be edited to workaround a
minor configuration bug. To determine whether or not LSF is running on a SLURM_based system,