
HP WebQoS Peak for HP-UX Concepts and Operation Guide

28 Chapter3
HP WebQoS Peak for Netscape
Configuring HP WebQoS for Netscape
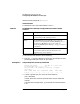
1. Start the Netscape Administration Server.
2. Select the server to configure.
3. Click on Server Status.
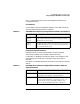
4. Select Log Preferences.
5. Enter the name of the new access logfile to create (Netscape will not
let you change the format of a logfile that is in use).
6. Select Custom format near the bottom of the page.
7. Append %Req->vars.hpacSessionState% at the end of the Custom
format field. Be sure to include a space at the beginning of this entry
to separate it from the other entries.
8. Click OK to make the change.
9. Click on Save and Apply to save your changes.
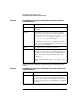
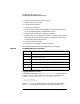
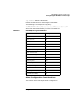
One of the following values will be logged to the access logfile:
Logging Statistics to a File
The statistics displayed on the HP WebQoS Statistics web page can be
logged to a file. To log the statistics to a file add the following lines to
/opt/ns-
server_name
/
server_id
/config/hpac/config.ac:
log.file
filename
log.interval
seconds
Where
filename
is the name of the file to which to save the statistics
and
seconds
is how often the statistics are saved (in seconds). The
Table 3-5 HP WebQoS Decision Log Values
Value Description
- A management request was served from the cache.
2 The request was rejected.
3 The request was processed as part of a basic priority session.
4 The request was processed as part of a high priority session.
5 The request was deferred to a future time slot.
6 The request was redirected to another server.