
HP WebQoS for the Solaris Operating Environment Release Note

HP WebQoS for Solaris
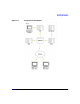
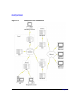
Installing HP WebQoS
Chapter 1 11
Installing the WebQoS Software
To install one or more of the WebQoS software components, do the following:
1. Whether you are installing the software from the CD or have downloaded the software
from the web, make sure you are in the directory in which the component files are located.
2. Install the desired WebQoS software component(s). Type:
/usr/sbin/pkgadd -d webqos3.0
You can select one, multiple (separate selections with a comma), all (default selection, just
hit Enter), or no components (enter q, then Enter).
Separate steps are required to install the management console on a PC. Refer to “Installing
the Management Console on a PC” on page 11 for more information.
Upgrading the Management Console on a PC
If you are upgrading the WebQoS software, you must also upgrade the management console
on your PC. Do this by removing the existing management console and installing the new
management console.
To upgrade the management console software on a PC, do the following (you can click the
Cancel button at any time to quit the process):
1. On the PC, from the Taskbar, choose Start > Settings > Control Panel to open the
Control Panel window.
2. Double-Click on Add/Remove Programs.
3. From the Install/Uninstall tab, find and highlight WebQoS and select Add/Remove.
4. The WebQoS Setup Maintenance program runs and you are asked to select the Modify,
Repair, or Remove option. Select Remove, and click Next.
5. Confirm file deletion by clicking OK.
6. At the Maintenance Complete screen, click Finish.
7. Go to the nextsection (“Installing the Management Console on a PC”) to finish the upgrade
process.
Installing the Management Console on a PC
You can install the HP WebQoS management console on either a single PC or on separate
PCs. However, one PC must be your primary one from which you configure WebQoS. All other
PCs are used for viewing purposes only.