
HP Web Jetadmin - Eco Solutions for HP Web Jetadmin
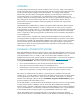
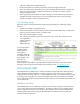

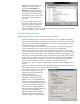

2. On the Licensing screen, provide
the Organization’s name and the
license key that was provided with
the installer. Either type or copy
and paste the license key in the
corresponding text area.
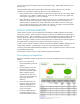
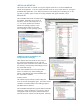
3. In the Web Address screen, select
the web application’s Virtual
Directory and IIS Application Pool.
The default name for the virtual
directory is ESF, but any name
can be entered. Remember this
name as it will be used in
the browser URL to access
EcoSMART Fleet. A
directory of this name will
be created under Inetpub,
wwwroot.
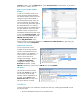
Note: Older versions of
Windows such as
Windows XP and Windows
Server 2003 may have
earlier versions of IIS prior
to 7.0 such as IIS 5.1. In
such cases, there will not
be an option to select ASP
.NET v4.0 for an
application pool. Merely
proceed with the default
and the installer will setup Eco
Smart Fleet using the default
pool.
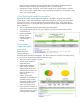
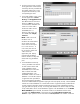
4. In the Database Connectivity
screen, parameters are entered
to select a SQL instance and
create a database where
EcoSMART Fleet will store the
data it collects from Web
Jetadmin databases. The
EcoSMART installer can create a
database in a local SQL instance
if rights have been provided for
the currently logged in Windows
account to create a database (sysadmin (sa) rights will work equally as well). The EcoSMART
installer can create a database in a remote SQL instance if rights have been provided for the
currently logged in Windows machine (machine$) account to create a database (sysadmin
(sa) rights will work equally as well). An existing SQL database can also be used, but a SQL
script would need to be run on the database to prepare it for EcoSMART use. If the Create
New Database option selected, the installer creates a new database with the name
provided under Database Name in the location provided under SQL Server Name and
Instance. Proper syntax for server and instance is Server\Instance. The installer creates the