
HP Web Jetadmin 10.3 - User Guide


for Reports on page 68). You can specify the time zone and custom hour when setting up data collection (see
Add Devices to Data Collection on page 211) or when creating data collection templates (Create a Data
Collection Template on page 213), For example:
Joy has devices in the Pacific time zone. Her HP Web Jetadmin server is in the mountain time zone. The
devices that Joy manages are not turned on until 8AM. Pacific time. Data collection at 12AM Mountain time
would not capture any data for the devices since they are turned off at the end of the business day. When Joy
sets up data collection for the devices, Joy can specify that she would like the collection to run in the Pacific
time zone and at 9:00AM. The data collection would start on the HP Web Jetadmin server at 10AM Mountain
time which is 9AM Pacific time.
HP Web Jetadmin will continue to use a 24 hour data collection cycle for all devices.
Steps for Adding Devices to Data Collection
NOTE: If you access this feature through the Reports - Data Collection - Management Task Module
on page 203, then you will skip the first page of the Add Devices to Data Collection Wizard.
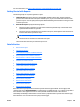
1. Expand the Reports tree in the left navigation pane and then click Data Collection.
In the Data Collection - Common Tasks task module, select Add devices to data collection. The Add
Devices to Data Collection wizard is started with the Select data collection page displayed.
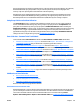
2. Select the template to use, if any and then select the type of data collection(s) to perform.
3. Select the time zone and the time to start data collection. The click Next; the Select devices page is
displayed.
NOTE: For more information about Data Collection offset hours, see Data Collection Custom Collection
Time on page 211.
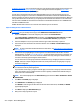
4. Select the device by highlighting it and clicking the arrow buttons between the two lists. To select
multiple devices, use either Ctrl+Click or Shift+Click. To move all devices from one list to the other, use
the double arrow buttons. You can sort the list of available devices by clicking the column headers, or
view more columns by right-clicking the column headers.
You can also select an entire group instead of individual devices, by changing the selection method to
Groups. Tasks (for example configurations and more) can be performed on a single group or a group
and all of its subgroups.
NOTE: Including all subgroups can potentially take much longer and cause much more network traffic,
so it should be used only when appropriate.
If you schedule a task using a group, the task will apply to the devices in the group at the time the task
starts. This makes it easy to redefine the devices used in regularly scheduled tasks without having to
delete and create a scheduled task.
NOTE: The columns displayed on the Select devices page are defined in View > Preferences > Device
Identification.
5. Click Next. The Confirm page is displayed.
6. Click Add Devices. The Results page is displayed.
Click Details to view the types of data collection for that device. When done, click Close; the Results
page is displayed again.
7. Click Done to display the Data Collection page.
8. Now you are ready to generate a report.
212 Chapter 3 Device Management ENWW