
Configuring a Redundant Pair of VMA SAN Gateways - Process Guide


23
identical. This will be important for the actual connection and discovery of the paired gateway and
export of LUN access.
Connect Secondary Gateway to SAN and Ethernet Switches
Perform steps in this section with the ‘secondary’ gateway still shutdown.
Connect the ‘eth1’ and ‘eth2’ Ethernet ports of the ‘secondary’ VMA SAN Gateway to the
appropriate Ethernet switch ports as defined previously.
Make appropriate Fibre Channel connections from the ‘secondary’ gateway FC target ports to the FC
SAN Switches using appropriate FC cables.
Do not connect the VMA Arrays to the ‘secondary’ gateway at this time.
Connect the ‘secondary’ gateway power cords to the planned power source.
Configure the Secondary VMA SAN Gateway
Power up the ‘secondary’ VMA SAN Gateway and log in using a serial connection CLI or KVM
session. At this time configure the secondary VMA SAN Gateway as according to the ‘Configuring
Additional Gateways’ section of the ‘HP VMA-series SAN Gateway Installation and User Guide’, P/N
AM456-9007B-Rev 2’.
When using the setup wizard (or using the ‘configuration jump-start’ command) to configure the
‘secondary’ gateway, be sure to respond ‘NO’ to Step 1 which asks if you want to ‘configure as
master/stand-alone?’. For Step 2 enter ‘eth1’ (default) and enter the IP address planned for the
‘secondary’ gateway at Step 3 of the configuration wizard. For Step 6, accept the default setting of
‘eth1’.
It is important for Step 7 that you accept the default Cluster ID that was pre-configured with the
‘secondary’ gateway which is also printed on the Cluster ID and License Key label on the top right
front of the gateway server enclosure. Do not enter the same Cluster ID as assigned to the ‘primary’
gateway at this time.
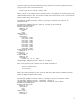
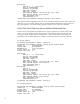
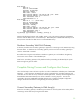
The following is an example using the gateway configuration wizard (configuration jump-start) to
enter the initial configuration settings on the ‘secondary’ gateway.
Violin Memory Gateway configuration wizard
Press '?' for help, Ctrl+B to go back to the previous step.
Default value is in square brackets: press Enter to accept it.
Press Ctrl+R to clear default to enter empty string.
Press Ctrl+C to jump to the end of the wizard at any time.
Step 1: Configure as master/stand-alone? [yes] no
Step 2: Public interface name? [eth1]
Step 3: Public interface IP address? 10.61.184.238
Step 4: Public interface netmask? 255.255.255.0
Step 5: Hostname? [memgate-06639c] hp-gateway2
Step 6: Cluster interface name? [eth1]
Step 7: Cluster id? [00500-0008-7178] <<= leave this set to the default value