
Deploying Virtual Connect Enterprise Manageron Microsoft Cluster Service


25
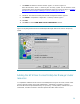
IMPORTANT: Be sure that the secondary system owns all of the clustered disks. Since installation will
result in an automatic reboot, it is recommended to shut down the primary system before beginning
the installation on the secondary system, to prevent the cluster resources from being failed over to the
primary system upon the reboot.
VERY IMPORTANT: Rename the existing HP Virtual Connect Enterprise Manager folder and all its
installed components folders (such as Systems Insight Manager) on the shared disk. In this way, the
VCEM data may be restored in case installation on the secondary system is not successful or is not
completed. In this example, V:\Program Files\HP was renamed to V:\Program Files\HPback before
continuing. Be sure to specify the same location and same folder name on the same shared disk as
used in the primary system installation.
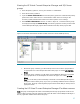
1. On the secondary system, repeat steps 1-13 in Installing HP Virtual Connect Enterprise
Manager on the primary system with respect to the secondary system.
2. Open the ~\HP Systems Insight manager\config\database.props file (e.g. using notepad)
and record the database name corresponding to the keyword hp.Database.databaseName.
3. Shut down the Secondary system.
Adjusting the HP Virtual Connect Enterprise Manager data source name
on the primary system
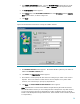
1. Bring up the primary system.
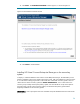
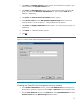
2. Click Control PanelàAdministrative Tools->Data Sources (ODBC).
3. Select the System DSN tab.
4. Select Insight_v50_0 and click Configure.
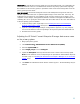
5. Update the Description referring to the database name created on the secondary system.
Note: Use the database name (corresponding to the hp.Database.databaseName keyword)
recorded in step 2 of Installing HP Virtual Connect Enterprise Manager on the Secondary
system, above.
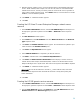
6. Click Next. The authentication mode selection window appears. The default settings may be
retained.