
HP VAN SDN Controller Installation Guide


java-1.7.0-openjdk-amd64 1051
/usr/lib/jvm/java-1.7.0-openjdk-amd64
If only Java 7 is listed, skip step b below and go to Step 5. If more than one Java
version is listed, go to step b below to set the default version.
b. Set Java 7 as the default version:
~$ sudo update-java-alternatives --jre –s
java-1.7.0-openjdk-amd64
5. Install the HP VAN SDN Controller from the directory in which it is stored:
~$ sudo dpkg –i hp-sdn-ctl_version_amd64.deb
• Replace version with a value for release version 2.0.1.4254 or greater, as
shown in Example 1.
Example 1 Installing the controller software
~$ sudo dpkg -i hp-sdn-ctl_2.0.1.4254_amd64.deb
The controller starts automatically after installation.
Verifying the controller installation
To verify the controller installation:
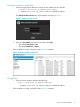
1. Using the Ubuntu command prompt, enter the following to check the installation state:
~$ dpkg -l hp-sdn-ctl
If the HP VAN SDN Controller package is properly installed, output similar to the
following appears:
ii hp-sdn-ctl 2.0.1.4254
HP VAN SDN Controller
2. In the command line window, verify that the sdnc service is started:
~$ sudo service sdnc status
If prompted, enter your device password.
The following output indicates that the sdnc service is started:
~$ sdnc start/running, process nnnn
Where: nnnn is the process ID assigned to the main HP VAN SDN Controller
process (sdnc).
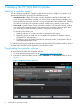
Access a controller interface
There are two interfaces for operating the controller:
• “Using the controller console GUI”
• “Using RSdoc”
8 Installing the HP VAN SDN Controller