
HP VAN SDN Controller Installation Guide


3. Select the check box next to the SDN Controller product, and then click Display selected.
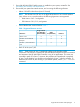
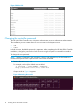
4. In the right pane on the product display screen, click Software downloads, as shown in
Figure 2.
Figure 2 Software downloads pane
5. On the My Networking Download software screen, select and download the HP VAN SDN
software package to your Ubuntu machine. By default, Ubuntu places the software package
in the Downloads directory unless you specify a different directory.
6. Read the latest HP VAN SDN Controller Release Notes included with the software package.
Installing and starting the controller in standalone mode
To install the downloaded HP VAN SDN Controller software:
NOTE: Where a command in this procedure is shown with multiple lines, the line breaks are
inserted at the points where a space occurs in the actual command.
1. Ensure that you have root access on the Ubuntu system (sudo).
2. Using the Ubuntu command prompt, begin installing the software dependencies. When
prompted, enter y.
~$ sudo apt-get install python-software-properties
ubuntu-cloud-keyring
~$ sudo add-apt-repository "deb
http://ubuntu-cloud.archive.canonical.com/ubuntu
precise-updates/folsom main"
~$ sudo apt-get update
3. Continue installing software dependencies. When prompted, enter y.
~$ sudo apt-get install openjdk-7-jre-headless postgresql
keystone keystone-doc python-keystone iptables unzip
4. Ensure that Java 7 is the default Java version on your Ubuntu machine. (If, in addition to Java
7, there is an older version of Java installed, such as Java 6, the installation will fail unless
Java 7 is designated as the default version.)
a. Use the following command to determine the versions of Java installed.
~$ sudo update-java-alternatives –l
An output with one or more lines appears, similar to the following:
java-1.6.0-openjdk-amd64 1061
/usr/lib/jvm/java-1.6.0-openjdk-amd64
nl
Installing and starting the controller in standalone mode 7