
LVM/VxVM and vPars sx2000 Upgrade
20
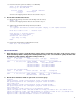
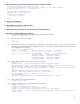
14.7. Activate the root volume group:
# vgchange –a y /dev/vg00
Activated volume group
Volume group "/dev/vg00" has been successfully changed.
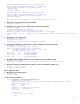
14.8. Verify that the hardware path for the boot device matches the primary boot path.
# lvlnboot –v /dev/vg00
Boot Definitions for Volume Group /dev/vg00:
Physical Volumes belonging in Root Volume Group:
/dev/dsk/ c9t10d0s2 (2/0/1/1/0.10.0) -- Boot Disk
Boot: lvol1 on: /dev/dsk/c9t10d0s2
Root: lvol3 on: /dev/dsk/c9t10d0s2
Swap: lvol2 on: /dev/dsk/c9t10d0s2
Dump: lvol2 on: /dev/dsk/c9t10d0s2, 0
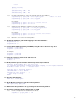
14.9. Update the LVM metadata with the new boot physical volumes hardware paths:
# lvlnboot –R /dev/vg00
Volume Group configuration for /dev/vg00 has been saved in /etc/lvmconf/vg00.conf
14.10. Reboot the virtual partition:
# reboot –s
14.11. Go back to 14.1. for the next LVM virtual partition.
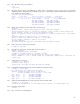
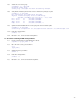
15. For all the remaining VxVM virtual partitions:
15.1. Boot the virtual partition in VxVM Maintenance Mode:
# vparboot –p vpar_name –o –vm
15.2. Go to the vPars console, press Control-A:
# ^A
[vpar_name]
15.3. Update the device special files:
# insf –e
15.4. Reboot the virtual partition:
# reboot –s
15.5. Go back to 15.1. for the next VxVM virtual partition.