
Implementing disaster recovery for HP Integrity Virtual Machines with Metrocluster and Continentalclusters on HP-UX 11i
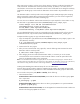
Table Of Contents
- Executive summary
- Introduction
- Audience
- Configuring Integrity Virtual Machines as packages in HP Metrocluster
- Verifying failover of Metrocluster packages across data centers
- Troubleshooting Metrocluster VM problems
- Application startup and monitoring
- Configuring Integrity Virtual Machines as packages in HP Continentalclusters
- Overview
- Software requirements for HP VMs in Continentalclusters
- Configuring HP VM packages in Continentalclusters
- Creating VM switches in all nodes of the primary cluster
- Configuring replicated storage for VM in Continentalclusters
- Installing the operating system on the virtual machine
- Testing the virtual guest OS in all nodes of the primary cluster
- Creating VM switches in all nodes of the recovery cluster
- Preparing the replicated storage for use in the recovery cluster
- Creating the virtual machine in all nodes of the recovery cluster
- Testing the virtual guest OS in all nodes of the recovery cluster
- Resynchronizing the replicated storage
- Packaging the HP VM in the primary cluster and the recovery cluster
- Creating a Continentalclusters package
- Creating a Continentalclusters configuration with the VM packages
- Running the Continentalclusters monitoring daemon in the recovery cluster
- Recovering to the recovery cluster
- Related documentation
- Appendix I
- Appendix II
- For more information
- Call to action

8
Creating a Continuous Access XP/P9000 device group
You need to create a Continuous Access XP/P9000 device group on every node in the cluster. To
create a device group, complete the following steps:
1. Copy the horcm.conf file in /etc directory into an instance specific file in all nodes in DC_1and
DC_2 if not already done previously.
# cp /etc/horcm.conf /etc/horcm0.conf
2. Edit the HORCM_MON and HORCM_CMD sections of the horcm0.conf file. For instructions on doing
this, see the
/etc/horcm.conf file.
3. To start the RAID Manager instance in all nodes, use the command "horcmstart.sh <inst #>":
# export HORCMINST=0
# horcmstart.sh 0
4.
Edit the HORCM_LDEV and HORCM_INST sections of the horcm0.conf file to contain devices on each
site being used for data replication.
A complete entry for the Node1 system in DC_1 is illustrated below. The serial number and the
CU:LDEV number define a LUN. Reserve the appropriate number of LUNs, depending on the number
of devices/device groups you need. For our case, we use a single LUN defined by the array serial
number 10053 and the CU:LDEV number 1:18.
HORCM_MON
#ip_address service poll(10ms) timeout(30ms)
Node1 horcm0 1000 3000
HORCM_CMD
#dev_name dev_name dev_name
/dev/rdsk/c9t2d0 /dev/rdsk/c10t2d0
HORCM_LDEV
#dev_group dev_name Serial# CU:LDEV# MU#
dgVM dgVM_dev0 10053 1:18
HORCM_ INST
#dev_group ip_address service
dgVM Node3 horcm0
dgVM Node4 horcm0
Note: It is recommended to have Business Copy (BC) devices on each end of the device group pair. These BC devices
provide a good copy of the data when recovering from a rolling disaster. For information on how to set up BC devices,
refer to
www.hp.com/support/manuals (click on “Storage Software” and then, under “Storage Replication Software,”
on “HP StorageWorks XP Business Copy Software”).
1. Restart the RAID Manager using the following commands:
# horcmshutdown.sh 0
# horcmstart.sh 0