
Implementing disaster recovery for HP Integrity Virtual Machines with Metrocluster and Continentalclusters on HP-UX 11i
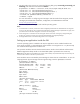
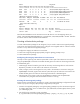
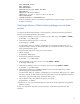
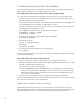
Table Of Contents
- Executive summary
- Introduction
- Audience
- Configuring Integrity Virtual Machines as packages in HP Metrocluster
- Verifying failover of Metrocluster packages across data centers
- Troubleshooting Metrocluster VM problems
- Application startup and monitoring
- Configuring Integrity Virtual Machines as packages in HP Continentalclusters
- Overview
- Software requirements for HP VMs in Continentalclusters
- Configuring HP VM packages in Continentalclusters
- Creating VM switches in all nodes of the primary cluster
- Configuring replicated storage for VM in Continentalclusters
- Installing the operating system on the virtual machine
- Testing the virtual guest OS in all nodes of the primary cluster
- Creating VM switches in all nodes of the recovery cluster
- Preparing the replicated storage for use in the recovery cluster
- Creating the virtual machine in all nodes of the recovery cluster
- Testing the virtual guest OS in all nodes of the recovery cluster
- Resynchronizing the replicated storage
- Packaging the HP VM in the primary cluster and the recovery cluster
- Creating a Continentalclusters package
- Creating a Continentalclusters configuration with the VM packages
- Running the Continentalclusters monitoring daemon in the recovery cluster
- Recovering to the recovery cluster
- Related documentation
- Appendix I
- Appendix II
- For more information
- Call to action
11
2. Initialize disks to be used by VxVM by running vxdisksetup command on the primary site.
# /opt/VRTS/bin/vxdisksetup –i c4t2d5
# /opt/VRTS/bin/vxdisksetup –i c4t2d6
Note: The following information provides details on how to determine the mapping between array device names
and the native OS names.
For Metrocluster Continuous Access XP/P9000, use raidscan command. For example,
# ls /dev/rdsk/* | raidscan –find -fx | grep 118
/dev/rdsk/c4t2d5 0 F CL4-E 5 3 10053 118 OPEN-V
For Metrocluster SRDF use
symdev command. For example,
# symdev list | grep 0015
0015 /dev/rdsk/c4t2d5 14C:1 16B:D1 RDF1+Mir Grp'd WD 4314
For Metrocluster Continuous Access EVA use
RSM_HV_Mapper tool. For example,
# RSM_HV_Mapper.pl –i
Virtual Disk Name..: \\Virtual Disks\Vdisk001Disk......................:
/dev/dsk/c4t2d5
3.
Create the disk group to be used by using the vxdg command on the primary system.
# vxdg init vmdatadg c4t2d5 c4t2d6
4. Verify the configuration.
# vxdg list
5. Create the logical volume.
# vxassist –g vmdatadg make datavol 2048M
6. Verify the configuration.
# vxprint –g vmdatadg
7. Deport the disk group.
# vxdg deport vmdatadg
8. Enable read/write permission on the remote site.
For Metrocluster Continuous Access XP/P9000
Split the CA link to enable remote side read/write permission with the
pairsplit command.
# pairsplit –g dgVM –rw
For Metrocluster SRDF
Split the SRDF link to enable R2 read/write permission.
# symrdf –g dgVM split
For Metrocluster Continuous Access EVA
Use HP StorageWorks Command View EVA to fail-over the DR group to enable read/write
permission on the remote site.
Note: Steps 9–13 are to be performed on any one node in the cluster only).
9. Enable other cluster nodes to have access to the disk group.
# vxdctl enable
10. Import the disk group.
# vxdg –tfC import vmdatadg
11. Start the logical volume in the disk group.
# vxvol –g vmdatadg startall
12. Verify the configuration.
# vxprint –g vmdatadg