
HP-UX Virtual Partitions Administrator Guide (includes A.05.09) (5900-2188, March 2012)

3. Use ioscan to verify the hardware addresses in your virtual partition plan:
# ioscan
4. Create the virtual partitions using the information you prepared in the virtual partition plan.
For example:
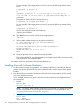
# vparcreate -p keira1 -a cpu::2 -a mem::1024 -a io:0.0.1 -a io:1.0.0 -a io:1/0/0/3/0.6.0:BOOT
# vparcreate -p keira2 -a cpu::1 -a cell:1:cpu::1 -a mem::1024 -a io:1.0.1 -a io:1.0.4 -a
io:1/0/4/1/0/4/0.1.0.0.0.0.1:BOOT
# vparcreate -p keira3 -a cpu::1 -a mem::1024 -a io:0.0.2 -a io:0.0.0 -a io:0/0/0/3/0.6.0:BOOT
5. If you are on an Integrity system, set the mode to vPars; otherwise, you will not be able to
boot into the vPars environment:
# vparenv -m vPars
6. Reboot the system.
# /etc/shutdown -r
7. Boot the system to ISL or EFI shell and boot the vPars Monitor and all the virtual partitions:
• PA-RISC
BCH> bo pri
interact with IPL: y
ISL> hpux /stand/vpmon vparload -all
• Integrity
Shell> fs0:
fs0:\> hpux
HPUX> boot /stand/vpmon vparload -all
Your system should now be booted with all virtual partitions up.
Removing the vPars Product
From a Single Virtual Partition
To remove the vPars product, execute the swremove command from the target virtual partition.
For example, to remove the vPars product from the partition winona3:
winona3# /usr/sbin/swremove -x autoreboot=true VirtualPartition
The product will be removed, and the virtual partition will be shut down. Because the vPars-specific
kernel modifications have been removed, the OS instance cannot be booted again as a virtual
partition. However, the OS instance can be booted into standalone mode.
If you are at the console of winona3, use Ctrl-A to toggle to another virtual partition.
CAUTION: Remove the vPars product only at the product level (VirtualPartition). Do NOT remove
the vPars product at the bundle level (T1335AC or VPARSBASE). Recommended kernel patches
are included in the vPars bundle; if the bundle is removed, these kernel patches will also be removed.
For more information on bundles and patches, go to the BSC website at http://www.hp.com/go/
patchmgmt-docs and see Patch Management User Guide for HP-UX 11.x Systems.
NOTE: When the vPars product is removed, the contents of the AUTO file in the LIF area will be
set to the default hpux (where /stand/vmunix is the default argument). This is true even if you have
previously modified the AUTO file to contain hpux /stand/vpmon. This replacement occurs on
the boot devices associated with the target virtual partition, including the devices listed in /stand/
bootconf and the primary and alternate paths of the target virtual partition. See bootconf(4) for
more information on the file /stand/bootconf.
Removing the vPars Product 117