
HP-UX Virtual Partitions Administrator Guide (includes A.05.09) (5900-2188, March 2012)


HPUX11i-OE-Ent Enterprise OE
HPUX11i-OE-MC Mission Critical OE
You should chose the same OE that your current virtual partition is running. Use the
swlist command to check which OE you are currently running:
# swlist -l bundle | grep -i OE
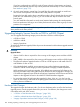
HPUX11i-OE-Ent B.11.23.0505 HP-UX Enterprise Operating Environment
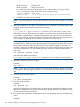
• T1335BC is the vPars A.04.xx bundle.
NOTE: Be sure that both the OE and vPars bundles are specified on the update-ux command
line.
6. After the all updates for the above virtual partitions have completed, use Update-UX to install
the latest OE and vPars bundle to the first virtual partition.
Example:
keira1 # update-ux -s depot1:/release/0505.1123/HPUX11i-OE-Ent.DVD HPUX11i-OE-Ent T1335BC
Although you can do all the updates in parallel, you need to make sure that all of the other
virtual partition updates have successfully performed the updating to the point of halting for
reboot. In the next step, the entire nPartition will be rebooted; if the other virtual partitions are
still in progress of updating, the OS instances may be in an unknown state.
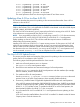
NOTE: If the BOOT and ALTBOOT disks are a mirrored pair, updating is not required on
the ALTBOOT disk. Otherwise, after updating the OS on the primary boot path disk, boot the
virtual partitions from the alternate path boot disk and repeat the update-ux procedure. For
example, if keira2 has an alternate boot disk that is not a mirror of the primary boot disk, and
you wish to update the OS on the alternate boot disk, boot keira2 from the alternate boot
path using:
MON> vparload -p keira2 -B ALT
and repeat the update-ux procedure
keira2# update-ux -s depot1:/release/0505.1123/HPUX11i-OE-Ent.DVD HPUX11i-OE-Ent T1335BC
7. Reboot the nPartition to the ISL> prompt.
Example:
MON> reboot
NOTE: At this point, you need to reboot the nPartition from the MON> prompt, not just the
virtual partition. By rebooting the nPartition, you can load the new vPars Monitor in the next
step.
8. From ISL> load the vPars Monitor.
Example:
ISL> hpux /stand/vpmon
9. Boot the virtual partitions.
Example:
MON> vparload -all
When the virtual partitions are booted, they will continue and complete their update processes.
After this is completed, you should arrive at the login: prompt for each virtual partition. Login
as root and continue to the next step.
10. Turn autoboot and autosearch settings back to their original settings that you recorded earlier
above.
Example:
104 Installing, Updating, or Removing vPars and Upgrading Servers with vPars