
Administrator's Guide
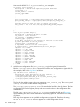
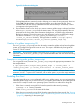


Figure 93 Confirmation Dialog Box
Clicking Yes produces a terminal window allowing you to enter the root password, where as
clicking No halts the addition of this client and returns you to the Ignite-UX GUI. Once
communication with the client is established and the client directory is constructed, a client
icon appears in the Ignite-UX GUI.
6. Ensure that the client icon for which you want to create a golden image is selected, and then
select Create Golden Image from the Actions menu. You may be prompted for the root
password for the client. After some informative dialog boxes, a Golden image information
dialog box appears. The archive name, tag, and description can be modified at this stage.
The archive is created in /var/opt/ignite/GoldenImages/<client>/
<client_os_release> directory. The log file that is created is /var/opt/ignite/
GoldenImages/client/<client_os_release>/golden_image.log.
Creation of a golden image using CLI
The make_golden_image script can also be used to create the golden archive from the golden
system, and configure the Ignite-UX server to use it. This script is available only from Ignite-UX
version C.7.18.63 onwards.
IMPORTANT: Do not use the golden system while make_golden_image is running for that
particular client, as the make_golden_image command modifies files with host and networking
information.
Examples on using make_golden_image script:
On an Ignite-UX server, execute make_golden_image script with appropriate parameters. See
the example below:
# /opt/ignite/data/scripts/make_golden_image -c <client_name> -f
<config_file_name> -p <client_architecture> -n <client_archive_name>
NOTE: The manpages for make_golden_image will be available in a future release. In the
meantime, use the -? option to the command, with no other options, to print the usage statement.
Enabling the client
Since the Ignite-UX server is now configured with the new golden image, you can use Ignite-UX to
install the golden image onto a client. To do this, you need to get the client to inform the Ignite-UX
server that it is ready to install a new operating system. There are two methods for doing this.
• If the client is currently running HP-UX, boot the system from the server by entering
# bootsys -v -w client_hostname
where client_hostname is the name of the client.
• If the client is not currently running HP-UX, boot the system from the client console. See “Booting
Itanium-based clients using the network” (page 100) or“Booting PA-RISC clients from the console
” (page 99), depending on the system type.
Enabling the client 159