
HP-UX System Administrator's Guide: Logical Volume Management HP-UX 11i v3 (B3921-90053 September 2011) Transform used: ESS version 2.2

For version 2.x volume groups, you can use vgmodify to do the following:
• Detect and handle physical volume size changes
• Modify the maximum volume group size.
• Handle physical volume LUN expansion. See “Modifying Physical Volume Characteristics”
(page 77) for more details
• Prepare a physical volume for a LUN contraction. See “Modifying Physical Volume
Characteristics” (page 77) for more details.
Beginning with the March 2009 Update, the vgmodify command can be run online (volume
group activated and applications running) for Version 1.0 and 2.x volume groups. Additionally,
for Version 1.0 volume groups, vgmodify can be run with the volume group offline (deactivated).
vgmodify for a Version 1.0 Volume Group
For Version 1.0 volume groups, use the following procedure to adjust the maximum number of PE
per PV, the maximum number of PVs in the VG, and the maximum number of LVs in the VG:
1. Run vgmodify to collect information about the volume group.
Save the output from these three commands:
# vgmodify -o -r vgnn
# vgmodify -v -t vgnn
# vgmodify -v -n -t vgnn
The -o option attempts to optimize the values by making full use of the existing LVM metadata
space. The -t option reports the optimized range of settings without renumbering physical
extents; the -n option enables renumbering of physical extents.
2. Based on the information collected in the previous step, choose new values for the volume
group parameters.
3. The new values may increase the size of the volume group reserved area (VGRA) on each
physical volume. The VGRA resides in the LVM header, so increasing its size may require
moving the first physical extent of any user data on physical volume. Use the pvmove command
to move the first physical extent to another location.
4. Review the values by running vgmodify with the new settings and the -r option.
5. Deactivate the volume group, if needed.
TIP: Beginning with the March 2009 Update of HP-UX, the volume group can be active
when running vgmodify.
6. Commit the new values by running vgmodify without the -r option.
7. If needed, activate the volume group. Run the vgdisplay command to verify the settings
have been applied.
Example: vgmodify for a Version 1.0 Volume Group
As an example, you expect to add larger disks to the volume group vg32. You want to increase
the maximum number of physical extents per physical volume (max_pe) and the maximum number
of physical volumes (max_pv). Here are the steps involved:
1. Run vgmodify to collect information about the volume group.
Save the output from these three commands:
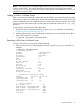
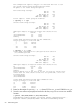
# vgmodify -o -r vg32
Current Volume Group settings:
Max LV 255
Max PV 16
Max PE per PV 1016
PE Size (Mbytes) 32
VGRA Size (Kbytes) 176
Common LVM Tasks 59