Software Package Builder 2.0 User’s Guide for HP-UX 11i v1, 11i v2, and 11i v3 Edition 2 Manufacturing Part Number: 5991-7462 February 2007 United States © Copyright 2002-2007 Hewlett-Packard Development Company, L.P. All rights reserved.
Legal Notices Warranty A copy of the specific warranty terms applicable to your Hewlett-Packard product and replacement parts can be obtained from your local Sales and Service Office. U.S. Government License Proprietary computer software. Valid license from HP required for possession, use or copying. Consistent with FAR 12.211 and 12.212, Commercial Computer Software, Computer Software Documentation, and Technical Data for Commercial Items are licensed to the U.S.
Intel®Itanium® Processor Family is a trademark of Intel Corporation in the US and other countries and is used under license. UNIX® is a registered trademark of The Open Group. Publication History The manual publication date and part number indicate its current edition. The publication date will change when a new edition is released. The manufacturing part number will change when extensive changes are made. • Software Package Builder 2.
About this Guide This guide describes installing and getting started with Software Package Builder. It also provides a basic overview of the software packaging process and terminology. It assumes that you are an HP-UX system administrator and familiar with installing and administering software in these environments. This guide applies to the February 2007 version of Software Package Builder 2.0. If you need additional information for Software Package Builder, visit the product Web site: http://software.hp.
Typographic Conventions We use the following typographical conventions. mxtool (4) HP-UX manual page. mxtool is the name and (4) is the section. From the command line, you can enter “man mxtool” or “man 4 mxtool” to view the manpage. See man (1). Book Title Title of a book. On the Web and on the Instant Information CD, it may be a hot link to the book itself. Command Command name or qualified command phrase. ComputerOut Text displayed by the computer. KeyCap Name of a keyboard key.
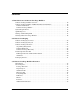
Contents 1. Introduction to Software Package Builder Software Package Builder Overview. . . . . . . . . . . . . . . . . . . . . . . . . . . . . . . . . . . . . . . . Software Package Builder and HP-UX Software Distributor . . . . . . . . . . . . . . . . . . . . Software Distributor . . . . . . . . . . . . . . . . . . . . . . . . . . . . . . . . . . . . . . . . . . . . . . . . . . . Software Package Builder . . . . . . . . . . . . . . . . . . . . . . . . . . . . . . . . . . . . . . . . . . . . . .
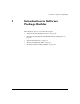
Contents 4. Getting Started with Software Package Builder Getting Started Using the SPB GUI. . . . . . . . . . . . . . . . . . . . . . . . . . . . . . . . . . . . . . . . Creating a New PSF . . . . . . . . . . . . . . . . . . . . . . . . . . . . . . . . . . . . . . . . . . . . . . . . . . . Managing Fileset Content . . . . . . . . . . . . . . . . . . . . . . . . . . . . . . . . . . . . . . . . . . . . . . Validating a PSF . . . . . . . . . . . . . . . . . . . . . . . . . . . . . . . . . . . . . . . . . . .
Introduction to Software Package Builder 1 Introduction to Software Package Builder The following topics are covered in this chapter: Chapter 1 • “Software Package Builder Overview” on page 10 • “Software Package Builder and HP-UX Software Distributor” on page 12 • “System Requirements” on page 13 • “Getting and Installing SPB” on page 15 • “Starting Software Package Builder” on page 16 9
Introduction to Software Package Builder Software Package Builder Overview Software Package Builder Overview Software Package Builder (SPB) provides a visual method to create and edit software packages using the HP-UX Software Distributor (SD-UX) package format. Once software is packaged, it can easily be transferred to a distribution medium, mass produced, and installed by administrators.
Introduction to Software Package Builder Software Package Builder Overview Software Package Builder offers the following features: Table 1-1 Chapter 1 Features of Software Package Builder Feature Description Graphical User Interface (GUI) for creating PSFs in SD-UX format. Provides an easy-to-use interface, making the complex task of creating a PSF easier. Command Line Interface (CLI) for automating nightly changes to packages. Provides a mechanism for easy automation of PSF edits and validation.
Introduction to Software Package Builder Software Package Builder and HP-UX Software Distributor Software Package Builder and HP-UX Software Distributor It is important to understand the relationship between SPB and SD-UX. Software Distributor SD-UX provides a powerful set of tools for centralized HP-UX software management.
Introduction to Software Package Builder System Requirements System Requirements The following table identifies the hardware and software requirements for Software Package Builder (SPB). Table 1-2 SPB Requirements Operating System • HP-UX 11i v1 (B.11.11) • HP-UX 11i v2 (B.11.23) • HP-UX 11i v3 (B.11.31) Software Java 1.
Introduction to Software Package Builder Optimizing Java Optimizing Java To achieve optimal Java performance, run the HPjconfig tool to tune the kernel and list any Java-specific patches that are needed. To access Java configuration information Step 1. Visit the Web site http://www.hp.com/go/java/ Step 2. Locate the section on HPjconfig for tuning HP-UX kernel parameters. Step 3. Install Java-specific patches, as needed.
Introduction to Software Package Builder Getting and Installing SPB Getting and Installing SPB SPB is available as a selectable application with the release of HP-UX 11i v2 (B.11.23) and 11i v1 (B.11.11), and an optional application with the release of 11i v3 (B.11.31). SPB can also be downloaded from the Web. Download SPB from the following URL: http://software.hp.com/products/SPB/download.html SPB is packaged in SD-UX format and can be installed with the swinstall command.
Introduction to Software Package Builder Starting Software Package Builder Starting Software Package Builder To launch SPB from the command line, enter: /opt/spb/bin/spb The SPB GUI will launch, and by default the application will use the packaging policy rules file for the HP-UX version you are running on your system.
Introduction to Software Package Builder Starting Software Package Builder NOTE If only a file name is given as the argument, SPB will look in the default policy rules file directory for the specified file. You can also specify an absolute path to the file. For additional information on this and other SPB command line options, refer to the spb (1M) manpage.
Software Packaging 2 Software Packaging If you are new to software packaging, this chapter provides an overview of the software packaging process and basic concepts. If you are already an experienced packager, you may want to use this chapter as a review, or move to Chapter 3, “Software Package Builder Features.
Software Packaging Software Packaging Overview Software Packaging Overview Application software is delivered in units called software packages. A software package is a collection of files and directories required to install a software product. Generally, a software package is designed and built by the application developer after completing the development of the application code.
Software Packaging Software Packaging Lifecycle Software Packaging Lifecycle The software packaging lifecycle is displayed in the figure below. Figure 2-1 Software Packaging Lifecycle 1. Identify the software package contents - Determine what files and directories you want to include in your software package. Your software package can consist of products, filesets, files, and other, optional software elements as discussed in “Software Elements” on page 24. 2.
Software Packaging Software Packaging Lifecycle 3. Create a Product Specification File (PSF) - Use SPB to create a PSF to define the software package. SPB provides a GUI for creating the PSF. 4. Validate the PSF - Determine that the PSF is valid prior to creating the software package. SPB uses a packaging policy rules file to validate the PSF. 5. Create the software package - Use the SD-UX swpackage command to create your software package. This can be done from the SPB GUI or the command line. 6.
Software Packaging Software Package Structure Software Package Structure A software package is created from a hierarchy of software elements. The hierarchy provides the structure needed by the filesystem to logically identify packaged files. A software package also contains metadata specific to each software element. The metadata is generated by setting attribute values. This is all accomplished through the creation of a PSF which defines the software package.
Software Packaging Software Package Structure • Group related files in the source filesystem that will directly translate to the destination filesystem. Software Elements A software package is created from a hierarchy of software elements, which are structured and defined in a PSF. The SPB-specific software elements are as follows: 24 File A file is the lowest level of software element that can be contained in a software package. Files are grouped together to create filesets.
Software Packaging Software Package Structure Chapter 2 Bundle A bundle is a reference to filesets, subproducts and/or products. Bundles may reference collections of filesets that belong to several different products. Creating bundles consisting of multiple filesets allows you to treat several filesets as a single entity. By specifying a bundle, all filesets under the bundle are included in the operation.
Software Packaging Software Package Structure Software Package Hierarchy The software package hierarchy provides the structure needed by the filesystem to identify packaged files. Figure 2-2 provides a graphical representation of the hierarchical structure to which a valid PSF must adhere. Figure 2-2 Software Package Hierarchy Containment vs. Reference There are two types of relationships that exist within the hierarchical structure of a software package: containment and reference.
Software Packaging Software Package Structure The difference between a containment relationship and a reference relationship can be illustrated by the notion that a bundle can be removed without actually removing the software elements that it references. However, removing a product always removes the filesets it contains, and the files contained in the filesets. Table 2-1 provides a summary of a software package's structural elements, their functions, and their relationship to other elements.
Software Packaging Software Package Structure Table 2-1 Structural Elements: Functions and Relationships (Continued) Structural Element File (7) 28 Function Files serve as the building blocks for a software package. Relationship Files are contained in one or more filesets.
Software Packaging Product Specification File Product Specification File A product specification file (PSF) defines the structure of a software package. The PSF provides a "road map" that identifies the software package according to its attributes, contents, compatibilities, and dependencies. SPB has a GUI that allows you to structure your PSF and define the attributes that apply to it. The PSF maps files in your source file system area to create the destination filesystem on a customer's system.
Software Packaging Product Specification File • What operating system(s) support the product. Each of the software element classes has its own set of attributes, and each attribute has a value that defines it. Most attributes are optional; however, there are a few required attributes. Assigning valid attributes to software elements provides more control and precision when the software package is installed, updated, and removed.
Software Packaging Packaging Policies Packaging Policies Packaging policies are a set of rules that must be consistently followed to create a valid software package. Packaging policies help ensure that the software package you create in SPB is consistently named and structured. SPB validates your PSF against packaging policies, eliminating the need for you to learn the intricacies of software package structuring.
Software Package Builder Features 3 Software Package Builder Features This chapter introduces you to the graphical user interface (GUI) and its features.
Software Package Builder Features Introduction Introduction The SPB GUI is designed to simplify the process of creating a software package by providing a visual method for creating the PSF, its software elements, attributes, and structure, as well as automating validation of the PSF against packaging policy rules. Figure 3-1 displays the main window in the SPB GUI and the regions it contains.
Software Package Builder Features Screen Regions Screen Regions The SPB GUI is comprised of the following main screen regions which will be described in detail in the proceeding sections: • “Package Structure” on page 35 • “Depot Region” on page 36 • “Attribute Table” on page 36 • “Messages Tab” on page 36 • “Policy Help Tab” on page 37 • “PSF View” on page 37 • “Menus” on page 37 • “Tool Bar” on page 38 Package Structure The Package Structure displays a navigable hierarchy of the software
Software Package Builder Features Screen Regions Depot Region The depot region displays the properties and the structure of the active depot. Within SPB, the depot is displayed as READ-ONLY. However, you can copy information from the depot and paste it into a PSF. You can also create a PSF from a depot. Attribute Table The Attribute Table displays attribute names and values for the software elements contained in the PSF.
Software Package Builder Features Screen Regions • Select Specific Messages - By selecting a specific message, the software element associated with the message appears highlighted in the Project Structure tree and the corresponding attribute appears highlighted in the Attribute Table. Message Counter A message counter is persistent in the lower, right-hand corner of the SPB main window. The counter displays the active PSF’s validation status. The number of errors, warnings, and notes are displayed.
Software Package Builder Features Screen Regions • File Menu - Contains the standard file-related functions. • View Menu - Provides options for changing your view of the Package Structure and filtering on various attributes. • Structure Menu - Contains commands for adding software elements to the Package Structure. This menu provides basic editing functions. • Attributes Menu - Contains commands for adding and editing Vendor Defined Attributes.
Getting Started with Software Package Builder 4 Getting Started with Software Package Builder This chapter provides tasks to introduce you with the features of SPB using the graphical user interface (GUI) and the command line interface (CLI).
Getting Started with Software Package Builder Getting Started Using the SPB GUI Getting Started Using the SPB GUI Get started using SPB by familiarizing yourself with how to create a PSF, add a product and filesets, manage fileset content, validate a PSF, and set attributes. Creating a New PSF This procedure walks you through the steps required to create a valid PSF. To create a PSF Step 1. Launch the SPB GUI. /opt/spb/bin/spb Step 2. From the main menu, select File->New PSF. Step 3.
Getting Started with Software Package Builder Getting Started Using the SPB GUI Step 5. To save and exit, click OK once all filesets have been added to the product. Managing Fileset Content Step 1. From the Package Structure, highlight the fileset to which you want to add files. Step 2. From the Structure menu, select Add Element(s)->Files. The Manage Fileset Content dialog is displayed. To create a destination filesystem Step 1. Click Add Directory.
Getting Started with Software Package Builder Getting Started Using the SPB GUI Step 4. Click Add. The directory or file(s) are added to the selected directory in the Destination Filesystem. Step 5. Repeat this process until you have mapped all the appropriate source files to the Destination Filesystem. Step 6. From the Destination Filesystem, select the directory you want to map files into. To set file (or directory) permissions Step 1.
Getting Started with Software Package Builder Getting Started Using the SPB GUI The results of the validation process appear on the Messages tab. If the PSF is valid, the message Validation Status: PSF Passed Validation appears. If it is invalid, you should debug the PSF as directed by the information provided in the Policy Help tab. Setting Attributes Most attributes are optional; however, there are a few required attributes.
Getting Started with Software Package Builder Getting Started Using the SPB GUI NOTE 44 Remember, you are able to validate your PSF in real-time. Every time you enter new data into the PSF, SPB revalidates the file.
Getting Started with Software Package Builder Using the SPB Command Line Interface Using the SPB Command Line Interface From the command line interface, you can perform the following tasks: • Edit a PSF • Validate a PSF • Specify a user-defined packaging policy rules file Editing from the CLI You can make edits to a PSF from the command line.
Getting Started with Software Package Builder Using the SPB Command Line Interface Example To validate the PSF file located in /opt/SPB/demo/demo1, you would type the following: spb -f /opt/SPB/demo/demo1 -V Incorporating SPB into Automated Processes For packagers with automated processes, the build process usually includes generating a PSF. To take advantage of SPB's validation capability, include the SPB validation command after the PSF generation step in the automated process.
Getting Started with Software Package Builder Additional Information Additional Information For more information about SPB, see the SPB Help system and Quick Start Tutorial.
Advanced Features 5 Advanced Features If you are an experienced packager, you might want to use SPB to add advanced features to your PSF.
Advanced Features Managing Fileset Content Managing Fileset Content This section provides additional information on the Manage Fileset Content dialog box and its advanced features. The following figure highlights the regions and features.
Advanced Features Managing Fileset Content Figure 5-1 Manage Fileset Content Dialog Box The Manage Fileset Content dialog allows you to map source files and directories to the destination filesystem and exercise control over directory and file attributes.
Advanced Features Managing Fileset Content Regions and Features 1. Source Filesystem - Allows navigation of the Source Filesystem for selection of files and directories to be mapped to the Destination Filesystem. 2. Add button - Adds the files or directories selected from the Source Filesystem to the Destination Filesystem. Multiple files or directories may be selected for addition. If the Recursive checkbox is selected, all files or directories contained in the selected directory will be implicitly added.
Advanced Features Managing Fileset Content • Recursive - The recursive option adds the selected directory and all its contents recursively. Individual filenames are listed in the PSF. • File * - This option is similar to the Recursive option; however, all files are implicitly added and represented only by an asterisk ( * ). The individual filenames are not listed in the PSF using this option.
Advanced Features Managing Fileset Content Figure 5-2 Advanced Options Dialog Box Step 2. Select the file mapping option you want to enable by clicking in the check box. This will enable the mapping option and display a checkbox on the Manage Fileset Content main window, as shown below.
Advanced Features Managing Fileset Content Step 3. From the main window, select the appropriate file mapping option. Step 4. Once the source and destination directories have been selected, click Add. Step 5. Continue adding directories using the selected file mapping method or clear the checkbox. NOTE Only one file mapping option can be applied at a time. Once you have selected a file mapping option, you must clear the checkbox to disable the option.
Advanced Features Managing Fileset Content Step 2. Select Apply to All. A Mode dialog box appears. Step 3. Select the appropriate mode for all files that currently appear in the File Attributes table.
Advanced Features Managing Fileset Content To change the default representation of the Mode field The default representation for file mode access permissions is octal (e.g., 0644). However, you have the option to display the symbolic representation for permissions (e.g., rw-r--r--). Step 1. Select the Advanced Options button. The Advanced Options dialog box displays, as shown below. Figure 5-4 Permissions Selections Step 2. Select Symbolic to change the mode permissions display. Step 3. Click OK.
Advanced Features Managing Fileset Content Figure 5-5 58 Symbolic Permissions Representation Chapter 5
Advanced Features Creating and Using a Subproduct Creating and Using a Subproduct Using subproducts provides a way for you to organize filesets into different groupings beyond that provided within a product. A subproduct is a reference to groups of logically related filesets. For example, you might create a subproduct that references a fileset grouping for the entire runtime configuration. It is important to remember that subproducts only reference filesets and do not physically contain them.
Advanced Features Creating and Using a Bundle Creating and Using a Bundle A bundle is a reference to filesets, products, and/or subproducts. Bundles may reference collections of filesets that belong to several different products. Creating bundles consisting of multiple filesets allows you to treat several filesets as a single entity. By specifying a bundle, all filesets under the bundle are included in an operation.
Advanced Features Creating and Using a Vendor or Category Creating and Using a Vendor or Category Adding a vendor or category to your PSF provides more detail about its contents. For example you can: • Add a vendor to display information regarding the PSF contents. The vendor’s information will display when using the swlist command. • Add a category to further identify the software package contents. To add a vendor or category Step 1.
Advanced Features Creating and Using Vendor Defined Attributes Creating and Using Vendor Defined Attributes Vendor Defined Attributes (VDAs) are optional but can be useful in providing additional information about a software package. A VDA may be created for any software element in the PSF. VDAs are noted during packaging modification with the swmodify command. You can list any attribute with the swlist command. To create a vendor defined attribute Step 1.
Advanced Features Overview of Software Specification Attributes Overview of Software Specification Attributes Software specification attributes are used to define a relationship or an assignment between a designated software element and other software element(s). Every attribute value in the PSF must use a designated value type, for software specification attributes this value type is software_specification.
Advanced Features Overview of Software Specification Attributes Corequisites The corequisites attribute defines a fileset dependency that requires another fileset or product to be installed and configured in order for the dependent fileset to operate correctly. Multiple corequisites may be defined. Prerequisites The prerequisites attribute defines a fileset dependency that requires another fileset to be installed and/or configured correctly before it can be installed or configured.
Advanced Features Overview of Software Specification Attributes SPB will not: • Resolve a software specification attribute that is external to the local PSF (e.g., in a depot on another system) • Import a software specification attribute that is external to the local PSF Software elements and their associated software specification attributes are displayed in the Package Structure. You can view the status of a software specification attribute and where applicable, edit its associated attributes.
Advanced Features Overview of Software Specification Attributes • AND - Use the AND relationship to specify multiple dependency attributes, each of which must be satisfied. The AND relationship is the default. • OR - Use the OR relationship to specify multiple dependency attributes in a set, where only one of the set must satisfy the dependency The following procedures apply to both corequisites or prerequisites dependency attributes.
Advanced Features Overview of Software Specification Attributes software specification for each corequisites (or prerequisites) attribute it contains. When a new corequisite or prerequisite is added to an OR set, the software specification value for that attribute is appended to the OR set's software specification and separated by the pipe symbol (|). Step 1. From the Package Structure, select the fileset for which you want to add an OR corequisites set. Step 2.
Advanced Features Overview of Software Specification Attributes Step 4. Edit the Software Spec field as appropriate to specify the remote content. IMPORTANT The software specification cannot contain spaces. Step 5. Click Add Content. The Fileset Content now contains the new, remote corequisites attribute. Step 6. Continue adding corequisites attributes as needed or click OK to exit.
Advanced Features Working with Depots Working with Depots Within SPB you can search for and open depots. In the Depot region, the depot properties and the depot structure are displayed. When a depot is opened in SPB, it is READ-ONLY. Within SPB you can perform the following depot-related tasks: • Visually compare two or more depots. • Create a PSF from a depot. • Validate a depot. Refer to Figure 5-6 to view the Depot region, which includes the depot properties and depot structure displays.
Advanced Features Working with Depots Validating a Depot To validate a depot perform the following: 1. From the main menu, select File->Open Depot. 2. Specify the hostname, path and name of the depot. 3. Review the validation messages for the depot. Depot validation occurs in the exact same manner as a PSF. Upon opening the depot, it is automatically validated. NOTE The depot is opened as a READ-ONLY file. Validation errors can be viewed but cannot be resolved from within SPB.
Advanced Features Working with Depots 3. Rename the depot and save as a PSF. The new PSF is created and its associated tab appears at the top of the Package Structure. NOTE Chapter 5 The depot properties, which are set by SD when the depot is created are not valid PSF attributes. Therefore, the Depot Properties will appear in the PSF as comments.When a PSF is created from a depot, the source information for files is lost.
Advanced Features Using Control Scripts Using Control Scripts You can use control scripts to customize the behavior of your software package. SD-UX supports execution of both product and fileset control scripts. These shell scripts allow you to perform customized checks and operations as part of your regular software management tasks. The swinstall, swconfig, swverify, swask, and swremove commands can execute one or more of these scripts.
Advanced Features Using Control Scripts • Killing and/or starting daemons For more detailed information, refer to the chapter regarding the use of control scripts in the Software Distributor Administration Guide located at the following Web site: http://docs.hp.
Advanced Features Additional Information Additional Information For more information about SPB, see the SPB Help system and Quick Start Tutorial.
Glossary corequisites Glossary A-B ancestor An attribute that names a previous version of a fileset. This is used to match filesets on a target system. If the match_target option is set to true, SD-UX matches the ancestor fileset name to the new fileset name. and relationship The default relationship for specifying one or more dependency attributes (corequisites or prerequisites) where all dependencies must be satisfied.
Glossary dependency D-E dependency A relationship between filesets in which one requires another in a specific manner. For example, before fileset A can be installed, it may require fileset B to be installed. SD-UX supports corequisite and prerequisite dependencies. dependent A fileset that has a dependency on another fileset. For example, if fileset A depends on fileset B, then B is a dependent or has a dependency on A.
Glossary root optional attribute An attribute whose inclusion in the product specification file is optional, will not effect the users ability to create a software package using swpackage. or dependency set Used to identify multiple corequisites or prerequisites attributes for a fileset where only one of the set must satisfy the dependency. or corequisites set See OR dependency set. or prerequisites set See OR dependency set.
Glossary root directory root directory The directory on a target system in which all the files of the selected products will be installed. The default (/), can be changed to install into a directory that will eventually act as the root to another system. S SD-UX HP-UX Software Distributor. The format and syntax of SD-UX software in depots. software depot A SD-UX format structure that contains one or more software products that can be installed on other systems or copied to other depots.
Glossary vendor tag unconfigure script An optional script associated with a fileset that is executed by swremove before the removal of filesets begins. vendor The vendor for the software being packaged. If a vendor specification is included in the PSF, the vendor and tag attributes are required for swpackage. vendor defined attribute An attribute you define to provide additional information about a software package.
Glossary unconfigure script 82 Glossary
Index A adding remote content, 67 advanced options, 52 dialog box, 54, 57 ancestor attributes, 63 and dependency relationship, 65 attribute table, 36 attributes, 29 directory, 52 display, 43 file, 52 recommended, 30 required, 30 software specification, 63 B bundle, 25, 60 C category, 25, 61 command spb, 45 command line interface (CLI), 45 editing, 45 return values, 46 validation, 45 commands installation, 15 contents attributes, 63 control scripts, 72 corequisites attributes, 63 creating bundle, 60 category
features, 51 regions, 51 source filesystem, 51 mapping files, 41 menus, 38 messages error, 36 generation, 36 note, 36 selection, 36 messages tab, 36 O or corequisites set, 66 or dependency relationship, 65 or prerequisites set, 66 organizing filesystems, 23 P package structure, 35 packaging policies, 31 default rules file, 31 policy help tab, 37 specifying rules file, 16 policy help tab, 37 prerequisites attributes, 63 product, 24 creating, 40 product specification file (PSF), 29 creating, 40 PSF validation
V validating CLI, 45 PSF, 42 software specification attributes, 64 validation, 42 vendor, 25, 61 vendor defined attributes (VDAs), 62 85