
Packaging Applications in SD-UX Format Using Software Package Builder


packaging applications in software distributor format using software package builder
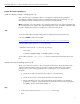
prepare the software package (1)
install the software package in a staging area (1a)
One of the first steps in packaging software is to prepare the original software package for
repackaging. Install the software package in an appropriate staging area, if allowed. You can
then determine what files and directories to include in the software package.
Note: Depending on how the software was originally packaged, not every software package may
allow a staging area. For example, the original package may contain executables with hard-coded
file paths. Installing this software in a staging area could cause links to break.
steps
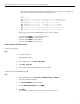
To download the software package and prepare the staging area perform the following:
1. Download JUnit from the following URL:
http://prdownloads.sourceforge.net/junit/junit3.8.1.zip?download
2. Download the zip file into your /var/tmp directory.
3. Extract the archive into the /opt directory, by entering:
# cd /opt
# /usr/local/bin/unzip /var/tmp/junit3.8.1.zip
You should now have the /opt/junit3.8.1 directory containing all the JUnit directories and
files.
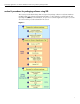
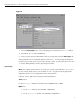
determine the software package structure (1b)
Group source directories and files so they correspond with the filesets and products that will be
used in the software package, whenever possible. To make the maintenance of the software
package easier, use the following guidelines when organizing the source and destination
filesystems:
• Create filesets with consistent file access modes (i.e., file permissions).
• Create directories with contents that are directed to the same filesets.
• Group related files in the source filesystem that will directly translate to the destination
filesystem. For example, create filesets that hold certain files such as runtime configuration
files (RUN), software documentation (DOC), etc.
steps
1. List the top-level directories under /opt/junit3.8.1 by entering,
# ll
6