
Software Distributor (SD-UX) Administration Guide HP-UX 11i v1, 11i v2, and 11i v3 (762797-001, March 2014)
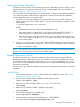
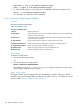

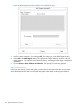
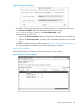
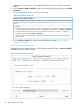
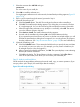
Table Of Contents
- Software Distributor Administration Guide
- Contents
- HP secure development lifecycle
- About This Document
- 1 Introduction to Software Distributor
- SD-UX Overview
- SD-UX Concepts
- Using the GUI and TUI Commands
- The Terminal User Interface
- Starting the GUI/TUI Commands
- Window Components
- Opening and closing items in the object list
- Marking Items in the Object List
- Preselecting Host Files
- Software Selection Window
- Session and File Management—The File Menu
- Changing Software Views—The View Menu
- Changing Options and Refreshing the Object List—The Options Menu
- Performing Actions—The Actions Menu
- Getting Help—The Help Menu
- XToolkit Options and Changing Display Fonts
- Working from the Command Line
- 2 Installing Software
- Installation with swinstall
- Features and Limitations
- Installing with the GUI
- Installing from the Command Line
- Installation Tasks and Examples
- Updating to HP-UX 11i
- Installing Patches
- Recovering Updated Files
- Installing Software That Requires a System Reboot
- Using Software Codewords and Customer IDs
- Re-installing Software Distributor
- Installing Multiple Versions
- Installing to an Alternate Root
- Compatibility Filtering and Checking
- Software Selection Checking
- Configuring Your Installation (swconfig)
- Verifying Your Installation (swverify)
- Installation with swinstall
- 3 Managing Installed Software
- 4 Managing Software Depots
- Depot Management Commands and Concepts
- Copying Software Depots
- Registering and Unregistering Depots (swreg)
- Verifying Signed Software Signatures
- Additional Depot Management Tasks and Examples
- Combining Patch Depots
- Creating a Tape Depot for Distribution
- Setting Depot Attributes
- Creating a Network Depot
- Managing Multiple Versions of HP-UX
- Listing Registered Depots
- Listing the Contents of a Depot (swlist -d)
- Source Depot Auditing
- Verifying a Depot (swverify -d)
- Removing Software from Depots
- Removing a Depot
- 5 HP-UX Patching and Patch Management
- 6 Using Jobs and the Job Browser
- 7 Remote Operations Overview
- 8 Reliability and Performance
- 9 SD-UX Security
- 10 Creating Software Packages
- Overview of the Packaging Process
- Identifying the Products to Package
- Adding Control Scripts
- Creating a Product Specification File (PSF)
- Product Specification File Examples
- PSF Syntax
- PSF Object Syntax
- Selecting the PSF Layout Version
- PSF Value Types
- Product Specification File Semantics
- Re-Specifying Files
- Packaging the Software (swpackage)
- Packaging Tasks and Examples
- Registering Depots Created by swpackage
- Creating and Mastering a CD-ROM Depot
- Compressing Files to Increase Performance
- Packaging Security
- Repackaging or Modifying a Software Package
- Packaging In Place
- Following Symbolic Links in the Source
- Generating File Revisions
- Depots on Remote File Systems
- Verifying the Software Package
- Packaging Patch Software
- Writing to Multiple Tapes
- Making Tapes from an Existing Depot
- 11 Using Control Scripts
- Introduction to Control Scripts
- General Script Guidelines
- Packaging Control Scripts
- Using Environment Variables
- Execution of Control Scripts
- Execution of Other Commands by Control Scripts
- Control Script Input and Output
- File Management by Control Scripts
- Testing Control Scripts
- Requesting User Responses (swask)
- Request Script Tasks and Examples
- 12 Nonprivileged SD
- A Command Options
- B Troubleshooting
- Error Logging
- Common Problems
- Cannot Contact Target Host’s Daemon or Agent
- GUI Won’t Start or Missing Support Files
- Access To An Object Is Denied
- Slow Network Performance
- Connection Timeouts and Other WAN Problems
- Disk Space Analysis Is Incorrect
- Packager Fails
- Command Logfile Grows Too Large
- Daemon Logfile Is Too Long
- Cannot Read a Tape Depot
- Installation Fails
- swinstall or swremove Fails With a Lock Error
- Use of Square Brackets ([ and ]) Around an IPv6 Address Causes an Error
- Some SD commands do not work after network configuration changes
- C Replacing or Updating SD-UX
- D Software Distributor Files and File System Structure
- Glossary
- Index
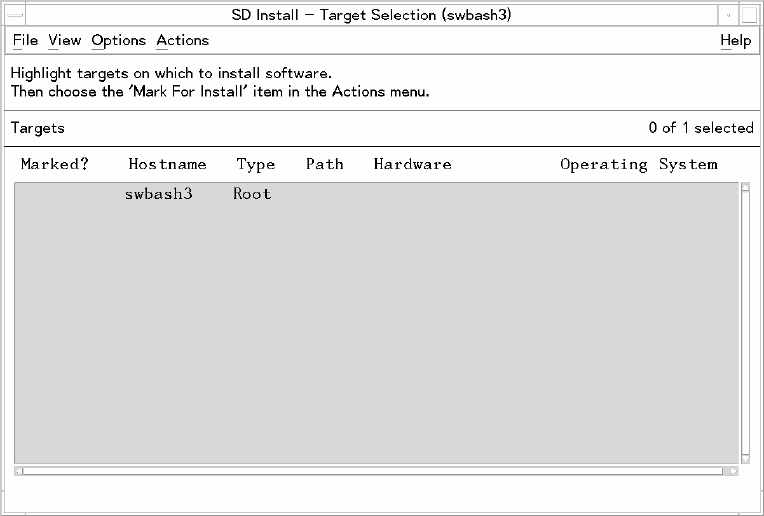
Figure 47 Target Selection Window
Specify the desired target for the installation:
1. For local default:
a. Highlight the local target system with a left mouse click. Then select Actions→Mark for
Install (or right-click to display the pop-up menu and select Mark for Install).
b. Select Actions→Show Software for Selection...
This displays the Specify Source dialog. If this is your first time through this tutorial, skip directly
to “Step III: Select Source” (page 124). After you have gone through this tutorial once, retry
Step I using remote targets.
— or —
For remote targets: choose Actions→Add Targets to install to a different target. This takes you
to the Add Targets dialog (Figure 48: “Add Target Dialog (for multiple or non default targets)”,).
2. Enter the target name in the Hostname: area (e.g., system_two) and select Add. This takes
you to the Select Target Path dialog.
Remote Operations Tutorial 123