
Software Distributor Administration Guide HP-UX 11i v1, 11i v2, and 11i v3 (5900-2561, March 2013)

7.2.3 Selecting Multiple Targets
This section discusses how to install to multiple targets, create target groups, and how to save these
groups for future software installations. (For single-target installations to your local (default) target,
see the procedures in “Remote Operations Tutorial” (page 124)).
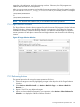
The Target Selection Window displays a list of targets may be displayed:
• If you have recalled a session file (File→Recall Session), any hosts defined in that session are
displayed.
• Otherwise, any hosts specified in the default hosts file (/var/adm/sw/defaults.hosts
or $HOME/.sw/defaults.hosts) are displayed. (See “Preselecting Host Files” (page 26).)
If the desired target for the installation is not in the list:
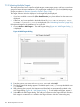
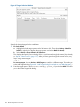
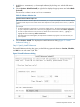
1. Choose Actions→Add Targets.... The Add Targets dialog (Figure 46: “Add Targets Dialog ”,)
is displayed.
Figure 46 Add Targets Dialog
2. Enter the primary root name in the Hostname: area and select Add.
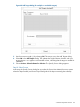
3. The Select Target Path dialog appears. The default path is root (/). To accept the default root
(/), click OK.
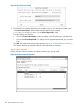
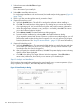
4. After selecting the root path, the Hostname and Root Path are automatically updated in the
Add Target dialog (Figure 46: “Add Targets Dialog ”,). To add additional targets, repeat 2.
5. Select OK in the Add Targets dialog. This adds your selections to the Target Selection Window.
Each target is contacted as it is added to the Target Selection Window. Networking may
122 Remote Operations Overview