
Software Distributor Administration Guide for HP-UX 11i

Remote Operations Overview
Remote Operations Tutorial
Chapter 6 207
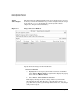
This is the name of your install job.
2. Select
OK to install the software now.
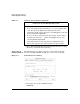
For single-target installations such as this tutorial, the Install
Analysis dialog appears (Figure 6-8 on page 208).
3. If this is your first pass through the tutorial, proceed to Step V.
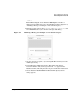
4. (Optional) Previewing a Job
a. Select the
Preview button. This tells SD to analyze the software
without installing it.
b. Click
OK. The Install Analysis dialog appears. This dialog lets
you monitor the analysis of a single-target job. You can also
browse log files and product summary information.
c. When the target Status indicates Ready (analysis is successful),
select
OK. This returns you to the Software Selection Window.
d. Select
Actions→Install. The Install Preferences dialog appears.
e. Proceed with the installation by selecting
OK in the Install
Preferences dialog.
(If you repeat this tutorial and choose to preview a job that uses
multiple targets, you will find that the Install Analysis dialog
does not appear. You can only monitor the preview job progress
from the Job Browser. See “Step VII: Monitor Results” on
page 209 for more information.)
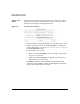
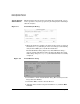
5. (Optional) Scheduling a Job
a. Select the
Schedule button. This activates the fields that let you
specify the time and date you at which you want your job to run.
(For example, you may want to schedule a job at midnight when
few users are logged in.)
b. After you specify the schedule information, click
OK. The system
displays a note indicating that the job has been scheduled.
c. Click
OK in the dialog. The Target Selection Window reappears.
Select
File→Exit to return to the Job Browser, from which you can
monitor your scheduled job.