C and C++ SoftBench User's Guide Manufacturing Part Number: B6454-97413 June 2000 © Copyright 2000 Hewlett-Packard Company.
Legal Notices The information contained in this document is subject to change without notice. Hewlett-Packard makes no warranty of any kind with regard to this manual, including, but not limited to, the implied warranties of merchantability and fitness for a particular purpose. Hewlett-Packard shall not be liable for errors contained herein or direct, indirect, special, incidental or consequential damages in connection with the furnishing, performance, or use of this material.
Copyright © 1994 X/Open Company Limited. UNIX is a registered trademark in the United States and other countries, licensed exclusively through X/Open Company Limited. Copyright © 1980, 1984, 1986 Novell, Inc. Copyright © 1979, 1980, 1983, 1985-1990 Regents of the University of California. This software is based in part on the Fourth Berkeley Software Distribution under license from the Regents of the University of California. Copyright © 1990 Motorola, Inc. All Rights Reserved.
Printing History New editions of this manual incorporate all material updated since the previous edition. The manual printing date and part number indicate its current edition. The printing date changes when a new edition is printed. Minor corrections and updates incorporated at reprint do not cause this date to change. The manual part number changes when extensive technical changes are incorporated.
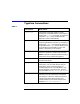
Typeface Conventions Table 1 Convention Description italic font Information you supply, either in syntax examples or in text descriptions. For example, if told to type: filename, you supply an actual file name like sample. Italics are also used for emphasis, and for Titles of Books. typewriter font Computer commands or other information that must be typed exactly as shown. For example, if told to type: sample, you type exactly the word in typewriter font, sample.
Contents 1. Maximizing Your Results with SoftBench SoftBench Task Flow . . . . . . . . . . . . . . . . . . . . . . . . . . . . . . . . . . . . . . . . . . . . . . . . . . . Understanding Projects . . . . . . . . . . . . . . . . . . . . . . . . . . . . . . . . . . . . . . . . . . . . . . . . . Building Targets . . . . . . . . . . . . . . . . . . . . . . . . . . . . . . . . . . . . . . . . . . . . . . . . . . . . . Understanding Build Configurations and Packages . . . . . . . . . . . . . . . . . . . . . . . .
Contents Customizing Build Configurations . . . . . . . . . . . . . . . . . . . . . . . . . . . . . . . . . . . . . . . Using Build Packages . . . . . . . . . . . . . . . . . . . . . . . . . . . . . . . . . . . . . . . . . . . . . . . . . Defining Targets for External Build . . . . . . . . . . . . . . . . . . . . . . . . . . . . . . . . . . . . . . . Using the Target Graph . . . . . . . . . . . . . . . . . . . . . . . . . . . . . . . . . . . . . . . . . . . . . . . . . Understanding the Graph . . . . . . .
Contents Understanding SoftBench CM . . . . . . . . . . . . . . . . . . . . . . . . . . . . . . . . . . . . . . . . . . . . 90 Getting Started - A Brief Overview . . . . . . . . . . . . . . . . . . . . . . . . . . . . . . . . . . . . . . . . 92 Managing the Archive System . . . . . . . . . . . . . . . . . . . . . . . . . . . . . . . . . . . . . . . . . . . . 95 Browsing Local Network Servers and Archives . . . . . . . . . . . . . . . . . . . . . . . . . . . . . 95 Creating an Archive Directory . . . . . . .
Contents Using the Mouse Pointer Versus the Text Cursor . . . . . . . . . . . . . . . . . . . . . . . . . . Editing Multiple Files . . . . . . . . . . . . . . . . . . . . . . . . . . . . . . . . . . . . . . . . . . . . . . . . Reusing the Edit Window . . . . . . . . . . . . . . . . . . . . . . . . . . . . . . . . . . . . . . . . . . . . . Selecting, Copying, and Pasting Text . . . . . . . . . . . . . . . . . . . . . . . . . . . . . . . . . . . . Calling Other SoftBench Tools from the Editors . . . . . . . .
Contents Checking Your Program . . . . . . . . . . . . . . . . . . . . . . . . . . . . . . . . . . . . . . . . . . . . . . . Viewing Violations . . . . . . . . . . . . . . . . . . . . . . . . . . . . . . . . . . . . . . . . . . . . . . . . . . . Terminating SoftBench CodeAdvisor . . . . . . . . . . . . . . . . . . . . . . . . . . . . . . . . . . . . Filtering Rule Violations . . . . . . . . . . . . . . . . . . . . . . . . . . . . . . . . . . . . . . . . . . . . . . For More Information . . . . . . . . . . .
Contents Setting a Breakpoint . . . . . . . . . . . . . . . . . . . . . . . . . . . . . . . . . . . . . . . . . . . . . . . . . Viewing and Modifying Breakpoints . . . . . . . . . . . . . . . . . . . . . . . . . . . . . . . . . . . . Clearing a Breakpoint . . . . . . . . . . . . . . . . . . . . . . . . . . . . . . . . . . . . . . . . . . . . . . . . Executing DDE Commands at a Breakpoint . . . . . . . . . . . . . . . . . . . . . . . . . . . . . . Setting C++ Breakpoints . . . . . . . . . . . . . . . . . . .
Contents Debugging Optimized Code . . . . . . . . . . . . . . . . . . . . . . . . . . . . . . . . . . . . . . . . . . . . . Customizing SoftBench Debugger . . . . . . . . . . . . . . . . . . . . . . . . . . . . . . . . . . . . . . . . Specifying Debugger Options . . . . . . . . . . . . . . . . . . . . . . . . . . . . . . . . . . . . . . . . . . Customizing User Buttons . . . . . . . . . . . . . . . . . . . . . . . . . . . . . . . . . . . . . . . . . . . . If Something Goes Wrong . . . . . . . . . . . . . .
Contents Browsing the Query Result . . . . . . . . . . . . . . . . . . . . . . . . . . . . . . . . . . . . . . . . . . . . Editing the Source File . . . . . . . . . . . . . . . . . . . . . . . . . . . . . . . . . . . . . . . . . . . . . . . Updating the Database . . . . . . . . . . . . . . . . . . . . . . . . . . . . . . . . . . . . . . . . . . . . . . . Performing a Query . . . . . . . . . . . . . . . . . . . . . . . . . . . . . . . . . . . . . . . . . . . . . . . . . . Simplifying Query Results . . . . .
Contents Viewing Multiple Graphs . . . . . . . . . . . . . . . . . . . . . . . . . . . . . . . . . . . . . . . . . . . . . 294 11. Using SoftBench File Compare Understanding the SoftBench File Compare Window . . . . . . . . . . . . . . . . . . . . . . . . Understanding the Menu Bar . . . . . . . . . . . . . . . . . . . . . . . . . . . . . . . . . . . . . . . . . . Understanding the "Working Directory" Input Box . . . . . . . . . . . . . . . . . . . . . . . . .
Contents Debugging with SQL . . . . . . . . . . . . . . . . . . . . . . . . . . . . . . . . . . . . . . . . . . . . . . . . . Editing and Rebuilding with SQL for SoftBench Debugger . . . . . . . . . . . . . . . . . . Using SoftBench CodeAdvisor and SoftBench Static Analyzer with SQL . . . . . . . For More Information . . . . . . . . . . . . . . . . . . . . . . . . . . . . . . . . . . . . . . . . . . . . . . . . . . 319 321 321 322 A. Using SoftBench Graph Windows Accessing SoftBench Graph Windows . . . .
Contents Troubleshooting . . . . . . . . . . . . . . . . . . . . . . . . . . . . . . . . . . . . . . . . . . . . . . . . . . . . . 351 C. Using Regular Expressions Pattern Matching . . . . . . . . . . . . . . . . . . . . . . . . . . . . . . . . . . . . . . . . . . . . . . . . . . . . . 354 D. Customizing SoftBench for Native Language Support (NLS) Preparing to Use NLS in SoftBench . . . . . . . . . . . . . . . . . . . . . . . . . . . . . . . . . . . . . . Setting the LANG Environment Variable . . . . . .
Contents 18
Maximizing Your Results with SoftBench 1 Maximizing Your Results with SoftBench SoftBench facilitates the development of reliable software, an especially difficult and time-consuming process when you work on large and complicated projects. SoftBench provides an integrated, consistent windowed interface to the tools you need the most.
Maximizing Your Results with SoftBench SoftBench Task Flow SoftBench Task Flow The tools pass information and control from one tool to the next, helping you move smoothly through the software development and maintenance tasks shown in Figure 1-1. Figure 1-1 Major Software Development Tasks Supported by SoftBench SoftBench tools and the data on which they operate can be distributed across a network and accessed transparently by individuals or teams.
Maximizing Your Results with SoftBench Understanding Projects Understanding Projects Projects are the fundamental work unit in SoftBench. Projects consist of a named set of files that produce a set of related targets using one or more sets of build instructions and dependencies. Figure 1-2 SoftBench Tools Interacting with Project and Files The critical parts of a project definition are: Project Name The logical name for the project.
Maximizing Your Results with SoftBench Understanding Projects Project file set The source, documentation and test files you wish to associate with the project. Project targets The executables, libraries, message catalogs, and other files that are the product of one or more builds. Build Configurations Instructions for how to transform your source files into your target files. Project names contain regular characters.
Maximizing Your Results with SoftBench Understanding Projects Figure 1-3 Building Sources into Targets Using Project's Build Instructions Targets that SoftBench builds: • are project-specific.
Maximizing Your Results with SoftBench Understanding Projects configurations provided by SoftBench. Build configurations are independent of projects and targets. SoftBench ships with a basic set of build configurations. You can create new user build configurations based on the shipped build configurations, adding build instructions that are unique to your environment.
Maximizing Your Results with SoftBench Understanding Projects package with no transform, just modifiers, would be the X11 library to be linked into an executable. A build configuration contains one or more transforms and zero or more packages (which may include transforms and/or other packages). A very simplified version of the actual build configuration to create an executable target from C source containing embedded SQL is shown in Figure 1-4.
Maximizing Your Results with SoftBench Understanding Projects Project build lets SoftBench manage your build instructions. You can specify source-to-target dependencies and build order dependencies, choose convenient system or customized build configurations and build packages, and automatically generate Makefiles or do without Makefiles altogether if you prefer. • SoftBench provides an external build model as an alternative to project build for people who already have a highly-tuned build environment.
Maximizing Your Results with SoftBench Sharing Projects with a Team Sharing Projects with a Team SoftBench projects provide the flexibility to have your development environment reflect your team interactions. Sharing a project description has all the benefits and difficulties associated with sharing any source file. A centralized project description means that everyone is working from the same project files, but there can be collisions when more than one person wants to make changes.
Maximizing Your Results with SoftBench Sharing Projects with a Team from that definition for their local working copies. Anyone who discovers the need for a change in the project definition communicates that to the owner, who makes the update, and then all of the team members re-clone their project definitions. Figure 1-5 Team Members Cloning the Project Definition The least usable method is to share the project definition files.
Maximizing Your Results with SoftBench Sharing Projects with a Team Figure 1-6 Team Members Sharing the Project Definition One Project with Subprojects, Many Authors Finally, your team can choose to divide up the project along the same lines as they divide up the work, especially if the project is large enough that multiple teams are cooperating on a single system release. Figure 1-7 Team Members Using Subprojects Each person's module of work may be designated as a subproject of the team's project.
Maximizing Your Results with SoftBench Sharing Projects with a Team 30 Chapter 1
Maximizing Your Results with SoftBench Planning Your Project Planning Your Project You can use SoftBench as your project planning environment by specifying the files of the project and their relationships even before the files exist. Unique icons in the Files view remind you which files have yet to be created in the file system. You can always change file lists to add, remove, or rename files as your project actually takes shape.
Maximizing Your Results with SoftBench Using the SoftBench Integrated Environment Using the SoftBench Integrated Environment The SoftBench project environment provides smooth transitions between all of your SoftBench tools. See Figure 1-6 on page 29 and “An Example SoftBench Session” on page 38 for how the tools flow together.
Maximizing Your Results with SoftBench Using the SoftBench Integrated Environment show you pictures of your code structure. SoftBench Debugger Monitor your program's execution with SoftBench Debugger. You can set breakpoints, trace function calls, and watch variable values to isolate defects in your code. Data Graph Window gives you a visual image of your data structures as they change.
Maximizing Your Results with SoftBench Using the SoftBench Integrated Environment SoftBench supports three ways to use tools: • using SoftBench tools together on one project • using SoftBench tools together on more than one project • using individual SoftBench tools in a standalone mode outside of projects Using SoftBench Tools Together The recommended way to use SoftBench is as a set of tools that communicate with each other.
Maximizing Your Results with SoftBench Using the SoftBench Integrated Environment Figure 1-9 Tools That Can Directly Invoke Other Tools Using SoftBench Tools on Multiple Projects If you want to work on multiple projects at the same time, you can either start multiple sessions of SoftBench or you can open multiple projects within a single session of SoftBench. When you run a single session of SoftBench, you can access only one project, the current project, at a time in the main SoftBench window.
Maximizing Your Results with SoftBench Using the SoftBench Integrated Environment • makes the opened project the current project • switches the project browser from the Projects view to the Files view, displaying the project's files Only the current project's files display in the Files view. If you had another project open, SoftBench by default leaves it open and all its tools running.
Maximizing Your Results with SoftBench Using the SoftBench Integrated Environment without access to project data, tool interactions may behave unpredictably. Recommendation: Even if you want to use only one or two SoftBench tools, launch the tools from the SoftBench main window. Reusing Tool Windows Within a single project, you can start only one instance of some tools and multiple instances of other tools.
Maximizing Your Results with SoftBench An Example SoftBench Session An Example SoftBench Session The following example shows how you can use SoftBench as you develop an application. To use the project build model where SoftBench takes care of the build instructions and Makefile: 1. Create a project by choosing "Project: New → Create…". 2. Set up a configuration management mapping between your local workspace root and the CM archive. 3. Write the code for your project.
Maximizing Your Results with SoftBench An Example SoftBench Session 7. When all syntax errors are fixed, use SoftBench CodeAdvisor (available with C++ SoftBench only, although rules exist for both C and C++) to find hidden coding problems not found by the compiler. Select the project or files of interest, then select the Check Code button. 8. To validate how well your application works, select the desired target, then choose either "Target: Debug…" or "Target: Run…".
Maximizing Your Results with SoftBench Learning SoftBench Learning SoftBench The SoftBench Online Tutorial teaches you the fundamentals of getting started with SoftBench. You can learn SoftBench using either a C or C++ example. The tutorial walks you through code development and maintenance tasks, introducing you to key SoftBench tools. Through this hands-on experience, you can learn the basic functions of the SoftBench tools and understand how to use these tools together to help you develop software.
Using SoftBench 2 Using SoftBench This chapter provides the basic information that you need to start using SoftBench. From setting up your project to making sure that your software does what you intend, SoftBench provides an easy-to-use, integrated environment to support your software development tasks.
Using SoftBench Prerequisites to Using SoftBench Prerequisites to Using SoftBench SoftBench requires that your PATH environment variable be set correctly. Your system administrator may have done this for you when SoftBench was installed. If you have a problem with your PATH, SoftBench notifies you. To see the current value of your PATH, type echo $PATH Verify that /opt/softbench/bin precedes /bin, /usr/bin, /usr/ccs/bin, and /opt/aCC/bin and that /usr/bin/X11 is included in your PATH.
Using SoftBench Starting SoftBench Starting SoftBench You can start SoftBench in two ways: • From the command line, type softbench • From CDE, 1. Select the CDE Application Manager icon on the CDE front panel. 2. In the CDE Application Manager, open the SoftBench folder and double-click on the SoftBench icon. Either action displays the main SoftBench window and opens a scratch project named Untitled. If you have existing projects, SoftBench opens the last project in which you worked.
Using SoftBench Understanding SoftBench Window Areas Understanding SoftBench Window Areas The main SoftBench window is shown in Figure 2-1. Table 2-2 contains descriptions of each window area.
Using SoftBench Understanding SoftBench Window Areas Table 2-2 Description of SoftBench Window Areas Window Area Description 1 Menu Bar Provides access to many SoftBench functions. When using most commands on the "Project", "File" and "Target" menus, select the project, file, or target of interest in the project browser or the target graph, then choose the menu command. Refer to SoftBench Online Help for detailed descriptions of any menu command.
Using SoftBench Understanding SoftBench Window Areas Table 2-2 Description of SoftBench Window Areas Window Area 5 Button Area Description Provides quick access to important actions: • Open to open a project or make an already open project current • Check Code (available with C++ SoftBench only) to find coding violations beyond errors already caught by the compiler • Build to build the entire project or selected target(s) Select one or more list items in the project browser or target graph, then select th
Using SoftBench Understanding SoftBench Window Areas Understanding the Builder Page The Builder page, shown in Figure 2-2, consists of two main parts: the target graph and the output browser. For information on using the Builder page, see “Building Projects and Targets” on page 70. Figure 2-2 Expanded SoftBench Window Displaying Builder Page Target Graph Provides a graphical view of targets and dependencies in a project using the project build model.
Using SoftBench Understanding SoftBench Window Areas Understanding the SoftBench CodeAdvisor Page The CodeAdvisor page, shown in Figure 2-3, consists of two main parts: the rule group selection area and the output browser. This page is available only when you have C++ SoftBench. Figure 2-3 Expanded SoftBench Window Displaying SoftBench CodeAdvisor Page Rule Group Selection Area Provides toggle buttons to select the type of violations you want to find.
Using SoftBench Understanding SoftBench Window Areas specific rule violation selected in the output browser. See “Viewing Violations” on page 151 for more information. • “■ Hide Filtered Items" toggle button which allows you to control whether you view the filtered violations, in the output browser. For more information about SoftBench CodeAdvisor see “Checking Your Code Using SoftBench CodeAdvisor” on page 76 and Chapter 6, “Using SoftBench CodeAdvisor,” on page 145.
Using SoftBench Setting Up a Project Setting Up a Project You can create a project several ways: • Create a project from scratch. (See “Creating a Project Using Project Build” on page 50 and “Creating a Project Using External Build” on page 52.) • Create a project by cloning another project. (See “Cloning a Project from an Existing Project” on page 53.) • Repartition a project into two projects. (See “Repartitioning an Existing Project” on page 54.
Using SoftBench Setting Up a Project To create a project build project: 1. Choose "Project: New → Create…" which displays the dialog box shown in Figure 2-4. Figure 2-4 Create Project" Dialog Box 2. In the "Create Project" dialog box, provide the project name, local workspace root, and a descriptive comment. 3. Select the "❍ Project Build" radio button. 4. Optionally, select Add Existing Source Files… to specify the source files during project creation.
Using SoftBench Setting Up a Project Configuration… and make the needed changes. (For more information, see “Customizing Build Configurations” on page 62.) If you want to have SoftBench generate a Makefile for use external to SoftBench, for example in a nightly build script, choose "Builder: Generate Makefile…". Creating a Project Using External Build External build provides build support when you write and maintain your own Makefiles or build scripts.
Using SoftBench Setting Up a Project must properly handle paths relative to your build directory. 6. Optionally, select Add Existing Source Files… to specify the source files during project creation. Alternatively, you can choose "Project: Add File(s) to Project…" after you create the project. 7. Optionally, select Define Targets… to specify the build commands for targets in the project. Alternatively, you can choose "Target: New…" after you create the project. 8.
Using SoftBench Setting Up a Project 4. Select Create. 5. Once the project is cloned, make any needed changes to the project. For example, you may need to change the build instructions, add or remove files, or remove or define additional targets. 6. Then, make sure you have the project files under your local workspace root. For example, you may need to copy the files or check out the files from configuration management.
Using SoftBench Setting Up a Project For external build projects, you may need to change build instructions in the current project if files have been removed. 8. Finally, make sure you copy the physical project files under your new local workspace root. Creating a Subproject When you create a subproject relationship, you also need to create the build instructions that implement the relationship.
Using SoftBench Modifying a Project Definition Modifying a Project Definition Under certain circumstances you may wish to change information about your project definition. SoftBench allows you to change the name, location, and type of project by choosing "Project: Modify Properties…". • To change the name of your project enter a new project name. Project names contain regular characters. Control characters, spaces, and punctuation characters special to the shell are not allowed in project names.
Using SoftBench Creating Files within a Project Creating Files within a Project New files that you create within SoftBench automatically become members of your project. Choosing "File: New" starts your configured editor with an untitled file. Alternatively, choose the "Editor" icon when you have no files selected. SoftBench vi Editor and SoftBench XEmacs's "File: Save" and "File: Save As…" menu commands automatically add the file into your project.
Using SoftBench Adding Existing Files to a Project Adding Existing Files to a Project Once a project is created, you can add files to the project in a number of ways. SoftBench vi Editor and SoftBench XEmacs's "File: Save" and "File: Save As…" menu commands automatically add a file into the project listed in the editor's title bar. From the main SoftBench window, you can choose "Project: Add File(s) to Project…" (see Figure 2-6).
Using SoftBench Adding Existing Files to a Project 1. Select the "❍ Choose Files By Directory" radio button. 2. Enter the directory name, or select … to browse to the desired directory. 3. Optionally, select the "m This Directory Down Recursively" radio button. Note: The recursive option on a deep hierarchy can take a long time, because this process looks at every file in the hierarchy. The recursive option works best on fairly shallow or restricted hierarchies. 4. Select the desired file types.
Using SoftBench Defining Targets for Project Build Defining Targets for Project Build SoftBench attaches build instructions to targets. Each target in your project must be defined and have its build instructions described. Creating a Target To define a new target: 1. Choose "Target: New…", which displays the "Define New Targets" dialog box shown in Figure 2-7. Figure 2-7 "Define New Targets" Dialog Box 2. Enter a target name in the "Target Name" input box. Target names must be unique within a project.
Using SoftBench Defining Targets for Project Build 5. Select Add to add the new target to the "Pending New Targets" list. 6. Define as many targets as you need while the dialog box is posted. When you are done, select OK. If the SoftBench-provided build configurations do not meet your needs, you can either define your own new build configuration or add target-specific customizations to an existing build configuration. See “Customizing Build Configurations” on page 62 for more information.
Using SoftBench Defining Targets for Project Build Customizing Build Configurations A build configuration specifies how to convert your source files into your targets. Build configurations may include packages as a shorthand notation for a common transform and its associated options or for common libraries. To create or modify build configurations: 1. Choose "Builder: Manage Build Configurations…" which displays the dialog box shown in Figure 2-8. Figure 2-8 "Manage Build Configuration" Dialog Box 2.
Using SoftBench Defining Targets for Project Build Depending on the changes you need, you can add packages (see “Using Build Packages” on page 63), libraries, library directories, include directories, compiler options, and other build instructions. To modify compile modes, defines, undefines, and compiler flags, you must select your compiler first. 4. Select Save to save changes under the current name. Select Save As… to save changes under a new name.
Using SoftBench Defining Targets for External Build Defining Targets for External Build As part of SoftBench's support for the external build model, you can create targets and save the command to initiate your build: 1. Choose "Target: New…" to display the "External Build Command" dialog box shown in Figure 2-9. Figure 2-9 "External Build Command" Dialog Box 2. Enter the build directory, build command, target name, and options for a target. 3. Select Save as Target.
Using SoftBench Defining Targets for External Build the file is named "Makefile", "makefile", or ends in the ".mk" suffix. a. In the "Add Files to Project" dialog box, select More File Types…. b. Add the "Makefile" file type to the "File Types to Use" list. c. Select the file type in the "Add Files to Project" dialog box. d. Select Add. Alternatively, you can add a Makefile to the project by selecting the "❍ Choose Files Individually" radio button and entering the Makefile name in the "Filename" input box.
Using SoftBench Using the Target Graph Using the Target Graph To conserve screen real estate, the target graph is not always visible. To display the target graph, select Expand >>, then select the Builder tab. The target graph is in the top half of the Builder page (see Figure 2-10). To hide the target graph entirely, turn off "View: Display Target Graph".
Using SoftBench Using the Target Graph Table 2-3 Build Model Operations in the Target Graph Operation Project Build External Build Display Dependencies Yes No Select Target Nodes Yes Yes Operations Available All Build only Graph Operations (save, find, zoom, hide, clear) Yes Yes The target graph has selection-sensitive popup menus. Depending on what is selected, an appropriate popup menu is available.
Using SoftBench Using the Target Graph Table 2-4 Graph Node States Color Meaning Blue Up-to-date—the target or intermediate file does not need to be built. Red Out-of-date—the files from which the target or intermediate file is derived have changed and the node needs to be rebuilt. White Not buildable—the file is not an appropriate build target; source files and include files are not buildable. Grey Non-existent—the file does not currently exist on the file system.
Using SoftBench Using the Target Graph Controlling Graph Complexity Controlling how many dependencies the target graph displays with the Display Dependencies menu button, discussed in the previous section, helps control graph complexity. Other mechanisms for controlling the complexity and appearance of the target graph include: • Choose one of the "Hide" commands from the "Graph" menu. These commands allow you to hide selected nodes, children of selected nodes, or unselected nodes from the graph.
Using SoftBench Building Projects and Targets Building Projects and Targets Whether you use the project build model or the external build model, SoftBench provides the flexibility to build either the entire project or individual targets. When nothing is selected in the project browser, SoftBench acts as if the current project is selected. Selecting the Build button in this state builds the entire current project.
Using SoftBench Building Projects and Targets Table 2-5 Compile Mode Settings Compile Mode Default Compiler Flag ■ Debug Select to prepare an object file for debugging; "-g" is the default for all compilers except aCC; "-g0" is the default for the aCC compiler. ■ Static Select to prepare for static analysis; "-y" is the default. ■ Optimized Select to tell the compiler to optimize the executable (to maximize the execution speed and minimize space usage); "-O" is the default.
Using SoftBench Building Projects and Targets External build projects do not use the "Set Compile Modes" dialog box to change the compiler flags sent via the "Compile Modes" toggle buttons. To override the compiler flags for an external build: 1. Turn off the toggle buttons for the compile mode that you want to override. 2. Choose "Builder: Use External Build Command…" to display the "External Build Command" dialog box. 3.
Using SoftBench Building Projects and Targets for external build projects using make(1) as the build command, enter the -n option in the "Options" input box of the "External Build Command" dialog box. Compiling Instead of Building SoftBench supports both compiling and building the elements of a project. With a "Build" command, you select a target and SoftBench transforms the dependencies to create the target.
Using SoftBench Building Projects and Targets Interpreting Error Messages The error messages displayed in the output browser depend on the compiler you are using. The messages always contain a line number, indicating the point in your source code where the compiler detected the error. The file name may be on the same line or on a previous line in the error output. An error message indicates the problem the compiler found.
Using SoftBench Building Projects and Targets • Choose "Open Editor on Selected Item…" to edit your source file. • Choose "Find String…" or type Control-S to find a specific string in the text displayed in the output browser. • Choose "Print/Save Browser Output…" to print or save the output browser's display. • Choose "Load Browser from File…" to reload a saved copy of the browser output that allows you to address the compile errors later without recreating the error list through another build.
Using SoftBench Checking Your Code Using SoftBench CodeAdvisor Checking Your Code Using SoftBench CodeAdvisor If you purchase C++ SoftBench, you can use SoftBench CodeAdvisor to check your code for critical coding violations beyond compiler errors. SoftBench CodeAdvisor allows you to check the entire project, selected targets, or selected files. To check your code: 1. Select Expand >> to expand the main SoftBench window. 2. Select the "CodeAdvisor" tab to display the CodeAdvisor page. 3.
Using SoftBench Running Other SoftBench Tools Running Other SoftBench Tools SoftBench provides menu commands and a toolbar for starting other tools in the SoftBench environment. When you position the mouse over a tool icon, SoftBench tells you which tool the icon represents. You can start tools in several ways: • Select files or targets in the project browser or on the target graph, then select the tool icon in the toolbar. When you start tools with data selected, the tool loads that data.
Using SoftBench Managing Your SoftBench Environment Managing Your SoftBench Environment SoftBench provides several ways to customize your environment. In general, customizations are located on the "View" and "Options" menus. The "Options" menu lets you tailor SoftBench's behavior to meet your needs.
Using SoftBench Managing Your SoftBench Environment You can make your custom menu entries visible to all tool classes in your SoftBench session. These entries appear under the "System Commands" label. To create these menu entries: 1. Create the desired menu commands using "Custom: Edit Menus…". SoftBench saves the menu information in $HOME/.softbench/menus/custom/toolname. 2. Rename the toolname file to $HOME/.softbench/menus/custom/shared.
Using SoftBench Managing Your SoftBench Environment Choosing Tool Preferences Some classes of SoftBench tools offer more than one choice of tool. For example, SoftBench supports two editors, SoftBench XEmacs Editor and SoftBench vi Editor. Other editors are available as SoftBench contributed tools and as third-party encapsulations. To see your tool choices, choose "Options: Tool Preferences…".
Using SoftBench Managing Your SoftBench Environment a file to the /opt/softbench/config/bmsinit directory. See the bmsinit(5) man page for more information. 3. Register the tool with SoftBench toolbar by editing the /opt/softbench/config/toolbar/config file. Changing this file requires superuser access. The file documents the format for new entries. 4. Add the new tool to the toolbar. See “Adding and Removing Tool Icons” on page 79.
Using SoftBench Managing Your SoftBench Environment To specify remote execution for builds, choose "Options: Build Settings…", then select the "Build Behavior" tab. Enter the remote system name in the "Compile Host" input box. See “Running the Build on a Remote System” on page 75 for more information. To specify remote execution for SoftBench Debugger, choose "Options: Debug Host…" from the SoftBench Debugger menu bar and enter the remote system name.
Using SoftBench Managing Your SoftBench Environment • To stop a SoftBench tool, choose "File: Exit" on the tool's menu bar. • To stop all tools associated with a project, close the project. Select the project in the project browser, then choose "Project: Close". • To stop SoftBench and all tools associated with a SoftBench session, choose "Project: Exit SoftBench" in the main SoftBench window. If you are working in an Untitled project, SoftBench asks you to name your project or delete it before you exit.
Using SoftBench Getting Help Getting Help SoftBench provides online help, accessible from the "Help" menu. You can access general help on any SoftBench tool, task-oriented help, or specific help on a selected window item. Figure 2-11 shows the Welcome window from SoftBench Online Help.
Using SoftBench Getting Help Using the Help Menu All SoftBench tools display "Help" as the last item in the menu bar. Common online help menu commands include: Tool Overview Gives you an overview of the tool and a list of subtopics. In the main SoftBench window, this menu command is "Help: Overview". Show Man Page Displays the man page for the current tool. On Item Displays a question mark cursor; move the cursor over the portion of the screen for which you want help and click the left mouse button.
Using SoftBench If Something Goes Wrong If Something Goes Wrong Table 2-6 Condition or Message Explanation Toolbar is missing Check the setting of the "View:■ Display Toolbar" toggle button. Alternatively, check "Options: Toolbar Setup" to ensure that you have tools selected or to configure your tool preferences. Target graph missing from Builder page Check the setting of the "View:■ Display Target Graph" toggle button. Set the toggle button to display the target graph.
Using SoftBench For More Information For More Information • On getting started with SoftBench, choose "Help: Tutorial". • On understanding particular features of a SoftBench tool, build configurations, build packages, and transforms, see SoftBench Online Help. • On compiler-generated error messages, see the language reference manual available under "Help: Language Reference".
Using SoftBench For More Information 88 Chapter 2
Using SoftBench Configuration Manager 3 Using SoftBench Configuration Manager SoftBench CM is a configuration management tool that helps manage code between software team members, software teams, and even corporate sites. SoftBench CM is fully integrated with the SoftBench environment, allowing access to configuration management functionality.
Using SoftBench Configuration Manager Understanding SoftBench CM Understanding SoftBench CM SoftBench CM helps you manage software development projects that consist of many versions and configurations. Using SoftBench CM, you can retrieve and build any version of an application in a consistent, repeatable manner. SoftBench CM is fully integrated with the SoftBench environment.
Using SoftBench Configuration Manager Understanding SoftBench CM within the archive. Using the SoftBench CM interface and the SoftBench main window together provides a complete view of your configuration management files. The SoftBench main window lets you browse the local files associated with a project, and SoftBench CM lets you browse archive files and directories.
Using SoftBench Configuration Manager Getting Started - A Brief Overview Getting Started - A Brief Overview SoftBench CM is an archive browser that lets you view, traverse, and modify the SoftBench archive system. SoftBench CM and SoftBench are integrated so that you use SoftBench CM to browse archive files and the SoftBench main window to manage projects containing your local files. To begin using SoftBench CM for your basic configuration management needs, follow the steps in this section: 1.
Using SoftBench Configuration Manager Getting Started - A Brief Overview The SoftBench CM window displays the files and directories contained within the selected archive. 3. Create an archive directory. a. Navigate through the current server to the area where you want to create an archive directory. b. Choose "Directory: Create…". c. Enter the name of the directory you want to create in the "Create Directory" input box. d. Select OK. 4. Create a mapping. a. Choose "Actions: Create New Mapping…". b.
Using SoftBench Configuration Manager Getting Started - A Brief Overview b. Choose "Actions: Check Out to Local Directory". c. Select the appropriate submenu: If you want to edit an archive file, check it out as locked so that you have read-write permissions and others know you are modifying the file. Checking a file out unlocked gives you a read-only copy of that file. If a file with the same name exists in your local directory, SoftBench CM overwrites it with the current archive version.
Using SoftBench Configuration Manager Managing the Archive System Managing the Archive System An archive is a file system located on a separate archive server. You use archives to store revisions of your local files and related information, including file revision history, descriptive text, and control attributes. You can establish a relationship between archive files and directories and your local system by creating mappings.
Using SoftBench Configuration Manager Managing the Archive System Figure 3-2 Viewing Local Servers and SoftBench CM Archives 2. Select the server and archive directory you want to open and the archive you want to browse. 3. Select Browse Archive to view the contents of this archive. The SoftBench CM main window displays the contents of the current archive directory (see Figure 3-3). To traverse directories, double-click on the desired directory.
Using SoftBench Configuration Manager Managing the Archive System • File or directory name Figure 3-3 SoftBench CM Main Window Creating an Archive Directory You use an archive to store revisions of your local files and make them available to other development team members. To help better organize projects, structure files in directories. To create an archive directory: 1. Navigate through the current server to the area where you want to create an archive directory. 2. Choose "Directory: Create…". 3.
Using SoftBench Configuration Manager Managing the Archive System Creating a Mapping between an Archive Directory and Local Directory SoftBench CM uses mappings to establish relationships between your local files and directories and the corresponding SoftBench CM server archive files and directories (see Figure 3-4). Before you can modify files in an archive directory, you need to create a mapping between that directory and a directory on your local system.
Using SoftBench Configuration Manager Managing the Archive System Modifying Mappings between Local and Archive Directories SoftBench CM lets you view and modify existing mappings between local and archive files and directories. To view existing mappings, choose "Actions: Show/Modify Mappings…". SoftBench CM displays the "Show/Modify Mappings" dialog box (see Figure 3-5).
Using SoftBench Configuration Manager Managing the Archive System Figure 3-5 "Show / Modify Mappings" Dialog Box To modify the server and archive locations: 1. Select an entry in the upper area of the "Show/Modify Mappings" dialog box. 2. Select Modify.... 3. Enter the correct server and archive information in the "Modify Mapping" dialog box. 4. Select OK. To modify a mapping between an archive and local directory: 1. Select the entry from the bottom window of the "Show/Modify Mappings" dialog box. 2.
Using SoftBench Configuration Manager Managing the Archive System optional "Symbolic Name List" entry (see “Creating a Default Symbolic Name for Archive Files” on page 112 for more information). 4. Select OK. To delete a server/archive directory location or a local mapping: 1. Select the entry. 2. Select the Delete associated with its window.
Using SoftBench Configuration Manager Managing Archive Files and Directories Managing Archive Files and Directories SoftBench CM offers complete configuration management functionality that lets you manage your archive files and directories from menu selections. For example, you can create initial files, check files out, delete directories, cancel file check outs, show the revision history of files, and compare file revisions.
Using SoftBench Configuration Manager Managing Archive Files and Directories 1. Select the file(s) you want to check out. 2. Choose "Actions: Check Out to Local Directory". 3. Choose the appropriate submenu: Locked checks out the most current revision of the file, gives you read-write permissions, and lets others know you are modifying the file. This helps avoid the problem of two developers working on the same file simultaneously. Unlocked checks out a read-only copy of that file.
Using SoftBench Configuration Manager Managing Archive Files and Directories 2. Choose "Actions: Update to Local Directory". 3. Choose the appropriate submenu: Current Directory Only copies the latest file revisions in the selected directory to the mapped local system. SoftBench CM also copies the subdirectories, but not their content. Recursive (Files and Directories) copies the latest file revisions in the selected directories and the latest file revisions from any subdirectory to the mapped local system.
Using SoftBench Configuration Manager Managing Archive Files and Directories Figure 3-6 Viewing an Archive File To view a file, double-click on the desired file. SoftBench CM displays the default revision of the file in the "View File" dialog box. To save the contents of the display to a local file: 1. Select Save As.... 2. Enter the local file name and location where you want to save the file. No link exists between the archive file displayed in the "View File" dialog box and the new local file.
Using SoftBench Configuration Manager Managing Archive Files and Directories d. Select Done to close the "Show Revision History" dialog box. e. Double-click on the same file to display the "View File" dialog box. f. Enter the revision number you located previously in the "Revision" input area. 3. Select Display. SoftBench CM displays the specified file revision. 4. Select Done. Deleting Archive Files and Directories SoftBench CM lets you delete unlocked archive files and empty directories.
Using SoftBench Configuration Manager Managing Archive Files and Directories Breaking a Lock on an Archive File You may need to break the lock on an archive file under certain circumstances, such as when a developer forgets to check in a source file before leaving town. Using SoftBench CM, you can determine who holds the lock and then break the lock so that another developer can work on the source file. To break the lock on an archive file: 1. Select the file. 2. Choose "File: Break File Lock…". 3.
Using SoftBench Configuration Manager Managing Archive Files and Directories To view the revision history of an archive file: 1. Select the file. 2. Choose "File: Show Revision History…". The "Show Revision History" dialog box displays the revision history for the selected file (see Figure 3-8). To view the revision history of a particular file revision: 1. Enter the revision number in the "Revision" input area. 2. Select Display.
Using SoftBench Configuration Manager Managing Archive Files and Directories Setting Archive Display Filters The archive display filter lets you view only those archive files and directories in which you are interested. From the "Display Filter" dialog box, you can customize the filter to include any combination of options: • Show a concise listing: Displays only the names of the files in the current archive directory. • Show only locked files: Displays only locked files in the current archive directory.
Using SoftBench Configuration Manager Managing Local Files Managing Local Files Your local file system contains one revision of each file. Changes to archive files, such as editing, are done in the local file system through the SoftBench main window. Working on your local system lets you make and test changes to local files before introducing those changes back into the archive file system. Modifying Local Source Files To modify a local file from the SoftBench main window: 1.
Using SoftBench Configuration Manager Managing Local Files 4. Include optional attributes: Revision: Defines an instance of a file in a series of changes. You can leave this field blank because SoftBench CM assigns the file a default number that denotes the latest version of a file. State: Gives a revision of a file a value such as "draft," "prototype," "final," or "release." You can leave this field blank because SoftBench CM uses "Exp" (experimental) as the default value. 5. Select OK.
Using SoftBench Configuration Manager Creating a Default Symbolic Name for Archive Files Creating a Default Symbolic Name for Archive Files The mapping between a local directory and an archive specifies which revision of files you use. The default setting retrieves the latest revision of each file from the archive during file check out. The default also sets each file as the new, latest revision during check in.
Using SoftBench Configuration Manager Creating a Default Symbolic Name for Archive Files During Check In • SoftBench CM tags the checked in file with the first symbolic name on the list. Two revisions of the same file cannot have the same symbolic name. If the system already includes a revision tagged with the specified symbolic name, the tag no longer applies to that revision. • SoftBench CM creates a branch, if necessary, for the new tagged revision.
Using SoftBench Configuration Manager Creating a Default Symbolic Name for Archive Files Table 3-1 Symbolic Names and Revision Numbers File X Revision Number File Y Symbolic Name Revision number Symbolic Name 1.5 1.5 — Revision1_1 1.4 1.4 1.3 — Revision1_1 1.3 1.2 — Demo Version 1.2 1.1 Table 3-2 1.1 Actions and Results After Setting Symbolic Name List Action —> Result Check out File X —> Checks out revision 1.2. Check out File Y —> Checks out revision 1.5.
Using SoftBench Configuration Manager Using the SoftBench CM Command Line Interface Using the SoftBench CM Command Line Interface SoftBench CM lets you execute commands from the command line. For more information about the command line, review the following man pages located in /opt/softbench/man directory. Table 3-3 SoftBench CM Command Line Man Pages Man Page Task Description cmdate(1) Sets dates across a network of machines using SoftBench CM.
Using SoftBench Configuration Manager Using the SoftBench CM Command Line Interface 116 Chapter 3
Using SoftBench Editors 4 Using SoftBench Editors SoftBench provides SoftBench XEmacs and SoftBench vi Editor for text editing. SoftBench comes preconfigured with SoftBench XEmacs as the default editor, with SoftBench vi Editor as an alternative. SoftBench Program Editor is now contributed software that you must custom configure if you choose to use it. Once your editor preference is set, actions which invoke an editor use the configured SoftBench editor.
Using SoftBench Editors Using Editors with Projects Using Editors with Projects When the editor is started from SoftBench, it understands your project information. SoftBench XEmacs and SoftBench vi Editor can save a file into the current project. The editor displays the current project on the title bar. You can also save a file outside of the current project. • Save–Save the file as it currently appears in the window. If the file is "Untitled", you are prompted for a file name.
Using SoftBench Editors Configuring an Editor Configuring an Editor Select your editor by choosing "Options: Tool Preferences…." Once your editor preference is set, actions which invoke an editor use the configured SoftBench editor. Refer to SoftBench Online Help for detailed information on each editor. SoftBench XEmacs is the default editor. If you are a new SoftBench XEmacs user, SoftBench automatically sets up a default XEmacs configuration for you.
Using SoftBench Editors Configuring an Editor 4. Save the changes to the file. 5. From the SoftBench main window, choose "Options: Tool Preferences". 6. From the dialog box, choose "Editor". The available editors are displayed. 7. Choose "SoftEdit" from the "Available Tools" list, then select OK. 8. Select OK. If you do not have root permissions, copy the line found in /opt/softbench/config/toolbar/prefsConfig into $HOME/.softbench/bmsinit. Be sure it is all on one line.
Using SoftBench Editors Starting the Configured SoftBench Editor Starting the Configured SoftBench Editor To edit a project file: • Double-click on it in the Files view • Select the file in the Files view and select the "Editor" icon. • Select the file and choose "File: Open…". • Alternatively, you can double click on the output browsers from other SoftBench tools to start your editor preloaded with the relevant file. To create a new file: 1.
Using SoftBench Editors Editing with SoftBench XEmacs Editor Editing with SoftBench XEmacs Editor SoftBench XEmacs is an advanced GUI editor with features that go beyond a typical text editor or vi. SoftBench XEmacs is built on GNU XEmacs . In addition to having pulldown menus and a toolbar, SoftBench XEmacs is self–documenting, customizable, and extensible.
Using SoftBench Editors Editing with SoftBench XEmacs Editor Using SoftBench XEmacs SoftBench XEmacs offers several robust user interface features (See Figure 4-1): • A menu bar provides access to pulldown menu functions. • A tool bar provides quick and easy access to selected pulldown menu features. • An edit area provides a multi-line editing area that responds to keyboard commands, as well as the pulldown menu items.
Using SoftBench Editors Editing with SoftBench XEmacs Editor Figure 4-1 SoftBench XEmacs Main Window Accessing Help Once you have started SoftBench XEmacs, you can access online help from the "Help" menu. The "Help" menu also provides access to online manuals via the "Help: XEmacs Help → UNIX Manual…" command. Editing Multiple Files SoftBench XEmacs allows you to sequentially edit multiple files in the same window or in multiple windows.
Using SoftBench Editors Editing with SoftBench XEmacs Editor editing a file and wish to make a quick change to another file and then return to editing the first file. 1. Within SoftBench XEmacs you can choose "File: Open…" and specify another file. If you use "Save" or "Save As…" the file will be added to the current project file set. 2. SoftBench XEmacs loads the new file, where you can edit the file's contents as desired. 3.
Using SoftBench Editors Editing with SoftBench vi Editor Editing with SoftBench vi Editor SoftBench vi Editor is an easy-to-use encapsulation of the UNIX vi editor. This tool gives you all of the features of vi plus the ability to execute SoftBench commands and tools from the pulldown menus. See “Calling Other SoftBench Tools from the Editors” on page 130 for integration information. Consult your system's vi documentation to learn about vi.
Using SoftBench Editors Editing with SoftBench vi Editor using alphanumeric and cursor-control keys for input. In addition, you can move the cursor using the mouse, and you have the ability to access SoftBench operations defined in the window by using the mouse or the Alt key in conjunction with other keys. Using the Mouse Pointer Versus the Text Cursor Note the differences between "mouse pointer" and "text cursor": Mouse pointer moves as you move the mouse.
Using SoftBench Editors Editing with SoftBench vi Editor behaviors: Table 4-1 If the vi autowrite option SoftBench vi Editor's behavior is set automatically saves the file before loading the new file. is not set you must manually save the file before loading the new file. To set the autowrite option, type ":set autowrite" from within SoftBench vi Editor or add it to your $HOME/.exrc file. 3. SoftBench vi Editor loads the new file and you can modify the file's contents as desired. 4.
Using SoftBench Editors Editing with SoftBench vi Editor For example, suppose that you are editing a file called FirstFile in the only existing SoftBench vi Editor window, and this window's "■ Reuse Window" toggle button is not selected. Editing SecondFile by choosing "File: Open" generates a new SoftBench vi Editor window with SecondFile loaded into it (because the first window is not to be reused).
Using SoftBench Editors Calling Other SoftBench Tools from the Editors Calling Other SoftBench Tools from the Editors One of the most useful benefits of having the vi and XEmacs editors encapsulated and integrated into SoftBench is that you can call other tools from within the editors, and you can call the editors from other tools. The default editing mode is "C" code, and changes based on the filename's suffix. The suffixes .C, .cxx, .cpp, .Cxx, .cc and .H cause the editors to switch to C++ mode.
Using SoftBench Editors Calling Other SoftBench Tools from the Editors Setting Breakpoints in a Program File You can also set SoftBench Debugger breakpoints in a program by choosing "File: Set Breakpoint". SoftBench Debugger sets the breakpoint on the line where the cursor is located. Using Configuration Management SoftBench provides access to frequent Configuration Management commands for operations such as checking in a file or checking out the latest copy of a file.
Using SoftBench Editors For More Information For More Information • On specifying an editor other than SoftBench XEmacs and SoftBench vi Editor, see “Registering New Tools with SoftBench” on page 80 and the bmsinit(5) man page. • On SoftBench vi Editor and its resources, see the vi(1) manual page. • On SoftBench XEmacs and its resources, see the xemacs(1) manual page.
Using SoftBench Class Graph/Editor 5 Using SoftBench Class Graph/Editor SoftBench Class Graph/Editor allows you to edit the class constructs in your C++ program using a visual, graphical interface. You can create and modify class hierarchies and edit class components with a few clicks of the mouse. SoftBench Class Graph/Editor is incorporated into the SoftBench Static Analyzer graphical interface. You need some familiarity with SoftBench Static Analyzer to use the SoftBench Class Graph/Editor features.
Using SoftBench Class Graph/Editor Editing C++ Structures with SoftBench Class Graph/Editor Editing C++ Structures with SoftBench Class Graph/Editor The class hierarchies and other data structures in C++ can be understood much more easily when they are presented in a graphical format. Static Graphs provide an excellent tool for viewing these structures. The SoftBench Class Graph/Editor in SoftBench Static Analyzer also allows you to edit C++ structures in the graphical display.
Using SoftBench Class Graph/Editor Editing C++ Structures with SoftBench Class Graph/Editor Any change to the sources or database must be reflected in the graph. Figure 5-1 SoftBench Class Graph/Editor Use Model Each time you make an edit, SoftBench Class Graph/Editor updates the graph, changes the source files, and invokes the source scanner to update the database. The scanning process takes time, and it's possible for the graph to become unsynchronized if you make edits before the scan completes.
Using SoftBench Class Graph/Editor Editing C++ Structures with SoftBench Class Graph/Editor database. Using SoftBench Class Graph/Editor with Other SoftBench Editors As you interact with SoftBench Class Graph/Editor, it immediately writes each change you make to the appropriate source files. SoftBench Class Graph/Editor maintains an "undo" list so that you can reverse changes even though they have been written to disk.
Using SoftBench Class Graph/Editor Editing C++ Structures with SoftBench Class Graph/Editor all files before making an edit. If any files have been changed since the last database update, SoftBench Class Graph/Editor updates the database before proceeding with the edit.
Using SoftBench Class Graph/Editor Using SoftBench Class Graph/Editor in Your Work Using SoftBench Class Graph/Editor in Your Work SoftBench Class Graph/Editor has several basic operations that you can apply to different use models. You can: • View and modify your existing C++ class hierarchy. The SoftBench Class Graph/Editor graph in SoftBench Static Analyzer gives you many ways to examine the structure of your C++ program.
Using SoftBench Class Graph/Editor Using SoftBench Class Graph/Editor in Your Work Creating New Components You can create new classes and class members by choosing one of the selections under the "Edit" menu. The actions you take depend on what you have chosen. Any files created in the process of adding components become part of your current project. "Edit: Create Class…" prompts you for the name of the new class.
Using SoftBench Class Graph/Editor Using SoftBench Class Graph/Editor in Your Work Member Functions" or "Show → Data Members" from the popup menu. Once you have selected the desired component, choose "Edit: Modify…", or press the right mouse button and select "Modify…". A dialog box similar to the corresponding "create" dialog box appears. Modify the desired information and select OK.
Using SoftBench Class Graph/Editor Sample Use Models Sample Use Models Using SoftBench Class Graph/Editor is a simple matter of applying the basic operations as needed in your specific C++ programming situation. Here are some examples of common scenarios. Creating a New Program SoftBench Class Graph/Editor is an excellent tool to help you "rough out" the structure of your program.
Using SoftBench Class Graph/Editor Sample Use Models or function template member (parameterized function). (You may want to use SoftBench Class Graph/Editor to create a class with the desired components, and then convert that class to a template using another editor.) However, you can perform any other operation with class templates, such as adding or removing member functions and data members, and deriving classes from the template.
Using SoftBench Class Graph/Editor If Something Goes Wrong If Something Goes Wrong Table 5-1 Condition Explanation Unable to update the data base. No files modified. SoftBench Class Graph/Editor was unable to update the Static database to reflect your changes. Make sure the data base is writeable. You may want to regenerate the database by choosing "File: Analyze File Set" or by rebuilding your program using Project. A recent (external?) edit is causing compile errors.
Using SoftBench Class Graph/Editor If Something Goes Wrong 144 Chapter 5
Using SoftBench CodeAdvisor 6 Using SoftBench CodeAdvisor SoftBench CodeAdvisor provides advanced code checking for C and C++. SoftBench CodeAdvisor (available in C++ SoftBench) can help you find and fix a variety of subtle and dangerous errors that most C and C++ compilers can not detect. SoftBench CodeAdvisor does not duplicate the error-checking functions of the compilers. The compilers check for many syntactic and some logic problems, but are limited to checking for fairly simple, localized problems.
Using SoftBench CodeAdvisor freeing the memory would be an error. SoftBench CodeAdvisor can detect this sort of logic error. It scans your program, looking for operator= definitions, and makes sure you check for the classA = classA case. If not, it warns you to fix your code. SoftBench CodeAdvisor rules focus on finding actual or potential defects in your code. Other rules check for maintenance, performance, and future problems or porting issues.
Using SoftBench CodeAdvisor SoftBench CodeAdvisor continues to increase the number of rules that it checks. Consequently, rules are grouped into categories which allows you to choose which rule groups you want to check.
Using SoftBench CodeAdvisor Comparing SoftBench CodeAdvisor to Debuggers or Dynamic Analyzers Comparing SoftBench CodeAdvisor to Debuggers or Dynamic Analyzers SoftBench CodeAdvisor detects rule violations by performing static analysis of the code using the Static database. Static analysis differs from dynamic or run-time analysis, in that it examines all of the available code.
Using SoftBench CodeAdvisor Performing the "Check Code" Operation Performing the "Check Code" Operation Perform the following steps to use SoftBench CodeAdvisor: 1. Build your project with the static option on (default). This gives the compiler the -y option and generates a Static database. 2. Run SoftBench CodeAdvisor on your compiled program. 3. View any rule violations in the SoftBench CodeAdvisor error browser. 4. Filter out any rule violations that you want to ignore (optional). 5.
Using SoftBench CodeAdvisor Performing the "Check Code" Operation If some of your compiles take place in directories other than your build directory you need to set the SB_DBNAME environment variable prior to building. Set SB_DBNAME to the path of the static database file expected by SoftBench CodeAdvisor (i.e., SB_DBNAME=builddir/Static.sadb;export SB_DBNAME where "builddir" is the "Build Directory" specified in the "Create Project" dialog box).
Using SoftBench CodeAdvisor Performing the "Check Code" Operation files if a project is selected). For example, if a violation depends on code in two files and you have only selected one of them for checking, SoftBench CodeAdvisor cannot detect the violation. Even if the file selected contains the actual violation, the other file was not selected, so SoftBench CodeAdvisor cannot detect the error.
Using SoftBench CodeAdvisor Performing the "Check Code" Operation Terminating SoftBench CodeAdvisor After Check Code has been pressed, the button changes to read Terminate. At any point you can cancel the Check Code operation by selecting the Terminate button, or you can allow the check to attempt to finish. If SoftBench CodeAdvisor for some reason cannot parse a file, SoftBench CodeAdvisor displays a message and SoftBench CodeAdvisor does not check this file.
Using SoftBench CodeAdvisor Performing the "Check Code" Operation This action filters all violations from the file that generated the selected violation. To filter all violations from a specific directory and its subdirectories: 1. Select a violation generated from the directory that you want to filter. 2. Select the Dir button. This action filters all violations from the directory that generated the selected violation. It also filters violations from subdirectories below that directory.
Using SoftBench CodeAdvisor For More Information For More Information For additional task information, refer to SoftBench Online Help by choosing "Help: SoftBench How To" from the SoftBench main window.
Using SoftBench Debugger 7 Using SoftBench Debugger SoftBench Debugger serves as a window interface to HP's debugger DDE(1), enhancing and extending the DDE functionality. You can use it to examine and control the execution of your programs. The following chapters discuss the SoftBench interface to DDE and common tasks you can perform with SoftBench Debugger. For complete descriptions of the SoftBench Debugger menus, use SoftBench Online Help.
Using SoftBench Debugger Understanding SoftBench Debugger Understanding SoftBench Debugger SoftBench Debugger provides interactive source and assembly-level debugging for software programs. It provides an area for viewing source code, an area for entering debugger commands, and areas for debugger output and program I/O. SoftBench Debugger also provides an interface for editing and rebuilding programs.
Using SoftBench Debugger Understanding SoftBench Debugger Monitor variable values You can set a watchpoint on a variable, causing it to be monitored after each instruction, statement, or function entry point, or when the program returns control to the debugger. SoftBench Debugger displays the current variable values in the Data Watch Window. View machine instructions You can view disassembled machine code with symbolic addresses at any address in your program. You can also view and access register values.
Using SoftBench Debugger Understanding SoftBench Debugger Build Your Code SoftBench Debugger allows you to build without returning to the main SoftBench window. This function unloads, requests the builder to build, and reloads the executable file automatically. Customize the user interface You can create buttons on the SoftBench Debugger window to streamline frequently repeated operations.
Using SoftBench Debugger Preparing Your Program for Debugging Preparing Your Program for Debugging Use Builder to compile (build) your projects for debugging. By default, Builder automatically generates the debug information required by SoftBench Debugger if you set the the "■ Debug" compile mode toggle button on the SoftBench main tool face. It may be necessary to recompile your application after enabling the "■ Debug" toggle.
Using SoftBench Debugger Using SoftBench Debugger Window Areas Using SoftBench Debugger Window Areas SoftBench Debugger provides an easy-to-use windowed interface to an underlying debugger. (See Figure 7-1.) SoftBench Debugger allows you to debug your programs without in-depth knowledge of the underlying debugger. The window shows the current program being debugged, the source code being debugged, debugger and program I/O, and other useful information.
Using SoftBench Debugger Using SoftBench Debugger Window Areas Like SoftBench Static Analyzer, SoftBench Debugger provides a "()" input box. This input box provides input to a number of command buttons (such as Print ( )) and many pull-down menu commands (such as "Break: Set At Hex Address ( )" or "Visit: Procedure ()"). You can enter information into the "()" input box for use with these commands, either by typing or by selecting text in the source or I/O areas.
Using SoftBench Debugger Using SoftBench Debugger Window Areas SoftBench Debugger shows the Annotation Margin, which indicates the Program Counter location with a PC Arrow. The Annotation Margin also shows program breakpoint locations. See “Setting and Using Breakpoints” on page 189. Breakpoints can be set and cleared by clicking in the Annotation Margin at the desired breakpoint location. SoftBench Debugger displays other symbols when debugging optimized code. See “Debugging Optimized Code” on page 227.
Using SoftBench Debugger Tearing Apart the Main Toolface Tearing Apart the Main Toolface The main SoftBench Debugger window can become quite large for some screens. Consequently, you can separate the main window into as many as four separate top level windows containing: • the Menu Bar, Executable, "()" input box, PC Location, and Current Location, and uses customizable buttons.
Using SoftBench Debugger Tearing Apart the Main Toolface To iconify all of the windows at once choose "File: Iconify Windows". To normalize all windows at once choose "File: Normalize Windows". These commands apply to all top level windows; those listed above as well as these windows: • stack trace • disassembly • register windows • data graph • watchpoint values.
Using SoftBench Debugger Loading or Rerunning an Executable Program Loading or Rerunning an Executable Program When you start SoftBench Debugger by selecting a target in the main SoftBench window, then selecting the "Debug" icon, SoftBench Debugger automatically loads the correct executable file. To load an executable program into SoftBench Debugger when you are already in SoftBench Debugger, choose "File: Load Executable…".
Using SoftBench Debugger Loading or Rerunning an Executable Program Choosing the menu option Allows you to "File: Load Executable…" or "File: Rerun…" set the arguments, I/O redirection, and environment variables for your program. You can specify the default values of these settings by choosing "Options: Default Load/Rerun Settings…". "File:Load Executable…" initialize all values to the defaults specified in "Options: Default Load/Rerun Settings…".
Using SoftBench Debugger Loading or Rerunning an Executable Program "Execution: Get Current Program Info…" displays a dialog box containing useful information about the current program, including the values set in the above dialog boxes. Specifying the Working Directory and Program Arguments By default, the loaded executable runs in the project's local workspace root. When you start SoftBench Debugger from the command line, the executable runs in the current working directory.
Using SoftBench Debugger Loading or Rerunning an Executable Program Program Load Values" dialog box shows the environment variables SoftBench Debugger passes to your program. To add new environment variables: 1. Choose "Options: Default Load/Rerun Settings…". 2. Enter the variable name and desired value in the "Name" and "Value" input boxes. 3. Select Add. To remove an environment variable: 1. Choose "Options: Default Load/Rerun Settings…". 2. Highlight a listed name=value pair. 3. Select Delete.
Using SoftBench Debugger Loading or Rerunning an Executable Program • If you start SoftBench Debugger from the command line (which means it has no access to the project data), or if you load an executable that is not part of the current project, you may need to list the source directories explicitly by choosing "File: Add Source Directories…".
Using SoftBench Debugger Loading or Rerunning an Executable Program 3. Select Add After, Add Before, or Replace to add a directory to the list of directories. 4. Select OK . SoftBench Debugger uses the new directory settings for the current debugging session.
Using SoftBench Debugger Stepping through Your Program Stepping through Your Program When SoftBench Debugger loads a program, it begins executing the program and pauses at the first line with a breakpoint. You can then use SoftBench Debugger to execute your program one or more statements at a time. In the default configuration, SoftBench Debugger displays the following buttons above the Debugger Output Area: Step Execute one statement, then stop. This is called single step execution.
Using SoftBench Debugger Interrupting a Running Program Interrupting a Running Program When the PC Location is "Running…", your program has control, and you cannot interact with the debugger. You may want to interrupt your program so you can regain control of the debugger. Instances when you might want to interrupt a running program include: • Your program hangs in some internal loop. • Your program did not arrive at breakpoints as planned.
Using SoftBench Debugger Interrupting a Running Program it returns to its calling procedure by selecting Continue Out. You can continue doing this until your program returns to debuggable code. You could also set a breakpoint at some later point in debuggable code. If the nondebuggable code is in an infinite loop, or does not return for some other reason, you must kill or rerun the program. There is no way to return the program to debuggable code.
Using SoftBench Debugger Interacting with Your Program Interacting with Your Program Many UNIX programs function quite well when their standard input and output are redirected. These programs are easy to debug using SoftBench Debugger, since SoftBench Debugger redirecting their I/O to the User Program I/O area does not affect them. Some programs are designed to be invoked from a terminal environment. They may use the terminal for program input and output, perhaps even using cursor-movement commands.
Using SoftBench Debugger Interacting with Your Program Use the scroll bar at the right of the User Program I/O Area to see previous output or input. You can edit lines in this area (see Chapter 4, “Using SoftBench Editors,” on page 117). When you press Return, SoftBench Debugger sends the line where the text cursor is located as input to the program. For example, to repeat a previous input, move the cursor to that line and press Return.
Using SoftBench Debugger Interacting with Your Program that interactions between SoftBench Debugger and your program do not lead to a deadlock. Events are processed when they happen, and are directed to the appropriate window. Debugging X programs not running in synchronous mode can lead to deadlock situations in which the keyboard focus is on an unresponsive window. The XtAppInitialize function called to initialize the X Toolkit can set your application to synchronous mode.
Using SoftBench Debugger Specifying Identifier Locations Specifying Identifier Locations When you enter an expression into the "()" input box or in the "Debugger Input" input box, you must enter the data in a way that can be understood by DDE. See "Help: DDE Reference" for detailed information on the syntax required.
Using SoftBench Debugger Specifying Identifier Locations locate. If you do not specify proc, SoftBench Debugger uses the Current Location procedure. For example, "23" would correspond to line 23 of the file displayed in the Editable Source Area. "\\xmotion\14" would correspond to line 14 of file xmotion.c. DDE prints locations in the Debugger Output Area using this format.
Using SoftBench Debugger Specifying Identifier Locations procedure (that is, the procedure that called the currently executing procedure), a depth of 3 is two below, and so on. You can use this for debugging recursive procedures where the stack contains multiple instances.
Using SoftBench Debugger Specifying Identifier Locations +offset indicates an offset toward the top of the stack (towards `run), and -offset indicates an offset toward the base of the stack (towards `main). You can also create DDE variables using the DDE declare command. These are useful if you need temporary variables to store intermediate results, pointers, or other values you will need later. See “Using Debugger Variables” on page 183.
Using SoftBench Debugger Examining and Changing Data in Your Program Examining and Changing Data in Your Program You can use SoftBench Debugger to view or change the values of variables in your program. This feature directly accesses the underlying debugger, and as such is very dependent on DDE features. DDE accepts commands only when SoftBench Debugger has control (the "Debugger Input" prompt is not greyed out) and your program is not running.
Using SoftBench Debugger Examining and Changing Data in Your Program For example, suppose you debug the following code fragment: x=0; y=9; while (y<1000) { x=sqrt(y); x++; y=x*x; } Set a breakpoint on the "x=sqrt(y)" line, and run the program. When the program stops at the breakpoint, the PC arrow is at that line. Enter "x" in the "()" input box (or simply double-click on "x", and SoftBench Debugger automatically enters it into the "()" input box) and select Print ( ).
Using SoftBench Debugger Examining and Changing Data in Your Program For example, if you declare a pointer as int *numptr, then selecting Print* ( ) with numptr in the "()" input box prints the integer pointed to by numptr. You can also Print ( ) the expression *numptr. Printing Hex or String Values SoftBench Debugger knows the type of the variables you print, and usually prints them in a usable form.
Using SoftBench Debugger Examining and Changing Data in Your Program in the "Debugger Input" input box. The tptr variable can then be used in any expressions in the "()" input box. For example, if counter is an integer in your program, you could store a pointer to it by entering tptr = &counter in the "()" input box, and selecting Print ( ). If you then enter "tptr" in the "()" input box, you can print its value by selecting Print ( ), or print the value of counter by selecting Print* ( ).
Using SoftBench Debugger Examining and Changing Data in Your Program If your program uses several different source languages, you can use "prop lang" to re-evaluate a complicated expression without re-entering it in the new language. For example, suppose you have a main program written in C that calls FORTRAN subprograms for some of its functions. Suppose you evaluate a complex C expression to check the value of a certain variable.
Using SoftBench Debugger Examining and Changing Data in Your Program Calling Functions You can call a procedure by putting the procedure call expression in the "()" input box and selecting Print ( ). For example, printing: myproc(1, 2, "string") calls the function "myproc( )". Any side-effects of the function occur normally. Viewing the Call Stack When enabled, the "Stack View" window presents you with a listing of the current execution call stack. (See Figure 7-5.
Using SoftBench Debugger Examining and Changing Data in Your Program Figure 7-5 "Stack View" Window Viewing Thread Stacks In threaded programs, SoftBench Debugger can display multiple stacks at once. Choose "Execution: Threads…" and select Stack… for the desired thread. Each "Stack View" window indicates its thread identity. An additional "Stack View" window, labeled "Current Thread", displays the stack for the currently executing thread.
Using SoftBench Debugger Understanding the Operation of Your Program Understanding the Operation of Your Program SoftBench Debugger supports four different monitors to help you understand the operation of your program. Breakpoints Cause your program to stop executing at a specified location, and return control to SoftBench Debugger. Breakpoints can be used to examine the status of the program when a certain line executes one or more times. See “Setting and Using Breakpoints” on page 189.
Using SoftBench Debugger Setting and Using Breakpoints Setting and Using Breakpoints A breakpoint is a "hook" placed in your executable program by SoftBench Debugger to halt execution at a specific line. SoftBench Debugger indicates a breakpoint by a breakpoint annotation in the Annotation Margin, to the left of the Editable Source Area. The breakpoint annotation appears on the same line as the source statement. See Figure 7-6.
Using SoftBench Debugger Setting and Using Breakpoints when you are responsible for only a part of a large program, you need only debug your particular module. Set breakpoints at the entry points of your module, and run the program to execute the code down to your module. When you have reached your module, you can Step through it to see it in more detail. 1. Set a breakpoint where you want to pause the program. See “Setting a Breakpoint” on page 190. 2.
Using SoftBench Debugger Setting and Using Breakpoints • If another source file contains the statement , put the name of its file or procedure in the "()" input box and choose "Visit: Procedure ( )" or "Visit: File ( )". 2. Click in the Annotation Margin next to the line on which you want a breakpoint. A breakpoint annotation appears in the Annotation Margin, indicating the location of the new breakpoint.
Using SoftBench Debugger Setting and Using Breakpoints Using the Break Menu The "Break" menu contains several entries that allow you to set a breakpoint at the current PC location, or associated with an identifier entered in the "()" input box. For example, if you want to set a breakpoint on the entry of a procedure named compute, you could enter compute in the "()" input box and choose "Break: Set at Procedure Entry ( )". Refer to Figure 7-6 to see the available choices.
Using SoftBench Debugger Setting and Using Breakpoints Figure 7-7 "Breakpoint Set/Change" Dialog Box If the program is multi-threaded, the "Breakpoint Set/Change" dialog box also includes a scrolled list of thread ID's. You can specify that a breakpoint is to affect any specific thread or set of threads. Viewing and Modifying Breakpoints To see a list of breakpoints, from the SoftBench Debugger menu bar, choose "Break: Show…".
Using SoftBench Debugger Setting and Using Breakpoints specified breakpoint. Changing Active / Suspend Status By default, a new breakpoint is Active. If you want to deactivate a breakpoint without deleting it, you can Suspend the breakpoint. This may be useful if, for example, you want a breakpoint to occur only in certain circumstances. You could Suspend the breakpoint, proceed with debugging your program, and then re-Activate the breakpoint as desired.
Using SoftBench Debugger Setting and Using Breakpoints the Source File Area, you can simply click on the breakpoint symbol to clear it. If the breakpoint is not currently visible: 1. Choose "Break: Show…" to display all current breakpoints. 2. Click on the breakpoint you want to clear. You can double-click on a breakpoint to display its source in the Source File Area, so you can be sure you delete the correct breakpoint. 3. Select Delete to remove the breakpoint.
Using SoftBench Debugger Setting and Using Breakpoints breakpoint, but does not stop until x reaches the critical value. You may also want to make the breakpoint Silent so the breakpoint notification message does not print each time the breakpoint is encountered.
Using SoftBench Debugger Setting C++ Breakpoints Setting C++ Breakpoints When you debug a C++ program, SoftBench Debugger provides some additional breakpoint settings. • "Break: Set at Class ( )" SoftBench Debugger sets breakpoints on all member functions of all instances of the specified class. • "Break: Set at Overloaded ( )" SoftBench Debugger sets breakpoints on all functions with the specified name. Use this when your program defines multiple functions with the same name.
Using SoftBench Debugger Setting C++ Breakpoints suspended. You can change all breakpoints in the group at the same time by selecting the group title line. Double-click on a group to display all breakpoints in the group.
Using SoftBench Debugger Setting and Using Watchpoints Setting and Using Watchpoints Watchpoints allow you to monitor the value of an expression, or the contents of a range of memory, while your program executes. SoftBench Debugger checks the value (as often as specified in the watchpoint definition), notifies you when it changes, and pauses your program. This can be extremely useful when searching for "mystery" errors.
Using SoftBench Debugger Setting and Using Watchpoints For performance purposes, you should set the granularity as coarsely as possible. For example, if you only need to know the value of the monitored expression each time you enter a procedure, there is no sense in monitoring it after every assembly instruction. Typically you would locate a problem by using a granularity of "Proc Entry+Exit" to narrow the source of the problem down to one procedure.
Using SoftBench Debugger Setting and Using Watchpoints 2. Select the type of watchpoint you want: "❍ Expression" or "❍ Address". 3. The area under the "Select Watchpoint Type" radio buttons changes to reflect the information needed by that watchpoint type. Enter the expression or address range desired. You can Print ( ) the expression "&var" to find the address of the variable var. 4. Select the granularity (how often SoftBench Debugger checks the value). 5. Modify any other information as required.
Using SoftBench Debugger Setting and Using Watchpoints data being watched. Complete watchpoints can be hidden by selecting the ▼ button next to the watchpoint. Select the button again (which is now >) to redisplay the watchpoint. Individual elements in a watchpoint (such as some elements in an array) can be hidden by selecting them and selecting "Selected -> Hide". Select "Watchpoint -> Show All Hidden Values" to redisplay them.
Using SoftBench Debugger Setting and Using Watchpoints 2. Highlight the watchpoint(s) you want to delete in the "Watchpoint Listing" dialog box. 3. Select Delete. You can clear all watchpoints by choosing "Watch: Clear All". You can also "deactivate" (Suspend) watchpoints without permanently deleting them. See “Viewing and Modifying Watchpoints” on page 201.
Using SoftBench Debugger Tracing Program Flow Tracing Program Flow SoftBench Debugger's trace functions help you monitor the flow of your program. This can be useful in many situations: perhaps you want to see when your program calls a particular function, or executes certain statements, but you don't want the debugger to stop your program. Tracing simply displays the current location when a trace is hit, and keeps executing your program.
Using SoftBench Debugger Tracing Program Flow Using the Trace Set/Change Dialog Box Choosing "Trace: Set…" allows you to specify all aspects of a trace. The "Trace Set/Change" dialog box is nearly identical to the "Data Watchpoint Set/Change" dialog box. See Figure 7-9. Figure 7-9 "Trace Set/Change" Dialog Box 1. Choose "Trace: Set…". 2. Select the granularity (how often SoftBench Debugger triggers the trace). Specify any "block," if desired, in the "When In" input box. 3.
Using SoftBench Debugger Tracing Program Flow these operations. Clearing Traces Choose "Trace: Clear All" to remove all traces from DDE's memory.
Using SoftBench Debugger Correcting Errors in Your Program Correcting Errors in Your Program Developers frequently spend a lot of time in the debugger, finding and fixing defects. SoftBench Debugger provides several commands to help you when you find an error: • You can alter variable values (see “Specifying Variables” on page 178) • You can change the location of the PC within the current procedure (see SoftBench Online Help for details), skipping the problem code and continuing debugging.
Using SoftBench Debugger Correcting Errors in Your Program Alternatively, edit your source code in your configured editor by choosing "File: Edit…" to specify the file you want to edit. Make your changes, then start the build from the editor, main SoftBench window, or SoftBench Debugger, whichever is easiest for you. The editable source code area in SoftBench Debugger displays the "Out of Date" message to inform you that the source has been changed.
Using SoftBench Debugger Debugging Dynamic Libraries Debugging Dynamic Libraries Dynamically-loaded libraries present special challenges to a debugger, due to the way the operating system implements them. SoftBench Debugger handles most of these issues for you. You can specify which libraries you want to debug. Programs can contain several kinds of library images: • Static: the library code is physically linked in with your program.
Using SoftBench Debugger Debugging Dynamic Libraries Figure 7-10 "Dynamic Images/Libraries" Dialog Box 210 Chapter 7
Using SoftBench Debugger Viewing Assembly Language and CPU Registers Viewing Assembly Language and CPU Registers SoftBench Debugger is intended as a high-level (source language) debugging aid. However, sometimes it is useful to examine your program's behavior at the assembly language level. This can help you determine when you have misunderstood something about the way the compiler works.
Using SoftBench Debugger Viewing Assembly Language and CPU Registers Figure 7-11 "Assembly Instructions" Window Select the Step Instruction button to step through your program one assembly instruction at a time. Select the Step Over Instruction button to step over a procedure call instruction. The Assembly Tracing Active button enables updating of the Assembly Instructions window. Leaving assembly tracing disabled until you need it allows your program to run faster.
Using SoftBench Debugger Viewing Assembly Language and CPU Registers Choose the format used to display the register values with the "Display Format" button. The "( ) Single" and "( ) Double" buttons on the HP-PA Floating Point Registers display allow you to specify whether SoftBench Debugger displays the registers as two 4-byte values or one 8-byte value.
Using SoftBench Debugger Handling Signals and Events Handling Signals and Events The UNIX operating system notifies a program of asynchronous events via signals. HP-UX also supports other "events" such as exec (program load) and throw (used in C++ exception handling). SoftBench Debugger handles these events using intercepts. Intercepts are distinct from any signal handlers in your program.
Using SoftBench Debugger Handling Signals and Events Figure 7-13 "Intercepts" Dialog Box SoftBench Debugger automatically creates intercepts for all signals and events. Signal intercepts are all active, and other intercepts are suspended. Highlight an intercept and select "Activate" to use it. The buttons below the list allow you to modify the intercepts' attributes. You can control four attributes for each intercept: Status Controls whether the intercept is currently Active.
Using SoftBench Debugger Handling Signals and Events on the right side of the dialog box. SoftBench Debugger retains information (such as Count and Commands) for suspended intercepts. Selecting Activate reactivates the intercept with the same information it had before. Handling Signals When your program receives a signal, you have the option of ignoring it or accepting it. If you ignore the signal, you can continue debugging your program as if no signal was received.
Using SoftBench Debugger Debugging After a Program Fails (Core Dump) Debugging After a Program Fails (Core Dump) SoftBench Debugger can diagnose some run-time errors in a program after the program has failed. Some signals, if not caught by the program, cause programs to write a core file and to terminate.
Using SoftBench Debugger Debugging After a Program Fails (Core Dump) Debugger sets the PC to the line that caused the core dump. The stack and all variables appear as they were when the program was about to execute that line. Here are some useful SoftBench Debugger actions that help find problems: • Examine the line in the Source File Area that was responsible for the core dump to look for an obvious problem.
Using SoftBench Debugger Debugging Forked Processes Debugging Forked Processes Some applications use the fork(2) command to create a child process. When a program calls fork, a second process is created that is an exact "clone" of the first process. The only difference between the two processes is the return value of the fork call; this tells each process whether it is the "parent" or "child" process.
Using SoftBench Debugger Debugging Threaded Applications Debugging Threaded Applications Threads are "mini-processes"—multiple "threads" of execution within a single process. Each thread has its own execution stack, but shares global variables with other threads in the process. There may be an arbitrary number of threads in a process, numbered 1 through N. (DDE assigns this thread number arbitrarily.
Using SoftBench Debugger Debugging Threaded Applications box. You can also display a new "Stack View" window for a specific thread by selecting it in the "Threads" dialog box and selecting Stack…. Setting Breakpoints on Threads You can activate breakpoints on all threads, or on any selected set of threads. Choose "Break: Show…" to display the "Breakpoints Listing" dialog box. If your program has multiple threads, the dialog box contains a thread area.
Using SoftBench Debugger Attaching the Debugger to a Running Program Attaching the Debugger to a Running Program SoftBench Debugger allows you to debug a process that is already running. For example, suppose you have a program that runs continuously in the background. Occasionally it does something wrong. Stopping the process and re-starting it in SoftBench Debugger can lose valuable state information.
Using SoftBench Debugger Debugging C++ Programs Debugging C++ Programs If you have installed C++ SoftBench, the following features support debugging of C++ programs (see also “Setting C++ Breakpoints” on page 197): C++ name handling: SoftBench Debugger lets you debug using your actual C++ variable and function names, without worrying about the underlying naming system. This means that you can highlight C++ text in the source view window and act upon it using SoftBench Debugger commands.
Using SoftBench Debugger Debugging C++ Programs Member functions: Breakpoints can be set on specific member functions. You can also call a member function directly from the "()" input box. Object identification: SoftBench Debugger recognizes whether a specified object pointer is a pointer to a declared class or a specific derived class. Instance breakpoints: You can set a breakpoint at a member function for a particular instance of a class.
Using SoftBench Debugger Debugging C++ Programs Using Breakpoints for Exception Handling HP-UX provides support for debugging C++ exceptions. You can enable intercepts on the "throw" and "catch" events. "Throw" intercepts occur at the time a C++ exception is detected, and "catch" intercepts occur where the exception is handled. See “Handling Signals and Events” on page 214 for a description of intercepts.
Using SoftBench Debugger Debugging C++ Programs However, if your program contains static objects, the constructors for those objects must be invoked before main(). By the time the debugger pauses in main(), the constructors have already completed. If you need to debug these constructors, you must tell DDE to pause before calling them. This can be accomplished by executing the DDE command "property system -on". When you set prop sys, DDE pauses at the very first assembly instruction of the program.
Using SoftBench Debugger Debugging Optimized Code Debugging Optimized Code Source-level debugging of unoptimized code is relatively easy because you have a simple correspondence between source code statements and the assembly code instructions into which they are translated. Also, program variables are stored in memory and are therefore easy to access. Optimization performs a series of transformations on the object code in order to make the program run faster.
Using SoftBench Debugger Customizing SoftBench Debugger Customizing SoftBench Debugger SoftBench Debugger is very flexible, and you can customize it to meet your needs. You can make most user interface customizations in SoftBench Debugger by choosing the menu selections under "Options". Other, less common customizations can be made in the "$HOME/.softbench/softbenchrc" file. See the softdebug(1) reference page for a description of all SoftBench Debugger resources.
Using SoftBench Debugger Customizing SoftBench Debugger areas are: • The buttons displayed on the SoftBench Debugger front panel. • The popup menus displayed when you click the right mouse button on the Source File Area and the "Assembly Instructions" source area. To modify these buttons: 1. Choose "Options: User Configurable Buttons…". SoftBench Debugger displays the "User Configurable Buttons" dialog box, showing the buttons configured for one of the areas. 2.
Using SoftBench Debugger Customizing SoftBench Debugger 1. $HOME/.softbench/debugui.buttons 2. install_root/config/softdebug/$LANG/debugui.
Using SoftBench Debugger If Something Goes Wrong If Something Goes Wrong Table 7-2 Condition Explanation A request to the debugger failed. The request message was: DDE could not process a request from SoftBench Debugger. If the solution is not obvious, see "Help: DDE Reference" to determine what went wrong. The following operations were flushed: Operations that had been queued up needed to be flushed for some reason. The error message shows which operations were discarded.
Using SoftBench Debugger If Something Goes Wrong Table 7-2 Condition Explanation operation: invalid relative index: index. Must be a valid positive (or negative) integer. This operation requires a valid integer offset argument. The UserOpEnvGotoBosRelative and UserOpEnvGotoTosRelative operations only accept positive integers. Check the button definition. Unable to open the button save file. SoftBench Debugger cannot create the button definition file.
Using SoftBench Debugger If Something Goes Wrong Table 7-2 Condition Explanation A token must be provided in the `()' area for the type request. An operation from the "Static" menu was chosen without providing an argument in the "()" input box. .__vptr cannot be followed. The Follow and Follow Recursively operations in the Data Graph Window cannot follow the special variable .__vptr used by the C front CC compiler. This is an internal variable and cannot be examined. .__vfp cannot be followed.
Using SoftBench Debugger For More Information For More Information • On DDE commands, command syntax, and advanced DDE features, see HP/DDE Debugger Online User's Guide. (choose "Help: DDE Reference"). • On any button, screen area, or menu item, use SoftBench Online Help. Move the mouse pointer to any menu selection and press F1. • On starting SoftBench creating projects and compiling and building projects and targets, see Chapter 2, “Using SoftBench,” on page 41.
Using SoftBench Debugger Data Graph Window 8 Using SoftBench Debugger Data Graph Window SoftBench Debugger Data Graph Window helps you visually navigate your complicated data structures. For basic graph operations such as saving the graph or selecting and moving graph objects, see Appendix A, “Using SoftBench Graph Windows,” on page 323.
Using SoftBench Debugger Data Graph Window Starting and Stopping the Data Graph Window Starting and Stopping the Data Graph Window Beginning a Browsing Session You can begin a browsing session with the Data Graph Window from SoftBench Debugger as follows: 1. Enter a variable or an expression in the "( )" input box. 2. Choose "Show: Data Graph ( )" or "Show: Data Graph Indirect ( )". You can iconify SoftBench Debugger after the Data Graph Window appears.
Using SoftBench Debugger Data Graph Window Understanding Data Graph Window Areas Understanding Data Graph Window Areas The Data Graph Window is a top-level window that you can iconify when not in use.
Using SoftBench Debugger Data Graph Window Understanding Data Graph Window Areas Understanding the Display Control Area The Display Control Area includes toggle buttons and push buttons which control the display of information on the Graph Area. Button Displayed Information ■ Show Arc Labels When selected, the arc labels indicate the pointer names. ■ Show Non-Followed Arcs When selected, SoftBench Debugger displays all arcs.
Using SoftBench Debugger Data Graph Window Understanding Data Graph Window Areas display the popup menu. Select "Show Node Values". The Graph Area can be manipulated using operations in popup menus. Different popup menus appear depending on whether you have selected a node or not. Table 8-1 shows the popup menus used in the Data Graph Window.
Using SoftBench Debugger Data Graph Window Understanding Data Graph Window Areas Reading Arcs Arcs represent pointers from one structure to another. The arc label is the name of the pointer, if named. You can toggle "■ Show Arc Labels" to display or hide the arc labels. Using Dialog Boxes The popup menu selection "Show Node Values" enables the "Node Values" dialog box, which displays the data members (including arrays) within a particular structure and their values.
Using SoftBench Debugger Data Graph Window Using the Graph Area Using the Graph Area The Graph Area helps you understand your program by creating a visual image of the data structures in memory and controlling the information displayed. Displaying New Nodes You add new nodes in the Graph Area by either of the following methods: • Entering an expression or variable in the "()" input box and choosing "Show: Data Graph ( )" or "Show: Data Graph Indirect ( )".
Using SoftBench Debugger Data Graph Window Using the Graph Area Values". The "Node Values" dialog box displays a list of all data members and their values. (See Figure 8-2.) The list can be scrolled and the text selected and copied as with any other Edit Area list. Figure 8-2 "Node Values" Dialog Box This dialog box includes two toggle buttons and one push button: Button Action ■ Show Embedded Arrays When selected, displays all the array element values for embedded arrays.
Using SoftBench Debugger Data Graph Window Using the Graph Area Table on page 243 shows the popup menu available in this dialog box.
Using SoftBench Debugger Data Graph Window Using the Graph Area Suspending Graph Updates Selecting the "■ Suspend" toggle button suspends updating of the Graph Area as you step through your program, which can improve debugging performance. As soon as you select "■ Suspend", popup menu actions become limited to those which manipulate the existing graph, such as "Save Image…" and "Hide Selection". Deselecting "■ Suspend" brings the Graph Area and dialog boxes up-to-date, and activates all menu items.
Using SoftBench Debugger Data Graph Window Sample Use Models Sample Use Models This section introduces you to several Data Graph Window concepts useful in verifying the correct or expected operation of your program's data structures. By setting strategic breakpoints and selecting the pointer dereferencing commands, you can quickly visualize what happens to your data structures during program execution. Using the Data Graph Window increases your program understanding and decrease your defect isolation time.
Using SoftBench Debugger Data Graph Window Sample Use Models If you enabled "Show Arc Label", you could see the name of the data member pointer, root. Figure 8-3 shows what the graph would look like at this point in the execution of this program. Figure 8-3 Binary Tree Node Continuing Program Execution Now select the \\TreeNode node. Select the Selected -> menu button, or click the right mouse button, to display the "Node Actions" menu. Select "Follow All".
Using SoftBench Debugger Data Graph Window Sample Use Models Showing Nodes Assume that at this point in your program you expect yet another pointer to be added. But your next Continue does not add another node. The reason is because "Follow All" dereferences pointers only one level deep. To follow all pointers to the end of the list, you could select the previous tree node and select "Follow All Recursively" from the "Selected" menu. This displays all nodes from that node forward.
Using SoftBench Debugger Data Graph Window Sample Use Models Figure 8-6 Viewing Values from Multiple Nodes Viewing Embedded Arrays Selecting "■ Show Embedded Arrays" on the "Node Values" dialog box displays the values of elements of arrays embedded in class or struct types. If you are tracking down a problem which might relate to an embedded array, you must turn on "■ Show Embedded Arrays" to view the element values. Figure 8-7 shows two "Node Values" dialog boxes with "■ Show Embedded Arrays" selected.
Using SoftBench Debugger Data Graph Window Sample Use Models interest and select "Show On Graph" from the Selected-> menu button on the "Data Graph - Node Values" dialog box. This command labels each selected node with specific data member names and values. You could transform the prior graph by selecting data members left, right, and key, and selecting "Show On Graph". Any node with a data member matching one of these names adds the matching data member and value to the label, as shown in Figure 8-8.
Using SoftBench Debugger Data Graph Window For More Information For More Information • On any button, screen area, or menu item, use SoftBench Online Help. Move the mouse pointer to any menu selection and press F1. • On basic operations like clearing, saving, and viewing the Graph Area, see Appendix A, “Using SoftBench Graph Windows,” on page 323.
Using SoftBench Static Analyzer 9 Using SoftBench Static Analyzer SoftBench Static Analyzer aids in the understanding of moderate to large-sized programs during the implementation, test, and maintenance phases of the software lifecycle. New members of a software team can use SoftBench Static Analyzer to understand the code quickly. Programmers can become more confident about the impact of their software changes using the added information it provides.
Using SoftBench Static Analyzer Starting SoftBench Static Analyzer Starting SoftBench Static Analyzer You can start SoftBench Static Analyzer from the main SoftBench window, from your configured editor, or from SoftBench Debugger. In the main SoftBench window, select the "Static Analyzer" icon in the toolbar, or choose "File: Static Analysis…". SoftBench Static Analyzer starts, displaying all your project's functions. SoftBench Static Analyzer focuses its queries on the current project.
Using SoftBench Static Analyzer Starting SoftBench Static Analyzer are learning about relationships between elements in your code. See Chapter 10, “Using Static Graphs,” on page 283 for more information on the Static Graph. SoftBench Class Graph/Editor provides a graphical way to edit your C++ programs. You can create, delete, and modify C++ classes, inheritance relationships, member functions, and data members.
Using SoftBench Static Analyzer Preparing to Make Queries Preparing to Make Queries To use SoftBench Static Analyzer effectively you must first understand some simple preparation concepts: • Generating Static Data • Specifying What Data to Analyze Generating Static Data Before you can use SoftBench Static Analyzer for program understanding, you must first generate Static information about your application by parsing code and creating a Static database.
Using SoftBench Static Analyzer Preparing to Make Queries Updating Static Data without Building Once the Static database is created, SoftBench has the knowledge to update Static data, whether you build the project from SoftBench or analyze the files from SoftBench Static Analyzer. To successfully generate Static data without rebuilding the project, choose "File: Analyze File Set". Specifying Static Data to Analyze SoftBench Static Analyzer performs queries on source files in your program.
Using SoftBench Static Analyzer Preparing to Make Queries 1. Choose "File: Customize File Set…" to display the "Customize File Set" dialog box. 2. Set the appropriate toggle buttons to include the current project, its subprojects, and its parent projects in the analysis file set. When you set the toggle buttons, the associated projects are added to the "Projects in File Set" list. When you deselect toggle buttons, associated projects are removed from the "Projects in File Set" list.
Using SoftBench Static Analyzer Preparing to Make Queries Filtering Queries by File Set Your programs often include files, such as system header files, that you may not want to include in your queries. By default, SoftBench Static Analyzer includes these files in any queries. You can restrict your queries to check only those files in your analysis file set by setting the "■ Filter Results Using Fileset" toggle button, located on the dialog box posted by "Options: Behavior Settings…".
Using SoftBench Static Analyzer Using SoftBench Static Analyzer Window Areas Using SoftBench Static Analyzer Window Areas Figure 9-1 shows the SoftBench Static Analyzer window. The primary window areas include: Menu Bar Provides access to most SoftBench Static Analyzer functions. Refer to SoftBench Online Help for detailed descriptions of any menu command. File Set Information Area Displays the current file set and its status.
Using SoftBench Static Analyzer Using SoftBench Static Analyzer Window Areas For more information on scoping, see “Using Scoping” on page 268. Query Information Area Displays what query was run last (the "Query" field), how many results are currently displayed (the "Results" field), and what level of scoping was used (the "Scoping Used" field).
Using SoftBench Static Analyzer Making Textual Static Queries Making Textual Static Queries After you have generated Static information, you can make queries on your application. SoftBench Static Analyzer supports both textual and graphic queries on your application. You can execute Static queries in three ways: • Choose a command from the "Show" menu. • Enter a program identifier in the "Symbol ()" input box, then choose a related command from the "Symbol" menu.
Using SoftBench Static Analyzer Making Textual Static Queries symbol of interest in the source code, then choose a command from that tool's "Static" menu. Selecting Text Selecting text from the Query Results Area records not only the text, but the filename, line number, and column number that locates the text. SoftBench Static Analyzer uses this location information in queries when " Scoping" is selected. (See “Using Scoping” on page 268 later in this chapter.
Using SoftBench Static Analyzer Making Textual Static Queries Declarations Lists all occurrences of an identifier that announce properties about it. Definition Lists the single declaration of an identifier that causes storage to be allocated. Uses Lists occurrences where the program uses, modifies, initializes, or calls an identifier's value. Modifications Lists occurrences where the program modifies or initializes an identifier's value.
Using SoftBench Static Analyzer Making Textual Static Queries 2. Choose "Symbol: Classification ()". Troubleshooting Invalid Identifiers for Queries SoftBench Static Analyzer returns an "Identifier not found" error for queries on identifiers that are not present in its database. Possible causes for this error include: 1. A source file has been edited to add new identifiers and has not been re-analyzed. Save the changes and either rebuild the project or choose "File: Analyze File Set". 2.
Using SoftBench Static Analyzer Using Query Results Using Query Results SoftBench Static Analyzer query results are displayed in a textual list using the main Static window. There are many ways to use these query results. One common use scenario includes: 1. Browse the SoftBench Static Analyzer query results. 2. Edit the source file at the query result location. 3. Update the Static database by rebuilding your application. 4. Perform a SoftBench Static Analyzer query with new Static data.
Using SoftBench Static Analyzer Using Query Results After a successful build or analysis of the file set, the "File Set Status" changes to "Open". Performing a Query After rebuilding your application you are ready to analyze the changed program with SoftBench Static Analyzer. You can perform the same Static query or initiate new queries. From the main Static window use the "Show" and "Symbol" menus to execute queries.
Using SoftBench Static Analyzer Simplifying Query Results Simplifying Query Results SoftBench Static Analyzer provides filtering mechanisms that allow you to focus only on the query results in which you are interested. These filters reduce the chance of information overload. SoftBench Static Analyzer also provides specific filters for graphical queries, which are described in “Simplifying Graph Displays” on page 292.
Using SoftBench Static Analyzer Simplifying Query Results Figure 9-3 Unfiltered Source File List To limit queries to only the files in your analysis file set, choose "Options: Behavior Settings…". In the resulting dialog box, set the "■ Filter Results Using Fileset" toggle button. To display the filtered list of source files, choose "Show: Source Files" again. Figure 9-4 displays the result of this filter.
Using SoftBench Static Analyzer Simplifying Query Results Filtering C++ Query Results In many cases, the query results of interest are a subset of the default query results that SoftBench Static Analyzer provides. The "View: Filter Results…" command provides a way to generate this subset of query results. These filters are available in C++ SoftBench only. For example, if you are investigating the interface of a class, you are interested only in public member functions of that class.
Using SoftBench Static Analyzer Simplifying Query Results information is used for queries made on selected nodes or arcs. Queries resulting from the Display operation are not scoped. See Chapter 10, “Using Static Graphs,” on page 283 for information on Static Graphs. Scoping Prerequisites and Constraints In order to use scoping, you must select the entry in the "Symbol ()" input box from the Query Results Area, your configured SoftBench editor, or SoftBench Debugger.
Using SoftBench Static Analyzer Simplifying Query Results ()" input box) and execute a "Symbol: References ()" command with scoping, SoftBench Static Analyzer displays the following: file.c (7), main: char *theta file.c (9), main: theta = "Hello World%d\n"; file.c (10), main: printf(theta,2); The "Scoping Used" value is "File & Line". If you turn off scoping and perform the same query again, SoftBench Static Analyzer displays the following: file.c file.c file.c file.c file.c file.
Using SoftBench Static Analyzer Redisplaying Past Queries Redisplaying Past Queries Each time SoftBench Static Analyzer executes a successful "Show" or "Symbol" menu command, SoftBench Static Analyzer places the query name in the "History" menu. From the "History" menu, the query result can be reviewed later, printed, saved to disk, or deleted. Note that SoftBench Static Analyzer saves the query result, not the query itself.
Using SoftBench Static Analyzer Redisplaying Past Queries description of the query and the query result in a file, or print to a printer. If you print the results, SoftBench Static Analyzer prompts you for the print command. If you save the results to a file, SoftBench Static Analyzer prompts you for a file name. This action does not remove the command from the "History" menu.
Using SoftBench Static Analyzer Using SoftBench Static Analyzer in Standalone Mode Using SoftBench Static Analyzer in Standalone Mode This section describes using SoftBench Static Analyzer from the command line. When you start SoftBench Static Analyzer from the command line, it has no knowledge of your project data. To access project data, start SoftBench Static Analyzer from the main SoftBench window or from the editor or SoftBench Debugger when they are started from the main SoftBench window.
Using SoftBench Static Analyzer Using SoftBench Static Analyzer in Standalone Mode Using the Staticfileset File The Staticfileset file, if it exists in the current directory, specifies the initial file set when SoftBench Static Analyzer starts in standalone mode. All files in Staticfileset, and all source files in the directories listed in Staticfileset, are loaded as the analysis file set. A different Staticfileset file can be used if you choose "File: Restore File Set…".
Using SoftBench Static Analyzer Customizing SoftBench Static Analyzer Customizing SoftBench Static Analyzer SoftBench Static Analyzer has many options that allow you to configure the tool for your unique environment and working style: • Use the "View" menu to make changes to the display of data. • Use the "Options" menu to change the behavior of SoftBench Static Analyzer. • Choose "Project: Modify Properties…" in the main SoftBench window to change the location of the Static database.
Using SoftBench Static Analyzer If Something Goes Wrong If Something Goes Wrong Table 9-2 Condition or Message Explanation No static analysis information after compilation. You did not specify the "■ Static" compile mode during the build. See “Generating Static Data” on page 254 in this chapter. Alternatively, your PATH is incorrect. See “Prerequisites to Using SoftBench” on page 42. The currently defined file set is empty (contains no source files or database files)….
Using SoftBench Static Analyzer If Something Goes Wrong Table 9-2 Condition or Message Explanation You have more queries in the "History" menu than fit on your screen. • The "History" menu size is too large. Remove unneeded "History" entries by choosing "History: query name →: Delete" to reduce the size of the list. • Choose "Options: History Menu Size…" and specify a smaller size. Only the last n entries are kept (where n is the new "History Menu Size").
Using SoftBench Static Analyzer If Something Goes Wrong Table 9-2 Condition or Message Explanation source line xxx unavailable. The results of this command include source file text, but the specified line in the source file is not available, probably due to recent editing. From the SoftBench Static Analyzer window, choose "File: Analyze File Set" or rebuild the program from the Project Window to update the Static database. Then repeat the "Show" command.
Using SoftBench Static Analyzer If Something Goes Wrong Table 9-2 Condition or Message Explanation Source file filename not found. The source file you requested cannot be found. Choose "File: Customize File Set…" to add the project (Parent or Subproject) containing the source file which couldn't be found. Alternatively, add the file to the project by choosing "Project: Add File(s) to Project…" and rebuild the project. This may also be an NFS access problem.
Using SoftBench Static Analyzer If Something Goes Wrong Table 9-2 Condition or Message Explanation Duplicate instances of identifier appear in query results. Your Static database may contain data from source files that have been removed. Remove the database and rebuild the code and repeat the query. Alternatively, use staticrmfile to remove data on specific files. See staticrmfile(1). Symbols that you have removed from your code appear in query results.
Using SoftBench Static Analyzer For More Information For More Information • On Static Graphs, see Chapter 10, “Using Static Graphs,” on page 283. • On Graph Window features for Static Graph and all SoftBench tools, see Appendix A, “Using SoftBench Graph Windows,” on page 323. • On softstatic command line options and X resources such as autoload, see the softstatic(1) manual page, available by choosing "Help: Show Man Page".
Using SoftBench Static Analyzer For More Information 282 Chapter 9
Using Static Graphs 10 Using Static Graphs SoftBench Static Analyzer includes four Static graphs to help you visualize your program structure. Call Graph Displays call relationships between functions. SoftBench Class Graph/Editor Displays inheritance, friendship, containment, template instantiations, base class, and derived class relationships between classes. You can edit the C++ classes in your program using the SoftBench Class Graph/Editor. This graph is part of C++ SoftBench only.
Using Static Graphs Static Graph Tasks Description Analyzing Impact of Change Determining how classes, functions, or files are impacted by a specific change. For example, "What code is affected if I change this parameter list?" Understanding Legacy Code Quickly understanding code you did not develop. The graphs provide different perspectives that can accelerate this learning process.
Using Static Graphs Starting SoftBench Static Analyzer Graphs Starting SoftBench Static Analyzer Graphs The Static Graphs are invoked from the "Graph" menu of SoftBench Static Analyzer: Function Description "Start" Invokes the graph without displaying any nodes. If the graph is already running it moves to the foreground. "Display Symbol()" Displays the identifier provided in the "Symbol ()" input box on the graph. "All Items" Displays all items of a specific symbol type on the graph.
Using Static Graphs Making Graphical Static Queries Making Graphical Static Queries This section covers the common features of these graphs. For more information on using generic SoftBench Graph Window features, see Appendix A, “Using SoftBench Graph Windows,” on page 323. General Static Graph Features The Static Graphs have a consistent user interface, with several common features: Feature Description Displaying Nodes Display nodes (files, functions, variables, classes) on each of the graphs.
Using Static Graphs Making Graphical Static Queries button, then activate the popup menu with the right mouse button. If no node or arc is selected, a menu of general graph operations appears. The "Selected" menu contains the same commands as the context-sensitive popup menu. Switching between Graphs Use "Graph: Switch To name Graph" to move between the Static Graphs. Display Legend All graphs use a combination of shapes and colors to distinguish different types of nodes.
Using Static Graphs Making Graphical Static Queries Operation Description Describe This choice brings up a dialog box that provides auxiliary information on the node. For example, a function node's "Describe" dialog box provides a list of function parameters, local variables, the location of the definition, and a list of attributes of the function. Node Queries By selecting the node you can perform queries that are specific to that node type and that graph.
Using Static Graphs Making Graphical Static Queries accessed by the function. Using Description Boxes The Static Graphs provide the ability to display additional detail about identifiers and relationships through description dialog boxes for both nodes and arcs.
Using Static Graphs Making Graphical Static Queries 2. Choose "Describe" from the popup menu. The "Describe" dialog box shows all functions and any global variables defined in that source file. Arc description boxes show additional detail on the relationships between nodes. For example, you might be interested in determining all places where a particular function calls another function. Select the arc and choose "Describe" from the popup menu to see occurrences of calls.
Using Static Graphs Making Graphical Static Queries However, you can print a saved image or incorporate it into other documentation. For complete descriptions of the options, see Appendix A, “Using SoftBench Graph Windows,” on page 323.
Using Static Graphs Simplifying Graph Displays Simplifying Graph Displays The Static Graphs can display many relationships between items in your program simultaneously. To use the graphs effectively, you may want to display only a subset of these relationships. You can filter nodes out based on topics such as inheritance, containment, type of function call, declarations, and many others, depending on the graph. To apply filters to new nodes and arcs that are added to the graph, choose "View: Filters…".
Using Static Graphs Simplifying Graph Displays You can further reduce complexity by displaying fewer relationships initially. For example, you can turn off all initial queries and subsequently display only the relationships of interest to you: 1. From the Call Graph, choose "Options: Queries On New Nodes…" and disable all queries. The default queries are "■ Calls" and " ■Calls Within". Without any default queries, no arcs are drawn. 2. Save these changes by selecting OK. 3. Choose "Graph: All Functions". 4.
Using Static Graphs Customizing Static Graphs Customizing Static Graphs The Static Graphs have many options that you can configure. Each graph has an "Options" and a "View" menu that help you customize the graph for your needs. For example, you can turn off the graph legend, or specify default queries to be applied to any new node that is added to the graph. Filters and other customizations are also available. See SoftBench Online Help for full descriptions.
Using SoftBench File Compare 11 Using SoftBench File Compare With SoftBench File Compare you can compare two text files by putting them next to each other in text windows and scrolling through them in a matching manner. You can then merge selected contents into a single new file. If you wish to change a file, you must modify the file using your pre-configured editor.
Using SoftBench File Compare Understanding the SoftBench File Compare Window Understanding the SoftBench File Compare Window You can access the SoftBench File Compare window from the SoftBench main window using: "File: Compare…", or by selecting the file Compare icon from the tool bar. If files are selected, they are provided as arguments to File Compare, allowing you to specify files to compare before the tool starts. Otherwise you may enter the file names directly into the tool.
Using SoftBench File Compare Understanding the SoftBench File Compare Window Using the "Left File" and "Right File" Input Boxes These two input boxes are for the names of the files to be compared. As with other SoftBench tools, you can use … to help you find the files you want. Compare starts a comparison between the two files. The comparison may take a few seconds or more, depending on the size of the files being compared.
Using SoftBench File Compare Understanding the SoftBench File Compare Window included in the new file: Table 11-1 SoftBench Static Analyzer Display Options Left Column Right Column Selection Blank Blank No Decision + − Left File − + Right File + + Both Files − − Neither File SoftBench File Compare initially leaves the left and right columns blank, indicating that you have not made a decision as to which side to save.
Using SoftBench File Compare Understanding the SoftBench File Compare Window SoftBench File Compare automatically copies contents that are identical in both files into the new file. Highlighting Differences These buttons enable you to change which difference between the left and right files SoftBench File Compare displays and highlights. First Moves the current selection to the first difference between the two files and highlights it.
Using SoftBench File Compare Comparing Two Files Comparing Two Files To compare two files: 1. Enter the name of the first file for comparison into the "Left File" box, and the name of the second file into the "Right File" box. You can begin the file name with "/" to override the current working directory, or enter just the name of the directory path and file relative to the current working directory. You can also use the … buttons to open a navigation dialog box to find the files you wish to compare.
Using SoftBench File Compare Merging Compared Files Merging Compared Files Merging files is similar to comparing files except that you decide what to put in a new file, what to name the new file, then you write your selections to the new file. Follow these steps to create a merged file: 1. Enter the names of the files you wish to merge in the "Left File" and "Right File" input boxes, or use the … buttons to open a navigation dialog to find the files you wish to compare. 2.
Using SoftBench File Compare If Something Goes Wrong If Something Goes Wrong Table 11-2 Condition Explanation No file specified message appears when you select Compare. You must enter a file name in the "Left File" or "Right File" input box. Could not open file: (filename) message appears when you select Compare. The file name in the "Left File" or "Right File" input box does not exist or is not readable. sdiff command failed to execute message appears when you select Compare.
Using SoftBench File Compare For More Information For More Information • On editing files, refer to Chapter 4, “Using SoftBench Editors,” on page 117. • On SoftBench File Compare, see the softcom(1) reference page, available by selecting "Help: Show Man Page".
Using SoftBench File Compare For More Information 304 Chapter 11
Using SoftBench Message Monitor 12 Using SoftBench Message Monitor SoftBench Message Monitor provides a window to SoftBench tool communication. It displays all messages sent through a particular Broadcast Message Server. It can also create and send messages to other tools. SoftBench Message Monitor is the companion tool to SoftBench Encapsulator, which provides the SoftBench integration library (libsoftbench). Use SoftBench Message Monitor to help debug of the message interface provided by this library.
Using SoftBench Message Monitor Starting SoftBench Message Monitor Starting SoftBench Message Monitor You can start SoftBench Message Monitor from the main SoftBench window. First you need to add the tool to the toolbar, then start the tool: 1. In the main SoftBench window, choose "Options: Toolbar Setup…". 2. From the "Available Tools" list in the "Toolbar Setup" dialog box, select MessageMonitor. Notice the "Message Monitor" icon in the middle of the dialog box. 3. Select Add to Toolbar.
Using SoftBench Message Monitor Understanding the SoftBench Message Monitor Window Area Understanding the SoftBench Message Monitor Window Area SoftBench Message Monitor has a menu bar and a message display. Figure 12-1 SoftBench Message Monitor Understanding the Menu Bar The menu bar at the top of the application window contains pulldown menus to initiate commands. SoftBench Message Monitor contains four menus: "File", "Messages", "Custom", and "Help" menus.
Using SoftBench Message Monitor Understanding the SoftBench Message Monitor Window Area Message-id A unique string identifying a particular message and any responses from the tool handling the request. Message-type Indicates whether this particular message is a "Request" (R), or a "Notify" (P for pass and F for fail). Tool_class Identifies the class of tool that sent, or is to handle, the message. Two examples are EDIT and DEBUG. Command Identifies the actual task requested or performed.
Using SoftBench Message Monitor Composing and Sending a Message Composing and Sending a Message You can compose and send messages from SoftBench Message Monitor using "Messages: Send Message…". Here is a sample session:…… 1. Choose "Messages: Send Message…". 2. Select "■ Tool Request". 3. Enter EDIT in the "Tool Class" input box to request an edit. 4. Enter WINDOW in the "Command" input box to bring up the file in an edit window. 5. "Host" and "Dir" identify the group of tools that communicate.
Using SoftBench Message Monitor Composing and Sending a Message A message resembling the following appears in the SoftBench Message Monitor Broadcast Messages area: Softmsg.nn 29-25966-tycho R EDIT WINDOW Assuming the appropriate editor successfully edits the file, it sends the following message in response to the request: For SoftBench vi Editor: softvi.2 29-25966-tycho P EDIT WINDOW For SoftBench XEmacs: softemacs.
Using SoftBench Message Monitor Logging Messages Logging Messages If you are integrating with SoftBench and want to see actual message formats, you can exercise SoftBench tools with SoftBench Message Monitor running. Tools may send several messages for a single action, filling the "Broadcast Message" area quickly. These messages can be saved by logging them to a file.
Using SoftBench Message Monitor Logging Messages 312 Chapter 12
Using SoftBench with SQL 13 Using SoftBench with SQL Relational Database Management System (RDBMS) products support embedded SQL statements in source code by using a preprocessor to translate the SQL into the source language. SoftBench assists developers using relational database embedded SQL in their software applications.
Using SoftBench with SQL Determining Supported Environments Determining Supported Environments SoftBench SQL Supports the system platforms, RDBMS products, and language environments found in the list below.
Using SoftBench with SQL Configuring SoftBench with SQL Configuring SoftBench with SQL SoftBench fully supports embedded SQL source files in both project and external build models. For project build, SoftBench provides packages to include in your build configuration instructions. Using Default SQL File Types SoftBench recognizes an embedded SQL source file type by the file extension. Each file extension results in unique language-specific operations.
Using SoftBench with SQL Configuring SoftBench with SQL b. Select the build configuration that most closely describes the type of target that you need to create. For example, to create a C executable that uses the Oracle database, select the "OracleCExecutable" build configuration. c. Expand each section of the dialog box to check the appropriateness of the build instructions. Add libraries, include files, compiler flags, etc. as needed for your application. d.
Using SoftBench with SQL Configuring SoftBench with SQL Using SQL with External Build If your Makefile was created with SoftBench version C.05.xx or earlier, you need to migrate your application to project build or use external build to build your application. With external build, you must maintain your Makefile manually. To use your Makefile or build script, choose "Builder: Use External Build Command…". Complete the dialog box and select Build.
Using SoftBench with SQL Configuring SoftBench with SQL update process varies based on how you build your project. For project build: 1. If preprocessor flags change, you need to manually edit the transform file for the preprocessor. See SoftBench Online Help for details. 2. Start SoftBench. 3. From the menu bar, choose "Builder: Manage Packages…". 4. From the drop-down list, select the desired SQL package. 5. Expand the sections of the dialog box to check the current package definition.
Using SoftBench with SQL Using SQL with SoftBench Tools Using SQL with SoftBench Tools You can use embedded SQL source files with Builder, the SoftBench editors, SoftBench Debugger, SoftBench Static Analyzer and SoftBench CodeAdvisor. Using SQL Preprocessor Wrappers Working with your original SQL source code is often simpler than working with the expanded SQL statements that the RDBMS sends to the compiler.
Using SoftBench with SQL Using SQL with SoftBench Tools Debugging Expanded SQL Statements With SoftBench Debugger you typically debug your program using the original source code with the SQL statements. However, you may want to debug your source code after the SQL statements have been expanded by the SQL preprocessor. To debug the generated source file instead of the embedded SQL file: Project build 1. Select the target and choose "Target: Display on Graph". 2.
Using SoftBench with SQL Using SQL with SoftBench Tools Editing and Rebuilding with SQL for SoftBench Debugger The make program does not follow dependencies beyond the source code (that is, the .c) level. So when using external build, you may need to remove the generated source code file after an edit to correctly rebuild. Project build 1. Select Edit in the SoftBench Debugger Edit Area or choose "File: Edit" to start your configured editor. 2. Make the source code change in the embedded SQL file. 3.
Using SoftBench with SQL For More Information For More Information • On packages, build configurations, project build, and external build, see the SoftBench Online Help.
Using SoftBench Graph Windows A Using SoftBench Graph Windows The various SoftBench graph tools visually help you with programming tasks. This appendix describes basic graph operations in the Graph Windows.
Using SoftBench Graph Windows Accessing SoftBench Graph Windows Accessing SoftBench Graph Windows SoftBench Graph Windows offer graphical views useful with several of the SoftBench tools. A Graph Window may be opened from: • the main SoftBench window, Builder page • SoftBench Static Analyzer • SoftBench Debugger Table A-1 shows how to access the various SoftBench graphs. Table A-1 Accessing SoftBench Graphs Starting From Procedure Main SoftBench window 1.
Using SoftBench Graph Windows Accessing SoftBench Graph Windows Table A-1 Accessing SoftBench Graphs Starting From Procedure SoftBench Debugger 1. Enter an expression or a variable in the "()" input box. 2. Choose "Show: Data Graph()" or "Show: Data Graph Indirect()". To end the browsing session for SoftBench Debugger Data Graph Window, select the Close button. To end a browsing session for the Static Graphs, select "Graph: Exit" from any Static Graph window.
Using SoftBench Graph Windows Using Graph Window Areas Using Graph Window Areas You use the Graph Area to create a visual image. From most tool graph windows you can: • Use popup action menus. • Control the arrangement of nodes (not available on the target graph). • Save an image to a file for printing. • Scroll and zoom the graph area to manipulate your view. • Clear the Graph Area and hide selected or unselected nodes.
Using SoftBench Graph Windows Using Graph Window Areas Table A-2 describes the formats in which you can save a graph image. Table A-2 Graph Image File Formats Option Used for xwd Importing graph images into a word processing or graphics application for further editing and reporting. This file format cannot be sent to a printer or plotter directly. HP-GL Sending graph images to a plotter or printer that handles HP-GL emulation.
Using SoftBench Graph Windows Using Graph Window Areas Using Graph File Image Save Options The tools provide the following options in the "Save Image" dialog box (see Figure A-1): • Save a graph image in "xwd", "HP-GL", or "PostScript" format. • Save an image of the entire graph area or just the visible portion of the graph. • Scale the graph image to fit on a single page or allow it to be printed actual size on multiple pages. The multiple page option prints the graph from left to right then top to bottom.
Using SoftBench Graph Windows Using Graph Window Areas 7. If you selected HP-GL, make sure the "HP-GL Device Type" option menu reflects the hardware on which you intend to print the image. 8. Enter your filename, which can also include the path name. For example, use savegraph.hpgl or savegraph.ps. Optionally, select the … button to access a file selection dialog box for specifying the file name. 9. Save the image. Selecting Apply saves the file and leaves the dialog box up for further actions.
Using SoftBench Graph Windows Using Graph Window Areas until changed during the same session. Settings in this dialog are not saved between sessions. You can use the xpr utility to convert an xwd file to a printable format. Using Vertical and Horizontal Scrolling If the scroll bar fills the entire scroll area, there is no more graph to be displayed. If the scroll bar appears smaller than the scroll bar area, it means the tool has more graph than could fit in the area.
Using SoftBench Graph Windows Using Graph Window Areas Zooming In or Zooming Out Graph Windows provide several zoom settings. You might zoom out for a high level view of the general structure of your graph. Zooming out decreases the size of the objects so you can see more of the graph. When zooming out, the labels become illegible. You can zoom in to look at the details in the nodes. Zooming in increases the size of the objects and allows you to read a smaller section of the graph.
Using SoftBench Graph Windows Understanding Nodes and Arcs Understanding Nodes and Arcs All graphs display nodes and arcs within the Graph Area. Nodes represent entities within your code, and arcs represent the relationships between the entities. The following pages describe how you can select, move, or hide nodes and arcs. Reading Graph Area Nodes The Graph Area includes nodes corresponding to entities, and arcs corresponding to the relationship between two entities.
Using SoftBench Graph Windows Understanding Nodes and Arcs When you select multiple objects, the tool applies the chosen popup menu action to all of them. The tools provide several ways to select more than one object. The reasons for selection determine the method you choose to use. For example, you may want to remove all nodes in a certain area of the graph. Figure A-3 shows the selection of two nodes within a Static Graph.
Using SoftBench Graph Windows Understanding Nodes and Arcs Table A-4 Methods for Selecting Multiple Objects Objects Procedure Regions 1. Depress the left mouse button in a background area of the graph. 2. Drag the pointer while pressing the left mouse button. A dashed rectangle appears with the point where the left mouse button was pressed as one corner, and the current pointer position as the diagonal corner. 3. Release the mouse button.
Using SoftBench Graph Windows Understanding Nodes and Arcs graph. Copies of the selected nodes and attached arcs indicate the new locations prior to releasing the mouse button. Upon release, these copies disappear and the tool moves the actual node and arcs to the new location. The auto-scroll feature of the graphs allow you to select and move regions of nodes and arcs which may not be completely visible in the current graph window.
Using SoftBench Graph Windows Customizing SoftBench Graphs Customizing SoftBench Graphs The Graph Windows layout and display can be controlled so you can easily reposition nodes and arcs. Controlling Graph Layout You can control the layout of the Data Graph Window from SoftBench Debugger by using the radio buttons at the top of the graph window. You control the layout of the SoftBench Static Analyzer Graphs by setting the "Options: ■ Full Relayout" toggle button.
Using SoftBench Graph Windows Customizing SoftBench Graphs Table A-5 Controlling the Graph Display Target Graph Area Static Graph Data Graph Window • Target Only (default) • all "View" menu commands in a Static Graph window • ■ Show Arc Labels • Intermediate File Dependencies • Source File Dependencies • Include File Dependencies • all "Options" menu commands in a Static Graph window • ■ Show Non-Followed Arcs • ■ Suspend • "Options: Behavior Settings…" in the main SoftBench Static Analyzer window
Using SoftBench Graph Windows For More Information For More Information • About a menu item or window area, use SoftBench Online Help. Move the mouse pointer over the item and press F1. • About the Target Graph, see “Using the Target Graph” on page 66. • About the Static Graphs, see “Making Graphical Static Queries” on page 286. • About using the SoftBench Debugger Data Graph Window, see Chapter 8, “Using SoftBench Debugger Data Graph Window,” on page 235.
Customizing SoftBench CM Configuration B Customizing SoftBench CM Configuration SoftBench CM lets you customize your configuration management environment at the user, system, or global level.
Customizing SoftBench CM Configuration Modifying the Configuration Files Modifying the Configuration Files The following configuration files come with SoftBench CM and are usually maintained by the SoftBench CM administrator. However, each SoftBench CM user can configure the default .fmrc file. The server reads and acknowledges modifications to these files every 30 seconds. The system writes a record to the /var/opt/softbench/cm/msglog file every time it reads a configuration file.
Customizing SoftBench CM Configuration Modifying the Configuration Files /etc/opt/softbench/config directory override the contents of the files found in /opt/softbench/config directory. Comment lines in these files begin with a "#" character. Configuring Where Archive Files are Stored The cm.mapping file determines where archive files are physically stored on the server. This file is created during installation and contains default entries that MUST be modified to map to your archive file structure.
Customizing SoftBench CM Configuration Modifying the Configuration Files The cm.mapping file initially contains the following entry for the /TestArchive directory: # TestArchive entry /TestArchive /var/tmp In this entry, /TestArchive is the logical archive path by which the SoftBench CM client and server communicate, and /var/tmp is the physical path where the example files are stored on the SoftBench CM server. Every file managed by SoftBench CM should have exactly one logical path name.
Customizing SoftBench CM Configuration Modifying the Configuration Files where f1, f2 and f3 are three distinct types. • User@System — User is either * (indicating any user) or a user name. — System is a sh(1) wild card pattern for a [full domain] machine name, or a machine address or address range in dot notation (see inetd.sec(4)). • Permission symbols (see Table B-2). Each option is specified by a lower case letter and each grouping by an upper case letter. • /path. Table B-2 Options Used in the cm.
Customizing SoftBench CM Configuration Modifying the Configuration Files Table B-2 Options Used in the cm.permission and cm.option Files Option Description u Delete a lock on a revision. v Rename a file. w Break a lock which is owned by another. x Delete a directory. y Move a symbolic revision name. z Delete a symbolic revision name. S Superaccess: allows all access rights. R Read access to archive files Equivalent to "abf". M Modify archive files Equivalent to "cdilmnptuwx".
Customizing SoftBench CM Configuration Modifying the Configuration Files prefix match, then most specific user/host match) to determine access rights. However, by specifying priorities, you can use a shorter path for a specific user. For example, in the following entries: *@host R /earth ; john@host S / ; jane@host 2S / ; the user "john" has "R" access to /earth because /earth is more specific than "/" and "S" access to the rest of the archive.
Customizing SoftBench CM Configuration Modifying the Configuration Files If the cm.permission file is missing, or no match is found, no access is allowed. You should specify a default entry such as: *@15.* -abf-cdilmnptuwx-oqz-esvy / ; Setting Logging and Debug Options The cm.option file specifies two archive options: LogOptions LogOptions: LogOptions: The recommended (default) setting for logging is to log every modification operation into the /var/opt/softbench/cm/activityLog file.
Customizing SoftBench CM Configuration Modifying the Configuration Files You can edit the inetd.sec file while running the archive server. The server notices the change and updates its internal data structures immediately.
Customizing SoftBench CM Configuration Performing SoftBench CM Administrator Tasks Performing SoftBench CM Administrator Tasks SoftBench CM requires a few maintenance tasks to ensure a smooth-running configuration management environment. Migrating Archive Files From RCS You can import individual RCS files into SoftBench CM using the -ARCS option of fci. SoftBench CM can also assume management of an existing hierarchy of RCS files. To migrate archive files from RCS: 1. Edit the /opt/softbench/config/cm.
Customizing SoftBench CM Configuration Performing SoftBench CM Administrator Tasks 5. Run "fci -ARCS file,v" to create the initial SoftBench CM archive files. 6. Begin using SoftBench CM for file versioning. This conversion process preserves the history and contents from the SCCS files. Modifying the Lockinfo File The file /var/opt/softbench/cm/lockinfo holds all archive file lock information and is created and maintained automatically.
Customizing SoftBench CM Configuration Performing SoftBench CM Administrator Tasks exceed the size of the disk. Several options exist for moving archive locations: To move an entire archive hierarchy to another disk: 1. Stop the cmserver process. 2. Copy or move the hierarchy. 3. Modify the cm.mapping file to reflect the new physical location. To move a portion of an archive hierarchy (subhierarchy) to another disk: 1. Stop the cmserver process. 2. Copy or move the hierarchy. 3. Modify the cm.
Customizing SoftBench CM Configuration Performing SoftBench CM Administrator Tasks Troubleshooting SoftBench CM uses archive log files for quick resolution of problems you may encounter. Using the Archive Status and Error Log The SoftBench CM server daemon keeps the file /var/opt/softbench/cm/msglog open in append mode for writing various status and error messages. Look at this file when unexpected events occur. Log files can grow without bounds if left unchecked.
Customizing SoftBench CM Configuration Performing SoftBench CM Administrator Tasks 352 Appendix B
Using Regular Expressions C Using Regular Expressions This appendix describes some of the more common types of pattern matching you can perform using Basic Regular Expressions in SoftBench. For the complete list and description of all of the basic regular expressions available, see regexp(5). Unless you specify otherwise, SoftBench searches for matches anywhere within a line.
Using Regular Expressions Pattern Matching Pattern Matching Table C-1 describes the following types of pattern matching: • Match any character. • Treat a special character as a literal. • Specify a list of matching values. • Match the beginning of a line. • Match the end of a line. • Match entire lines. • Exclude specified values. • Match a range of values. • Repeat a single character any number of times. • Repeat an expression any number of times.
Using Regular Expressions Pattern Matching Table C-1 Description of Special Characters in Regular Expressions To… Use… Example Match any character . To match a string beginning with the characters st, followed by any character, followed by ck, enter: st.ck In response, SoftBench matches such strings as stack or stocks. To match a string that includes a period, refer to the description of the backslash character (\). Treat a special character as a literal.
Using Regular Expressions Pattern Matching Table C-1 Description of Special Characters in Regular Expressions To… Use… Example Specify a list of valid matching values. [valid_values] To match either stack or stock, enter: st[ao]ck To specify the string ab, followed by any digit except 5, enter: ab[012346789] Note that to treat an opening or closing bracket as a literal string, it must be the first character after the opening bracket.
Using Regular Expressions Pattern Matching Table C-1 Description of Special Characters in Regular Expressions To… Use… Example Exclude specified values. [^] When the caret (^) appears first within the list of bracketed valid values, it is used to exclude all of the characters that follow it. For example, to match ab or any character other than 5, enter: ab[^5] Otherwise, ^ represents a literal character.
Using Regular Expressions Pattern Matching Table C-1 Description of Special Characters in Regular Expressions To… Use… Example Match a range of values [-] To match ab followed by any digit, enter: ab[0-9] To match any digit except 5, enter: [1-46-9] Note that if you need to match the dash (-), do not place it between any two characters that could be interpreted as a range of values. For example, a-z could be interpreted as a range of values, while z-a would not.
Using Regular Expressions Pattern Matching Table C-1 Description of Special Characters in Regular Expressions To… Use… Example Match the end of a line match_expression$ To match all occurrences of stack that occur at the end of a line, enter: stack$ Match entire lines ^match_expression $ The following regular expression would match all occurrences of stack_push as long as it appeared on a line by itself: ^stack_push$ Repeat a single character single_character* To match ab, followed by any number
Using Regular Expressions Pattern Matching Table C-1 Description of Special Characters in Regular Expressions To… Use… Example Treat a composite expression within parenthesis as a single expression to be repeated (composite_expres sion)* To match ab followed by a string repeated any number of times (for example, ab1, ab2ab3, ab2ab3,ab4), enter: (ab[0-9])* 360 Appendix C
Customizing SoftBench for Native Language Support (NLS) D Customizing SoftBench for Native Language Support (NLS) This appendix describes how to configure your system so that SoftBench correctly handles non-USASCII data. It also tells you how to access human interface localizations if you have purchased a localized version of SoftBench. If you use USASCII data exclusively, you can skip this appendix.
Customizing SoftBench for Native Language Support (NLS) Preparing to Use NLS in SoftBench Preparing to Use NLS in SoftBench SoftBench was developed to take full advantage of the flexibility of the X11 Window System in supporting non-USASCII text handling and localized human interface preferences. Strings for menu alternatives, button labels, and user messages have been placed in resource (app-defaults) files and message catalogs to provide dynamic access and localizability.
Customizing SoftBench for Native Language Support (NLS) Preparing to Use NLS in SoftBench path. Be sure that your value of LANG and your X server font search path are consistent. See “Setting the LANG Environment Variable” on page 364 for more information on LANG and character-set representation. 5. Set the *Scheme resource using xrdb or specify it in your $HOME/.Xresources file to indicate the color and font scheme file you wish to use.
Customizing SoftBench for Native Language Support (NLS) Setting the LANG Environment Variable Setting the LANG Environment Variable You must set the LANG environment variable to make use of native language support. Setting the LANG environment variable directs SoftBench to use the language-sensitive routines for character handling, and will control where X11 applications look for resource (app-defaults) files. You can set LANG to most of the values supported by HP-UX.
Customizing SoftBench for Native Language Support (NLS) Setting the LANG Environment Variable Table D-1 To have LANG apply to: Set LANG in: Only the X11 applications that you run $HOME/.x11start Only the current SoftBench session The command line from which you start SoftBench. Converting from One Encoding Method to Another Files saved using one encoding method will not be interpreted properly if LANG specifies another encoding when reading the files.
Customizing SoftBench for Native Language Support (NLS) Rebinding Alt Rebinding Alt To replace the Alt keybindings used by the editor with alternate bindings using ESC, include the following lines in your $HOME/.Xresources file or use xrdb to set them: *CodeEdit*extendKey: *Edit*extendKey: *ListMgr*extendKey: esckey esckey esckey Note that ESC works differently from Extend char: To enter Alt-A using Extend char: Press Extend char and hold it down while pressing A.
Customizing SoftBench for Native Language Support (NLS) SoftBench Mnemonics and Non-USASCII Character Inputs SoftBench Mnemonics and Non-USASCII Character Inputs All SoftBench tools' menus have mnemonics. A mnemonic is a single character used to identify each menu name (the menus are displayed at the top of the tool's main window). The mnemonic is indicated visually by the underlined letter in the menu button. For example, F in the "File" menu is the mnemonic.
Customizing SoftBench for Native Language Support (NLS) SoftBench Mnemonics and Non-USASCII Character Inputs 3. To change the value of the mnemonic, pick a letter in the menu label that is neither a mnemonic for another top-level menu in the same tool nor used with Alt to input a non-USASCII character. To remove the mnemonic, pick a letter that does not occur in the menu label. Use the letter you have selected as the new value of the menu mnemonic resource. 4.
Customizing SoftBench for Native Language Support (NLS) SoftBench Keyboard Accelerators and Non-USASCII Character Inputs SoftBench Keyboard Accelerators and Non-USASCII Character Inputs Some of the SoftBench tools' menu commands have keyboard accelerators. Accelerators are keystrokes (such as Alt-Shift-E for "File: Edit…") that can be used to invoke the menu command without having to pull down the menu itself.
Customizing SoftBench for Native Language Support (NLS) SoftBench Keyboard Accelerators and Non-USASCII Character Inputs Choose your accelerator resource values carefully. Be careful not to select a value for an accelerator resource that conflicts with edit keybindings. For information on SoftBench edit area keybindings, see "Edit Area Keybindings" in SoftBench Online Help.
Customizing SoftBench for Native Language Support (NLS) Starting Your Localized SoftBench Starting Your Localized SoftBench Once all of the customizations explained above have been performed, you are ready to run your localized SoftBench system. You can start SoftBench by typing "softbench" in a shell window. If your SoftBench system does not operate as you expect, try logging out and logging back in. If SoftBench still fails, check for and correct any configuration errors.
Customizing SoftBench for Native Language Support (NLS) Remote Execution Hosts and NLS Remote Execution Hosts and NLS You can invoke localized SoftBench applications on any remote execution host that has a similarly configured localized SoftBench installation. The value of LANG on the invocation host is passed to the remote host when the application is started. The environment variables do not contain any host information, however. Thus, the message catalogs, application resource files, etc.
Customizing SoftBench for Native Language Support (NLS) Editing in SoftBench Editing in SoftBench All characters that can normally be entered from an HP keyboard into an HPterm window can also be entered into SoftBench Edit Areas. However, you may need to modify your input method or customize your SoftBench environment. If you have difficulty entering non-USASCII characters into SoftBench XEmacs, see "Setting Your Meta Key Binding" in SoftBench Online Help.
Customizing SoftBench for Native Language Support (NLS) Editing in SoftBench 374 Appendix D
Glossary Accelerator A key or key combination that performs the same function as a menu choice, but without the need to drop down the menu. It is accessible anywhere within the window. For example, Shift-Alt-E is identical to choosing "File: Edit…". Alternate Source Root One or more directories which are the top of a tree for additional source locations. You can use alternate source roots to provide additional directory trees which SoftBench searches to find project files when doing an external build.
You edit a copy of the original file in this temporary storage area, and the original file is not changed unless you save the edits. Build An action appropriate for projects and targets. When you choose "Build" with a target file selected, SoftBench begins with the source files and transforms them as necessary to create the end result, the target. With project build, SoftBench uses build dependency information and build configuration information to build the target.
customized build configuration. To see the complete list of available build configurations, choose "Builder: Manage Build Configurations…" on the SoftBench main window, then explore the drop-down list of build configuration names. Check In The process of moving file changes from the local file system into the archive file system. When you check a file in as unlocked, the local copy of the file is read-only. Check Out The process of retrieving a copy of an archive file into a mapped, local file system.
creation of a target is dependent upon the existence of another file or target. SoftBench supports three types of dependency relationships: a subproject relationship, a build order dependency between two targets in the same project, and a source-to-target relationship between source files and the target derived from them. The first two types of dependency relationships both provide a build order dependency.
setting and reading environment variables. Execution Host The computer on which a process executes. For example, you can specify a remote compile host for building projects or a remote debug host for debugging executables. The remote execution host can be different from the computer that runs the main SoftBench window or SoftBench Debugger. SoftBench must be installed on the remote execution host.
that file. The file and its series of changes are stored in an archive. File Server A computer system that maintains source, version control, or other sets of files. The system can be centralized so that project team members have access to the same versions of common files.
Intermediate File A file that is derived from a source file and serves as an intermediate step between the source file and the target. For example, object files (*.o files) are intermediate files between source files and executable files (targets). Generated source files, such as source files resulting from transforming embedded SQL source, are also intermediate files. SoftBench determines what intermediate files you need based on the build configuration associated with the target.
are closed. Makefile A control file that specifies rules for building targets. Makefiles can contain the following types of information: • macro definitions • file dependency information • executable commands Makefiles help you maintain up-to-date versions of projects that result from many operations on a number of files. In SoftBench, you can use project build, which frees you from maintaining your own Makefiles, or you can use external build, which allows you to use and maintain your existing Makefiles.
names) and files, and are represented by various shapes in the graphic display. In SoftBench Debugger's Data Graph Window, nodes represent variables. Package A package is a compiler, third-party or in-house library, or utility that is used to build a target. Packages can include library and include directory information, defines and compiler flags, and precompiler or code generator specifications. Packages provide a short-cut way to use third-party or in-house libraries in many build configurations.
names contain regular characters. Control characters, spaces, and punctuation characters special to the shell are not allowed in project names. Project Browser The area in the main SoftBench window that displays project data. In the Projects view, the project browser displays projects and subprojects. In the Files view, the project browser displays files and targets in the current project. Project Build A project build means that users let SoftBench manage their build instructions.
Push Buttons Independent buttons found in top-level tool windows and in dialog boxes, which when pushed initiate frequently used system actions. Query A request for cross-reference information about some part of your project in SoftBench Static Analyzer. Radio Buttons A graphical user interface construct consisting of several buttons representing several choices. Only one button may be selected at any time. When a button is selected, all other buttons are automatically deselected.
a build, or during an "Analyze File Set" operation. Subproject A subproject is a project with a defined build dependency relationship to a parent project.
derived from its associated source files. • External build targets have an associated build command which can produce the target. • Targets are the end product of a build, as distinguished from intermediate files (.o files or generated .C files) which are produced as an intermediate step in the build. Not every target is an executable file, and not every executable file in a project is a target. SoftBench treats files that are added via the "Project: Add File(s) to Project…" operation as files.
or memory range, and notifies the user if the value changes. This is especially useful if variables in your program change value unexpectedly. Working Directory The directory in which your SoftBench processes run. In most cases, SoftBench uses the local workspace root as the working directory. You can override this location for a target by changing the target's properties.
Index Symbols $HOME/.softbench/bmsinit, 80 $HOME/.softbench/projectname.msglog, 311 ( ) input box, 160, 182 ( ) Silent, 194, 202 ( ) Verbose, 194, 202 ), debugging, 175 .softdebugrc file, 228 .underscorevfp, 243 .underscorevptr, 243 .
Index B B (Breakpoint) annotation, 161, 189, 190, 193 Backup archives, 349 Behavior Settings (Options menu), 257, 266, 267 Block specifying, 177 traces, 204 bmsinit, 80, 120 Boldface font, 5 Break File Lock(File menu), 107 Break menu, 191, 192, 197 Activate All, 194 Clear All, 195 Set, 192 Set at ( ), 191 Set at Class ( ), 197 Set At Hex Address ( ), 211 Set at Instance ( ), 197 Set at Overloaded ( ), 197 Set at Procedure Entry ( ), 192 Set at Template ( ), 197 Show, 189, 193 Suspend All, 194 Breaking arch
Index Button area, 44 Buttons, 162 customizing, 228 C Call graph, 284 Call stack, 186 Calling functions, 186 Cancel Check Out (Discard Changes) (Actions menu), 103 Case sensitivity, 178 CDE dragging files, 77 integrating with SoftBench, 82 starting SoftBench from, 43 workspaces, 36 Change Working Directory (File menu), 167 Changing build type, 56 data, 181 source code, 207 variables, 181, 183 Character constants, 185 Characters, non-USASCII, 367 Check In from Local Directory(Actions menu), 94, 110 Check Out
Index Compile (File menu), 73, 130 Compile mode external build, 72 override, 71 Compile options, 159 changing, 71 Compiler flags defining, 71 external build, 72 Compiling for debugging, 159 from your editor, 130 Computer font, 5 Configuration files, 340 Configuration management, 27 choosing tool, 80 Class Graph/Editor, 142 from Debugger, 207 from your editor, 131 Configuration Management submenu (File menu), 38, 131 Configuring an editor, 119 Program Editor, 119 SoftCM, 92 toolbar, 79 vi Editor, 119 Constan
Index Window Control Area, 240 Data members displaying, 243 setting values, 243 viewing values, 247 Data Value Show'' menu), 183 DDE Busy, 161 communication, 162 Reference, 155 variables, 183 DDE commands, 181 declare, 180 list decl, 184 on breakpoints, 192, 195 on buttons, 229 on intercepts, 215 on traces, 204, 205 on watchpoints, 200 print, 184 prop lang, 184 Deadlock, 175 Debug (Target menu), 39, 77 debug compiler option, 197 Debug Running Process (File menu), 222 Debugger, 155 adding source directories,
Index source-to-target, 51, 61 target-to-target, 61 Description Boxes, 289 Directory archive, 97 working, 167 Directory menu Create, 93, 97 Delete, 106 Display Filter(Options menu), 109 Display legend Static Graph, 287 target graph, 328 Display on Graph (Target menu), 66 Display Results (View menu), 266 Distributed data, 81 Dynamic libraries, debugging, 209 E Edit Area syntax, 126 Edit menu Add Base Class, 139 Create Class, 139 Create Data Member, 139 Create Member Function, 139 Modify, 140 Undo, 140 Update
Index Exit SoftBench (Project menu), 83 Expanding group breakpoints, 197 Expressions printing, 182 using, 184 External build, 26, 39, 50, 52 changing to project build, 56 CodeAdvisor, 149 Debugger, 169 defining targets, 64 makefile, 64 SQL, 317 F File adding existing to project, 51, 53, 58 adding groups to project, 58 check in, 110 check out, 102 comparing, 295, 300 creating in project, 57 creation with editor, 121 dependencies, 51 icons, 59 in XEmacs Editor, 122 linking sources to targets, 61 mapping, 168
Index use new types, 64 File'' menu Load New Executable, 37 Files view, 44, 59 fileSetFile resource, 274 Filter Results (View menu), 266, 268 Filtering archive display, 109 buttons, 48 Cplusplus queries, 268 queries by file set, 257, 266 query results, 266 sourceless nodes, 293 Static Graphs, 292 violations, 152 Filters (View menu), 292 Find Node (Graph menu), 287 Find String (Output browser menu), 75 Follow All Recursively, 241 Follow Recursively, 243 Font boldface, 5 computer, 5 italic, 5 typewriter, 5 fo
Index Identifier Matching Rules (Options menu), 263 Images saving PostScript and HP-GL, 328 Index vi Editor, 128 Informix, 314 Inherited values, 225 Input, 174 Instance break, 197 Integration, 32 calling other tools from editor, 130 with CDE, 82 Intercepts, 214 Intermediate file, 58 access to commands, 67 Interpreting error messages, 74 ISO 8859.
Index an identifier, 262 archive server, 100 breakpoints, 193 mappings, 100 projects, 56 watchpoints, 201 Module specifying, 177 More Build Actions submenu (Target menu), 72 More File Types button, 64 Moving archives, 349 Multiple files vi Editor, 127 XEmacs Editor, 124 N Native Language Support, 362 Nested classes, 224 Networked environment, 81 New (File menu), 38 New (Target menu), 39, 51, 53, 60, 64 New Clone (Project menu), 53 New Create (Project menu), 38, 51 NLS, 362 Node Values dialog box, 241 Nodes
Index location, 161, 172, 220 Permissions, 342 Planning your project, 31 Popup menu, 239, 287, 326 customizing, 228 Show Data Members, 140 Show Member Functions, 140 PostScript file format, 326 saving images, 328 Preferences, setting, 80 Preprocessor wrapper, 319 Prerequisites to using SoftBench, 42 Preview Build (More Build Actions submenu), 72 Previewing a build, 72 Print/Save Output (Output browser menu), 75 Printing data, 181, 182 dialog box, 326 expressions, 182 graph images, 290, 326 hex or string va
Index selecting text, 261 simplifying results, 266, 269 textual, 260 textual and graphical, 252 valid identifiers, 263 Queries On New Nodes(Options menu, 138 Query graph, 284 Query Result Area, 259 Querying scope, 181, 182, 183 Queue Length, 240 R RCS migration, 348 RDBMS, 313 supported, 314 versions, 317 Redirecting I/O, 167 Redisplaying query results, 271 Reference relationships, 261 References (Static menu), 130 Refresh Files View (View menu), 59 Registering Program Editor, 119 tools, 80 Registers, 213,
Index breakpoints, 190 data member values, 243 PATH, 42 revision, 111 revision state, 111 watchpoints, 200 Sharing projects, 27 subprojects, 29 Show (Break menu), 189, 193 Show (Trace menu), 206 Show (Watch menu), 201 Show Data Members(Popup menu), 140 Show Local Server Information(Actions menu), 92, 95 Show Man Page (Help menu), 85 Show Member Functions(Popup menu), 140 Show menu, 252, 260, 265 Assembly Instructions, 211, 218 Classes, 260 Data Graph ( ), 236 Data Graph Indirect ( ), 236 Data Value Print Fo
Index SQL, 313 build configuration, 315 debugging, 319 file types, 315 in project build model, 315 packages, 317 packages,nodebug, 320 preprocessor wrapper, 319 SoftBench CodeAdvisor, 321 Static Analyzer, 321 updating versions, 317 with external build, 317 SQLDEBUG Makefile macro, 320 Stack, 217 viewing, 186 Stack (Show menu), 181, 186, 218 Stack Frame, 161 Stack Settings (Options menu), 179, 186 Standalone customizing Static Analyzer file set, 256 Static Analyzer, 273 tools, 36 Standard I/O, 174 Starting C
Index stderr, 167, 174 stdin, 167, 174 stdout, 167, 174 Stopping Data Graph Window, 236 SoftBench, 82 tools, 82 String constants, 185 Strings, printing, 183 Subproject, 22 build order, 73 building, 55, 73 converting, 55 creating, 55 sharing, 29 Suspend All (Break menu), 194 Suspending Data Graph Window, 244 Switching Static graphs, 287 Sybase, 314 Symbol menu Pattern Match (), 263 Symbol () input box, 258, 260, 261 Symbol () menu Pattern Match (), 261 Symbol menu, 252, 260, 261, 265 Classification (), 263 P
Index Clear All, 206 Set, 205 Show, 206 Traces, 188, 204 clearing, 206 commands at, 204 creating, 204 DDE commands, 205 granularity, 204 Registers, 213 viewing, 205 Transform, 24 Troubleshooting, 351 build, 86 File Compare, 302 in Class Graph/Editor, 143 in Debugger, 231 Static Analyzer, 276 toolbar, 86 types file using nonlocalized, 362 Typewriter font, 5 U Undebuggable code, 172 Understanding code, 39 Undo(Edit menu), 140 Unload Executable(File menu), 37 Unlocking archive files, 107 Untitled project, 43 U
Index filtering, 48, 152 Violation Help, 49, 76, 151 Visit menu File ( ), 191 Procedure ( ), 178, 181, 191 W Watch menu, 200 Clear All, 203 Set, 200 Set at Entry ( ), 200 Show, 201 Values Display, 201 Watchpoints, 188, 199 changing, 201 clearing, 202 collapsing, 202 creating, 200 DDE commands, 200 expanding, 202 granularity, 199 hiding, 202 setting, 199, 200 viewing, 201 Window area, 44 in XEmacs Editor, 122 reusing, 37 SoftBench File Compare, 296 status information, 337 Window Configuration (Options menu),