
Red Hat Directory Server 8.0 Administrator's Guide


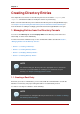


The Create New Instance dialog box is displayed.
3. Enter a unique identifier for the server in the Server Identifier field.
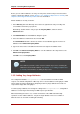
NOTE
This name must only have alphanumeric characters, a dash (-), or an
underscore (_).
4. Enter the a port number for LDAP communications in the Network port field.
5. Enter the suffix managed by this new instance of the directory in the Base Suffix field.
6. Enter a DN for the Directory Manager in the Root DN field.
For information on the role and privileges of the Directory Manager entry, refer to Section 7,
“Configuring the Directory Manager”.
7. Enter the password for this user in the Password for Root DN field, and confirm it.
8. Enter the user ID for the Directory Server daemon in the Server Runtime User ID field.
9. Click OK.
A status box appears to confirm that the operation was successful. To dismiss it, click OK.
7. Configuring the Directory Manager
The Directory Manager is the privileged database administrator, comparable to the root user in
UNIX. Access control does not apply to the Directory Manager entry; likewise, limits on
searches and other operations do not apply. The Directory Manager entry is created during
installation; the default DN is cn=Directory Manager. The password for this user is defined in
the nsslapd-rootdn attribute.
To change the Directory Manager DN and password and the encryption scheme used for this
password, do the following:
1. Log in to the Directory Server Console as Directory Manager.
If you are already logged in to the Console, change the bind DN, as described in Section 4.2,
“Changing Login Identity”.
2. In the Directory Server Console, select the Configuration tab, and then select the top entry
in the navigation tree in the left pane.
3. Select the Manager tab in the right pane.
Chapter 1. General Red Hat Directory Server Usage
12