
Red Hat Directory Server 8.0 Administrator's Guide


• Section 2.1, “Exporting Directory Data to LDIF Using the Console”
• Section 2.2, “Exporting a Single Database to LDIF Using the Console”
• Section 2.3, “Exporting to LDIF from the Command-Line”
CAUTION
Do not stop the server during an export operation.
2.1. Exporting Directory Data to LDIF Using the Console
Some or all of directory data can be exported to LDIF, depending upon the location of the final
exported file. When the LDIF file is on the server, only the data contained by the databases
local to the server can be exported. If the LDIF file is remote to the server, all of the databases
and database links can be exported.
Export directory data to LDIF from the Directory Server Console while the server is running, and
do the following:
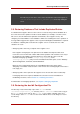
1. Select the Tasks tab. Scroll to the bottom of the screen, and click Export Database(s).
Alternatively, select the Configuration tab and click the Export from the Console menu.
The Export Database dialog box opens.
2. Enter the full path and filename of the LDIF file in the LDIF File field, or click Browse to
locate the file.
Browse is not enabled if the Console is running on a remote server. When the Browse
button is not enabled, the file is stored in the default directory,
/var/lib/dirsrv/slapd-instance_name/ldif.
1
3. If the Console is running on a machine remote to the server, two radio buttons are displayed
beneath the LDIF File field.
• Select To local machine to export the data to an LDIF file on the machine from which the
Console is running.
• Select To server machine to export to an LDIF file located on the server's machine.
4. To export the whole directory, select the Entire database radio button.
To export only a single subtree of the suffix contained by the database, select the Subtree
radio button, and then enter the name of the suffix in the Subtree text box. This option
exports a subtree that is contained by more than one database.
Exporting Directory Data to LDIF Using the
121