
Red Hat Directory Server 8.0 Administrator's Guide

The following sections describe importing data:
• Section 1.1, “Importing a Database from the Console”
• Section 1.2, “Initializing a Database from the Console”
• Section 1.3, “Importing from the Command-Line”
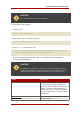
CAUTION
All imported LDIF files must also contain the root suffix.
1.1. Importing a Database from the Console
When performing an import operation from the Directory Server Console, an ldapmodify
operation is executed to append data, as well as to modify and delete entries. The operation is
performed on all of the databases managed by the Directory Server and on remote databases
to which the Directory Server has a configured database link.
You must be logged in as the Directory Manager in order to perform an import.
To import data from the Directory Server Console, do the following:
1. In the Directory Server Console, select the Tasks tab. Scroll to the bottom of the screen, and
select Import Database.
Alternatively, import by going to the Configuration tab and selecting Import from the
Console menu.
2. In the Import Database dialog box, enter the full path to the LDIF file to import in the LDIF
file field, or click Browse to select the file to import.
If the Console is running on a machine remote to the directory, the field name appears as
LDIF file (on the machine running the Console). When browsing for a file, you are not
browsing the current directory for the Directory Server host, but the filesystem of the machine
running the Console.
3. In the Options box, select one or both of the following options:
• Add Only. The LDIF file may contain modify and delete instructions in addition to the
default add instructions. For the server to ignore operations other than add, select the Add
only checkbox.
• Continue on Error. Select the Continue on error checkbox for the server to continue with
the import even if errors occur. For example, use this option to import an LDIF file that
Chapter 4. Populating Directory Databases
114