
STM Online Help: xstm Online Help (graphical interface)


Top
Install/Deinstall Support Tool Licenses
Most support tools do not require a support tool license. A few of the advanced tools (for example, expert tools)
require a license from HP.
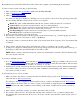
The following procedure tells you how to install and deinstall support tool licenses:
1. Move the cursor to the System Menu pulldown in the Main Menu Bar.
2. Move the cursor to the License cascade menu selection.
3. Click on Install. (Only HP personnel should click on Install HP-Only.)
4. Enter your password.
5. Click on "OK".
NOTE: If you selected Install, your permissions are only valid on the current test system.
If you selected Install HP-Only your permissions are valid on all test systems accessible to the user interface,
until the user interface is exited. Your permissions are only valid on the system running the user interface during
the current test session.
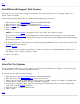
6. To deinstall all licenses on the current test system (including any HP-Only licenses on the system), return to the
License cascade menu selection.
7. Click on Deinstall.
A popup dialog box is displayed, cautioning you of the consequences of continuing with the deinstall process,
and asking you if you wish to continue or cancel.
8. Click on "Continue".
Top
Select/Set Test Options
You can modify the behavior of tools by setting test options at the user interface. For example, you can set an option
for all exercisers to loop continuously when they are run.
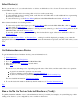
To select and set test options, do the following:
1. Move the cursor to the Options Menu pulldown in the Main Menu Bar.
2. Move the cursor to the Tool Options Menu cascade menu selection.
3. Click on the "Tool Options" menu function, whose options you wish to change. For example, you might select
"Verify" and the "Verify Options" dialog box will then be displayed.
4. To get help on a particular option, click on its field and press the F1 function key for context-sensitive help.
(You can also use the On Item command.)
5. Select the options you desire with the mouse.
6. Click on "OK".
Top