
Online Diagnostics (EMS and STM) Administrator's Guide September 2012


Table Of Contents
- Online Diagnostics B.11.31.19.04 Administrator Guide
- Contents
- 1 Introduction
- Overview
- Hardware Monitoring
- Support Tools Manager
- OnlineDiag Bundle Media
- 2 Installing the Online Diagnostics Software
- 3 Configuring and Administering EMS Hardware Monitors
- Configuring the Fibre Channel Monitors
- Hardware Monitoring Request Manager
- Configuring Hardware Monitoring
- Running the Monitoring Request Manager
- Enabling Monitoring
- Listing Monitor Descriptions
- Viewing Current Monitoring Requests
- Adding a Monitoring Request
- Modifying a Monitoring Request
- Verifying Hardware Event Monitoring
- Checking Detailed Monitoring Status
- Retrieving and Interpreting Event Messages
- Deleting Monitoring Requests
- Disabling Monitoring
- Peripheral Status Monitor
- Configuring the Peripheral Status Monitor
- 4 Administering the Support Tools Manager
- 5 Troubleshooting Online Diagnostics
- Glossary
- Index
- 6 Support and other resources
- 7 Documentation feedback
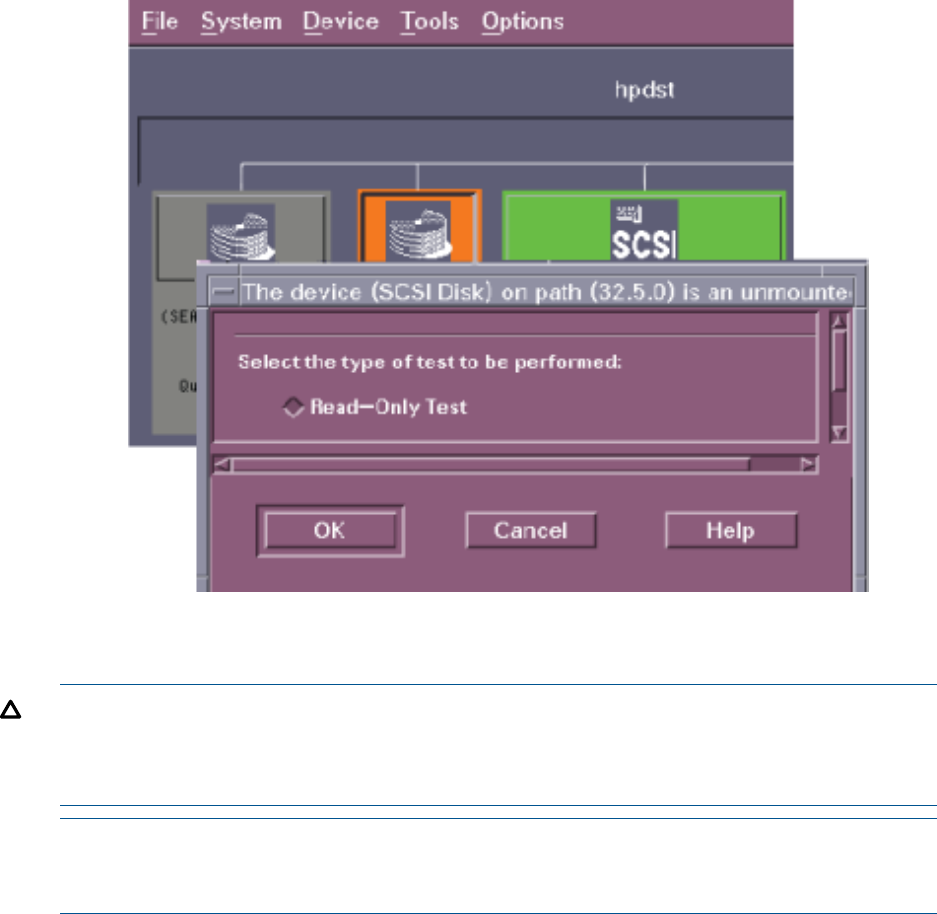
Figure 9 Selecting the Type of Test (xstm Interface)
The color of the device on the device map changes to blue when the test begins. Figure 4-5
shows the progress indicator.
CAUTION: Selecting a Read-Write Test option can destroy the information on the disk. You
must select the Read-Write Test option to check if the writing operation is functioning properly
on new, unused disks. However, a Read-Only Test option only reads the information on the
disk. This test does not affect the information on the disk.
NOTE: You are prompted to select the type of test only if you have unmounted the disk and
mounted it again. If you have not unmounted the disk, the Read-Only Test option is selected
by default.
Running Support Tools 51