
LDAP-UX Client Services B.05.01 Administrator Guide for HP directory servers and Windows ADS
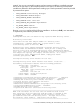


* Configuring "/etc/nsswitch.conf" and "/etc/pam.conf" to use ldap ... done.
* Starting ldapclientd daemon ... done.
* Starting ldapcconfd ... done.
LDAP-UX was successfully configured.
NOTE: For more information about the configuration files created or modified by autosetup,
see “Samples of LDAP-UX configuration files created or modified by autosetup” (page 410).
You can display details about the LDAP-UX Client Services configuration by using the
/opt/ldapux/config/display_profile_cache command. For more information about
the use of this command, see Section 9.2.4 (page 280).
2.3.6.2 Automating Existing LDAP-UX Domain Installation mode
For this mode of installation, you can run autosetup in silent mode and provide values for
parameters in the command line or with environment variables. You must preestablish trust with
the remote directory server by installing the CA certificate before running autosetup (for more
information, see Section 2.3.2.3.3 (page 39)). To perform this installation without user interaction,
you must specify the same command-line options or environment variables as required by the
automated Existing Directory Server Installation:
The bind DN (the DN of the directory server user who can add the local host to the directory
server's LDAP-UX domain): use either the -D option or the LDAP_BINDDN variable.
The password used with the bind DN: use either -j option or the LDAP_BINDCRED variable.
The host name of the directory server being joined: use either -h option or the LDAP_HOSTPORT
variable.
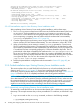
In the following example, these parameters are specified in the command line:
# ./autosetup -h acct1053 -D "uid=domadmin,ou=people,dc=calif,dc=acme,dc=com" -j /tmp/jfile -q
* Extending schemas ... done.
* Downloading profile from DS ... done.
* Configuring ldapux_client.conf ... done.
* Provisioning LDAP-UX Client information into the Directory Server ... done.
* Setting up proxy user ... done.
* Configuring "/etc/nsswitch.conf" and "/etc/pam.conf" to use ldap ... done.
* Starting ldapclientd daemon ... done.
* Starting ldapcconfd ... done.
LDAP-UX was successfully configured.
2.3.6.3 Postinstallation steps for Existing LDAP-UX Domain Installation mode
After completing an Existing LDAP-UX Domain mode guided installation, perform these steps:
• If you installed LDAP-UX into an existing LDAP-UX B.04.xx environment, or into an LDAP-UX
B.05.xx environment that was configured by the customized installation (setup), or in any
LDAP-UX B.05.xx environment that was modified since being created, ensure that the
user/group and host management tools can identify the proper locations in the directory server
tree for creating new users, groups, and hosts. The tools expect the LDAP-UX configuration
profile to indicate the correct location for the host entries. For more information about assuring
the management tools properly interface with the configuration profile, see Section 9.3.5.6
(page 306) and Section 7.8.1 (page 235).
• Perform the postinstallation configuration tasks documented in Section 2.5 (page 89), as
needed.
2.4 Customized installation (setup) for an HP directory server environment
The customized installation requires that you be familiar with the LDAP-UX and directory server
environment. This section describes how to perform this installation, tailoring the installation and
configuration to the specific needs of your organization and environment.
2.4 Customized installation (setup) for an HP directory server environment 57