
LDAP-UX Client Services B.04.15 with Microsoft Windows Active Directory Server Administrator's Guide (edition 8)

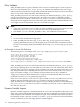
Table Of Contents
- LDAP-UX Client Services B.04.15 with Microsoft Windows Active Directory Administrator's Guide
- Table of Contents
- Preface
- 1 Introduction
- 2 Installing LDAP-UX Client Services
- Before You Begin
- Summary of Installing and Configuring LDAP-UX Client Services
- Planning Your Installation
- Installing LDAP-UX Client Services on a Client
- Configuring Active Directory for HP-UX Integration
- Step 1: Install Active Directory
- Step 2: Install SFU 2.0, 3.0 or 3.5 including Server for NIS
- Step 3: Create a Proxy User
- Step 4: Add an HP-UX Client Machine Account to Active Directory
- Step 5: Use ktpass to Create the Keytab File for the HP-UX client machine
- Step 6: Add POSIX Attributes into the Global Catalog
- Importing Name Service Data into Your Directory
- Configuring LDAP-UX Client Services
- Step 1: Run the Setup Program
- Step 2: Install the PAM Kerberos Product
- Step 3: Configure Your HP-UX Machine to Authenticate Using PAM Kerberos
- Step 4: Configure the Name Service Switch (NSS)
- Step 5: Configure the PAM Authorization Service Module (pam_authz)
- Step 6: Configure the Disable Login Flag
- Step 7: Verify LDAP-UX Client Services for Single Domain
- Step 8: Configure Subsequent Client Systems
- Configuring the LDAP-UX Client Services with SSL or TLS Support
- Downloading the Profile Periodically
- 3 Active Directory Multiple Domains
- 4 LDAP-UX Client Services with AutoFS Support
- 5 LDAP Printer Configurator Support
- 6 Dynamic Group Support
- 7 Administering LDAP-UX Client Services
- Using the LDAP-UX Client Daemon
- Integrating with Trusted Mode
- SASL GSSAPI Support
- PAM_AUTHZ Login Authorization
- Policy And Access Rules
- How Login Authorization Works
- PAM_AUTHZ Supports Security Policy Enforcement
- Policy File
- Policy Validator
- Dynamic Variable Support
- Constructing an Access Rule in pam_authz.policy
- Static List Access Rule
- Dynamic Variable Access Rule
- Security Policy Enforcement with Secure Shell (SSH) or r-commands
- Adding Additional Domain Controllers
- Adding Users, Groups, and Hosts
- User and Group Management
- Displaying the Proxy User's Distinguished Name
- Verifying the Proxy User
- Creating a New Proxy User
- Displaying the Current Profile
- Creating a New Profile
- Modifying a Profile
- Changing Which Profile a Client is Using
- Creating an /etc/krb5.keytab File
- Considering Performance Impacts
- Client Daemon Performance
- Troubleshooting
- 8 Modifying User Information
- 9 Mozilla LDAP C SDK
- A Configuration Worksheet
- B LDAP-UX Client Services Object Classes
- C Command, Tool, Schema Extension Utility, and Migration Script Reference
- LDAP-UX Client Services Components
- Client Management Tools
- LDAP User and Group Management Tools
- Environment Variables
- Return Value Formats
- Common Return Codes
- The ldapuglist Tool
- The ldapugadd Tool
- The ldapugmod Tool
- The ldapugdel Tool
- The ldapcfinfo Tool
- LDAP Directory Tools
- Schema Extension Utility
- Name Service Migration Scripts
- Unsupported Contributed Tools and Scripts
- D Sample PAM Configuration File
- E Sample /etc/krb5.conf File
- F Sample /etc/pam.conf File for HP-UX 11i v1 Trusted Mode
- G Sample /etc/pam.conf File for HP-UX 11i v2 Trusted Mode
- H Sample PAM Configuration File for Security Policy Enforcement
- Glossary
- Index
$ klist -k
Keytab name: FILE:/etc/krb5.keytab
Principal
--------------------------------------------
1 ldapux/hpntc10.cup.hp.com@HP.COM
1 host/hpntc10.cup.hp.com@HP.COM
Configuing a Principal as The Proxy User
The following describes three different ways to configure a principal as the proxy user:
• Configure a user principal:
Use ldap_proxy_config -i or "-d and -c" to enter a Kerbers user principal and its credential
(i.e. password).
The following is an example to use ldap_proxy_config -i command with proxy user
without the realm information proxyusr and password proxywd:
cd /opt/ldapux/config
./ldap_proxy_config -i
proxyusr
proxywd
The following is an example to use ldap_proxy_config -d -c command to create a
proxy user with the realm information john@CUP.HP.COM and the proxy user credential
proxycrd:
cd /opt/ldapux/config
./ldap_proxy_config -d john@CUP.HP.COM -c proxycrd
• Configure a service or host principal:
Use ldap_proxy_config -i or -d to specify the service or host principal with or without
entering a password. If the password is provided, LDAP-UX will retrieve the password
information from /etc/opt/ldapux/pcred file. When no password is specified, LDAP-UX
Client Services assume the proxy user is a service or host principal and retrieve the credential
information from the keytab file.
The following is an example to use ldap_proxy_config -i command to create a host
principal hpntcA.cup.hp.com:
cd /opt/ldapux/cinfig
./ldap_proxy_config -i host/hpntcA.cup.hp.com@HP.COM
• Use only the keytab file without configuring proxy:
With this method, the old pcred file must be deleted if there is one. LDAP-UX Client Services
uses ldapux/<FQHN>@<REALM> as the default service principal. If it does not exist, the
host/<FQHN>@<REALM> in the keytable file is the principal to be used. FQHN stands for
Fully Qualified Host Name.
The principal defined in a keytab file can be shared among several services, such as Kerberized
Interface Service or LDAP-UX using the host principal for authentication. The LDAP-UX proxy
principal is used solely for LDAP-UX.
Keytab File
LDAP-UX allows you to specify the keytab file when you use the SASL GSSAPI authentication.
Run the setup program to specify the keytab file or use the kerberos_keytab_file option
in /etc/opt/ldapux/ldapux_client.confto specify the keytab file. If you do not specify
a keytab file, LDAP-UX will use the default file specified in /etc/krb5.conf. If there is no
104 Administering LDAP-UX Client Services