
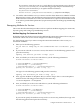
LDAP-UX Client Services B.04.10 Administrator's Guide (edition 7)
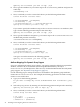


1. Run the following steps to find the name of the LDAP server used on the server certificate.
Assuming this certificate has been installed in your local certificate database file,
/etc/opt/ldapux/cert8.db:
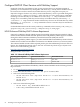
• Run the following commands to list all server certificates used by LDAP-UX:
cd /etc/opt/ldapux
certutil -d . -L
• Run the following command to select the nickname of the certificate from the above
list:
cetutil -d . -L -n <selected nickname>
• Select the first name component of the “Subject:” name. For example, if the
“Subject:” string is “CN=ldapserver.example.com, O=Example Corp” then
the name component would be “ldapserver.example.com".
NOTE: Depending on how your certificate administrator manages your network, the above
server certificate may not be found in your cert8.db file. Instead you may only find
certificates for any trusted Certificate Authorities. In this case, contact your certificate
administrator for the LDAP server certificate details.
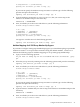
2. In a separate window, use the ldapentry tool to modify the value of the
preferredServerList attribute with the LDAP server name found in step 1. See
“Modifying a Profile” (page 118) for detailed information on changing LDAP-UX configuration
profile settings manually.
3. Examine the “preferedServerList” attribute
4. Use the nslookup tool to verify the IP address specified in the preferred server list matches
that of the name of the host name found in step 1 above.
For example, if the preferredserverlist attribute value is 192.168.1.1:636 and “Subject”
is CN=ldapserver.example.com,O=Example Corp, then
$ nslookup 192.168.1.1
Name Server: dns-resolver.example.com
Address: 192.169.1.254
Trying DNS
Name: ldapserver.example.com
Address: 192.168.1.1
Configure the LDAP-UX Client Serivces with SSL or TLS Support 49