
LDAP-UX Client Services B.04.10 Administrator's Guide (edition 7)
2. Stop directory server
3. Remove the obsolete automount schema:
a. objectclass- automount
b. attribute-automountInformation
Note: for Netscape Directory Server, they are in 10rfc2307.ldif.
4. Start directory and re-run setup program to install the new
automount schema.
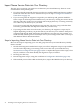
Do you still want to use the new automount schema?
Press Yes will exit this program. {YES]:
Reply "yes" when asked do you still want to use the new automount schema. If you reply
yes, it will take you to exit this program. You must re-run the setup program again to install
the new automount schema after you exit this program and manually delete the obsolete
automount schema. For detailed information on how to remove the obsolete automount
schema, see Removing The Obsolete Automount Schema (page 59).
If you reply no, setup skips to step 9 and the new automount schema will not be imported.
Otherwise, you will be asked to enter the DN (Distinguished Name) and password of the
directory user who can import the schema into the LDAP directory.
10. If you are creating a new profile, add all parent entries of the profile DN to the directory
(if any). If you attempt to create a new profile and any parent entries of the profile do not
already exist in the directory, setup will fail. For example, if your profile will be
cn=profile1,ou=profiles,o=hp,com, then ou=profiles,o=hp.com must exist in
the directory or setup will fail.
11. Next enter either the DN of a new profile, or the DN of an existing profile you want to use,
from Configuration Worksheet (page 183).
To display all the profiles in the directory, use a command like the following:
ldapsearch -b o=hp.com objectclass=DUAConfigProfile dn
If you are using an existing profile, setup configures your client, downloads the profile, and
exits. In this case, continue with step 12 below.
12. If you are creating a new profile, enter the DN and password of the directory user who can
create a new profile from Configuration Worksheet (page 183).
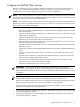
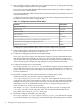
13. Next, it will prompt you for the following information:
Select authentication method for users to bind/authenticate to
the server
1. SIMPLE
2. SASL DIGEST-MD5
To accept the default shown in brackets, press the Return key.
Authentication method: [1]:
Press the return key if you choose to accept SIMPLE authentication method, type 2 if you
choose SASL DIGEST-MD5 authentication method for the following prompt:
Authentication method: [1]:
14. Next enter the host name and port number of the directory where your name service data
is, from Configuration Worksheet (page 183). For high availability, each LDAP-UX client can
look for name service data in up to three different directory hosts. You can enter up to three
hosts, to be searched in order.
15. Enter the base DN where clients should search for name service data from Configuration
Worksheet (page 183).
Configure the LDAP-UX Client Services 35