LDAP-UX Client Services B.04.00 with Microsoft Windows 2000/2003 Active Directory Administrator’s Guide HP-UX 11i v1 and v2 Edition 2 Manufacturing Part Number: J4269-90049 E0705 © Copyright 2005 Hewlett-Packard Development Company, LP.
Legal Notice Hewlett-Packard makes no warranty of any kind with regard to this manual, including, but not limited to, the implied warranties of merchantability and fitness for a particular purpose. Hewlett-Packard shall not be liable for errors contained herein or direct, indirect, special, incidental or consequential damages in connection with the furnishing, performance, or use of this material. © 2003 Hewlett-Packard Development Company, L.P.
Contents 1. Introduction Overview of LDAP-UX Client Services . . . . . . . . . . . . . . . . . . . . . . . . . . . . . . . . . . . . . . . 3 How LDAP-UX Client Services Works . . . . . . . . . . . . . . . . . . . . . . . . . . . . . . . . . . . . . . . 5 2. Installing LDAP-UX Client Services Before You Begin . . . . . . . . . . . . . . . . . . . . . . . . . . . . . . . . . . . . . . . . . . . . . . . . . . . . . . . Summary of Installing and Configuring LDAP-UX Client Services . . . . . . . . . . . . . . .
Contents Downloading an Automatic Profile . . . . . . . . . . . . . . . . . . . . . . . . . . . . . . . . . . . . . . . . . Understanding the ldapux_client.conf Configuration File . . . . . . . . . . . . . . . . . . . . . . Resolving Duplicate Entries . . . . . . . . . . . . . . . . . . . . . . . . . . . . . . . . . . . . . . . . . . . . . . When there are duplicate entries in the local domain . . . . . . . . . . . . . . . . . . . . . . . . When there are duplicate entries in remote domains. . . . . . . . .
Contents Policy Validator . . . . . . . . . . . . . . . . . . . . . . . . . . . . . . . . . . . . . . . . . . . . . . . . . . . . . . Adding Additional Domain Controllers . . . . . . . . . . . . . . . . . . . . . . . . . . . . . . . . . . . . Adding Users, Groups, and Hosts . . . . . . . . . . . . . . . . . . . . . . . . . . . . . . . . . . . . . . . . . Displaying the Proxy User’s Distinguished Name . . . . . . . . . . . . . . . . . . . . . . . . . . . . Verifying the Proxy User . . . . . . . . . . . . . .
Contents C. Command, Tool, and Migration Script Reference LDAP-UX Client Services Components . . . . . . . . . . . . . . . . . . . . . . . . . . . . . . . . . . . . Client Management Tools . . . . . . . . . . . . . . . . . . . . . . . . . . . . . . . . . . . . . . . . . . . . . . . create_profile_entry . . . . . . . . . . . . . . . . . . . . . . . . . . . . . . . . . . . . . . . . . . . . . . . . . . create_profile_cache . . . . . . . . . . . . . . . . . . . . . . . . . . . . . . . . . . . . . . . . . . . .
Preface About This Document This document describes the installation and administration tasks of LDAP-UX Client Services with Microsoft Windows 2000 or 2003 Active Directory. Intended Audience This document is intended for system and network administrators responsible for installing, configuring, and managing LDAP-UX Client Services with Microsoft Windows 2000 or 2003 Active Directory.
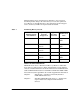
Manual updates may be issued between editions to correct errors or document product changes. To ensure that you receive the updated or new editions, you should subscribe to the appropriate product support service. Contact your HP sales representative for details. Table 1 Publishing History Details Document Manufacturing Part Number Operating Systems Supported Supported Product Versions Publication Date J4269-90017 11.0, 11i B.03.00 September 2002 J4269-90027 11.0, 11i v1 and v2 B.03.
Chapter 3 Active Directory Multiple Domains — provides information specific to Active Directory Multiple Domains. Chapter 4 Administering LDAP-UX Client Services — describes administrative procedures used to keep clients operating efficiently. Chapter 5 Modifying User Information — provides steps to modify user information. Chapter 6 Mozilla LDAP C SDK — describes the Mozilla LDAP SDK for C and the SDK file components. Typographical Conventions This document uses the following conventions.
{ } The contents are required in formats and command descriptions. If the contents are a list separated by |, you must choose one of the items. ... The preceding element may be repeated an arbitrary number of times. | Separates litems in a list of choices. Related Documents The following documents and resources contain useful and related information: • LDAP-UX Integration Release Notes (J4269-90045) available at http://docs.hp.com/hpux/internet.
Please include document title, manufacturing part number, and any comment, error found, or suggestion for improvement you have concerning this document. Also, please include what we did right so we can incorporate it into other documents.
xii
1 Introduction LDAP-UX Client Services simplifies HP-UX system administration by consolidating account and configuration information into a central LDAP directory. This LDAP directory can reside on an HP-UX system, such as Netscape Directory Server 6.
Introduction integrated into Microsoft Windows 2000 or 2003 Active Directory. Information provided in this manual specifically outlines the installation and administration tasks of LDAP-UX Client Services with Microsoft Windows 2000/2003 Active Directory. For information about integration of LDAP-UX Client Services with HP-UX based directories, refer to LDAP-UX Client Services Administrator’s Guide (J4269-90044) at http://docs.hp.com/hpux/internet.
Introduction Overview of LDAP-UX Client Services Overview of LDAP-UX Client Services Traditionally, HP-UX account and configuration information is stored in text files, for example /etc/passwd and /etc/group. Network Information Service (NIS) was developed to ease system administration by sharing this information across systems on the network. With NIS, account and configuration information resides on NIS servers.
Introduction Overview of LDAP-UX Client Services shown in Figure 1-2. This adds greater scalability, operation with other applications and platforms, and less network traffic from replica updates.
Introduction How LDAP-UX Client Services Works How LDAP-UX Client Services Works LDAP-UX Client Services leverage the authentication mechanism provided in the Pluggable Authentication Module (PAM), and the naming services provided by the Name Service Switch (NSS). Refer to pam(3), pam.conf(4), and Managing Systems and Workgroups at http://docs.hp.com/hpux/os for information on PAM.
Introduction How LDAP-UX Client Services Works Figure 1-3 HP-UX Client Login Sequence with Windows 2000 (SFU 2.0) HP-UX Client Windows 2000 Server Login PAM Library PAM Kerberos Active Directory NSS Engine NSS_ LDAP Kerberos Services msSFUName: bobj cn: Bob Jolly msSFUHomeDirectory:/home/bobj uidnumbr: 208 gidnumbr: 20 loginshell: /usr/bin/ksh With LDAP-UX Client Services, HP-UX commands and subsystems can transparently access name service information from the Active Directory through PAM and NSS.
Introduction How LDAP-UX Client Services Works Table 1-1 Examples of Commands that use PAM and NSS (Continued) Commands using NSS Commands using PAM and NSS nsquerya passwd who ftp whoami su fingerb rlogin id telnet logname dtlogin groups remsh newgrpb pwgetb grgetb listusersb loginsb a. nsquery(1) is a contributed tool included with the ONC/NFS product. b.
Introduction How LDAP-UX Client Services Works configuration information is stored in the directory, all each client needs to know is where its profile is. Each client downloads the configuration profile from the directory. The profile is an entry in the directory containing details on how clients will access the directory.
2 Installing LDAP-UX Client Services This section describes the decisions you need to make and the steps to install and configure LDAP-UX Client Services.
Installing LDAP-UX Client Services the following sections: 10 • Before You Begin • Summary of Installing and Configuring LDAP-UX Client Services • Planning Your Installation • Installing LDAP-UX Client Services on a Client • Configuring Active Directory for HP-UX Integration • Importing Name Service Data into Your Directory • Configuring LDAP-UX Client Services • Configuring the LDAP-UX Client Services with SSL Support • Downloading the Profile Periodically Chapter 2
Installing LDAP-UX Client Services Before You Begin Before You Begin This section lists some things to keep in mind as you plan your installation: NOTE Chapter 2 • Use the configuration worksheet in Appendix A to record your decisions and other information needed for configuration. • Refer to the LDAP-UX Client Services Release Notes (J4269-90045) at http://docs.hp.com/hpux/internet for last-minute information. • The white paper Preparing Your Directory for HP-UX Integration at http://docs.hp.
Installing LDAP-UX Client Services Summary of Installing and Configuring LDAP-UX Client Services Summary of Installing and Configuring LDAP-UX Client Services The following section summarizes the steps you should take to install and configure an LDAP-UX Client Services environment: Step 1. Refer to “Planning Your Installation” on page 14. Step 2. Install LDAP-UX Client Services on each client system. Refer to“Installing LDAP-UX Client Services on a Client” on page 23. Step 3.
Installing LDAP-UX Client Services Summary of Installing and Configuring LDAP-UX Client Services Step 9. Optionally modify the disable_uid_range flag in the /etc/opt/ldapux/ldapux_client.conf file to disable user login uids to the local system from specific users on the LDAP server. Refer to “Step 6: Configure the Disable Login Flag” on page 45. Step 10. Verify each client is working properly. Refer to “Step 7: Verify LDAP-UX Client Services for Single Domain” on page 46. Step 11.
Installing LDAP-UX Client Services Planning Your Installation Planning Your Installation Before beginning your installation, plan how to set up and verify your Active Directory and your LDAP-UX Client Services environment. Consider the following questions. Record your decisions and configuration information in Appendix A, “Configuration Worksheet,” on page 143. • Will Active Directory be set up with a single domain or multiple domains? Starting from the release of B.03.
Installing LDAP-UX Client Services Planning Your Installation The specific number of domain controllers necessary in your network depends on the network size and configuration. A minimum of two Active Directory domain controllers are recommended for each domain. For more information, refer to the Active Directory documentation, or to http://www.microsoft.com/Windows2000 and http://windowsupdate.microsoft.com.
Installing LDAP-UX Client Services Planning Your Installation • How will user and group data be migrated into your directory? The migration scripts provided with LDAP-UX Client Services for Active Directory migrate all user and group data to the “Users” container.
Installing LDAP-UX Client Services Planning Your Installation If these parameters are the same for all your clients, you need only one profile. You will need at least one profile per Active Directory Domain Controller. In general, it is a good idea to have as few profiles as necessary to simplify maintenance. Refer to Appendix B, “LDAP-UX Client Services Object Classes,” on page 147 to decide how many different profiles you need.
Installing LDAP-UX Client Services Planning Your Installation Figure 2-2 Example Directory Structure for Multiple Domains DC=cup, DC=hp, DC=com CN=Configuration profile data CN=Users user data group data DC=,DC=cup,DC=hp, DC=com DC=,DC=cup, CN=Configuration CN=Configuration CN=Users user group data data profile data NOTE profile data DC=hp, DC=com CN=Users user group data data By default, the CN=configuration, DC=cup, DC=hp, DC=com configuration container only exists in the r
Installing LDAP-UX Client Services Planning Your Installation By default, Active Directory does not grant enough access rights to retrieve user and group information by anonymous access. Therefore, a proxy user needs to be configured. Write your proxy user DN on the worksheet in Appendix A. • How will you set up /etc/pam.conf? What other authentication do you want to use and in what order? PAM provides authentication services.
Installing LDAP-UX Client Services Planning Your Installation You have a choice between SIMPLE (the default), or SASL GSSAPI. • Do you want to specify the keytab file when you use SASL GSSAPI authentication. LDAP-UX Client Services allows you to specify the keytab file when you use the SASL GSSAPI authentication. You can run the setup program to specify the keytab file. If no file is specified, LDAP-UX will use the default keytab file configured in /etc/krb5.conf using default_keytab_name.
Installing LDAP-UX Client Services Planning Your Installation access control rules defined in the local policy file to control the login authorization. Because pam_authz doesn’t provide authentication, it doesn’t verify if a user account exists. If the /etc/opt/ldapux/pam_authz.policy file does not exist in the system, pam_authz performs access control based on the netgroup information found in the /etc/passwd and /etc/netgroup files. If the /etc/opt/ldapux/pam_authz.
Installing LDAP-UX Client Services Planning Your Installation NOTE The passwd command may still allow you to change a password for a disabled user when alternative authentication methods, such as PAM Kerberos, are used since LDAP does not control these subsystems. • How will you communicate with your user community about the change to Active Directory? For the most part, your user community should be unaffected by the directory. Most HP-UX commands will work as always.
Installing LDAP-UX Client Services Installing LDAP-UX Client Services on a Client Installing LDAP-UX Client Services on a Client These are the major steps required to install LDAP-UX Client Services on a client: Step 1. Use swinstall(1M) to install the LDAP-UX Client Services software, the NativeLdapClient subproducts, on a client system. See the LDAP-UX Client Services Release Notes for any last-minute changes to this procedure. You don’t need to reboot your system after installing the product.
Installing LDAP-UX Client Services Configuring Active Directory for HP-UX Integration Configuring Active Directory for HP-UX Integration This section describes the requirements and steps on how to prepare Active Directory to work with LDAP-UX Client Services. NOTE If you will be configuring your system for ADS multiple domains, there will be some additional configuration instructions to follow. These are listed under the appropriate step number.
Installing LDAP-UX Client Services Configuring Active Directory for HP-UX Integration • The Active Directory Schema snap-in allows you to manage your Active Directory schema. For installation information, refer to the Active Directory on-line Help “Manage the schema”. • Active Directory Services interface (ADSI) editor is part of Windows 2000 Support Tools and is used to create and modify Active Directory objects. The Windows 2000 Support Tools can be found on the Windows 2000 Server CD.
Installing LDAP-UX Client Services Configuring Active Directory for HP-UX Integration IMPORTANT When installing SFU version 2.0, ensure that you choose Customized Installation at the Installation Options screen. This allows you to select the Server for NIS component for installation. When installing SFU version 3.0 or 3.5, the Server for NIS will be installed by default.
Installing LDAP-UX Client Services Configuring Active Directory for HP-UX Integration CAUTION Make sure the proxy user is a member of the Domain Users group, which allows read access only, and not the Administrator group to protect Active Directory entries from malicious modifications. A proxy user’s access right to objects in an Active Directory depends on what default permissions Active Directory has been configured with during installation.
Installing LDAP-UX Client Services Configuring Active Directory for HP-UX Integration — Delegate POSIX attribute read access to the proxy user. By doing this, you allow the proxy user to read only POSIX attributes of user and group objects: 1. Start Active Directory Users and Computers. 2. Click the container which contains the proxy user, usually it is “Users”. 3. Select Delegate Control from the Action menu. 4. The Delegation of Control Wizard starts, click Next. 5.
Installing LDAP-UX Client Services Configuring Active Directory for HP-UX Integration 10. Repeat above steps to delegate user posix attributes to the proxy user by choosing "User objects" in 7), and choose the following posix user attributes in 8): For SFU, version 2.0: — Read gecos — Read loginShell — Read msSFUHomeDirectory — Read gidNumber — Read uidNumber — Read msSFUName For SFU, version 3.0 or 3.
Installing LDAP-UX Client Services Configuring Active Directory for HP-UX Integration Step 4: Add an HP-UX Client Machine Account to Active Directory Use the Active Directory Users and Computer tool to create a user account for your HP-UX host. • If you are using ADS multiple domains: add a host account for HP-UX client machine to every domain you want to access.
Installing LDAP-UX Client Services Configuring Active Directory for HP-UX Integration Step 6: Add POSIX Attributes into the Global Catalog The GCS is the domain controller which hosts the global catalog for a forest. The global catalog contains partial information of each domain in the forest. If you want LDAP-UX Client Services to query GCS to decide which domain a queried data belongs to, then add the following POSIX attributes into the global catalog: For SFU version 2.
Installing LDAP-UX Client Services Importing Name Service Data into Your Directory Importing Name Service Data into Your Directory The next step is to import your user, group, and other services data into your Active Directory. When planning to import your data, consider the following: • If you have already imported data into your Active directory with the SFU 2.0 Server for NIS migration tool, LDAP-UX Client Services can use that data and you can skip to “Configuring LDAP-UX Client Services” on page 34.
Installing LDAP-UX Client Services Importing Name Service Data into Your Directory You can also run the setup program to select and set the attribute map to be used with your directory server. To import your user, group, and other services data into your LDAP directory, complete the following steps, modifying them as necessary. Step 1. Decide which migration method and scripts you will use.
Installing LDAP-UX Client Services Configuring LDAP-UX Client Services Configuring LDAP-UX Client Services To configure the LDAP-UX Client Services, complete the steps in this section. If you attempt to enable SSL support with LDAP-UX, you must configure the LDAP directory server to support SSL and install the security database (cert7.db or cert8.db and key3.db) on your client before you run the setup program.
Installing LDAP-UX Client Services Configuring LDAP-UX Client Services 1. Log in as root and run the setup program: cd /opt/ldapux/config ./setup The setup program asks you a series of questions and usually provides default answers. Press the Enter key to accept the default, or change the value and press the Enter key. At any point during setup, press the Control-b keys to return to the previous screen or press the Control-c keys to exit setup. 2.
Installing LDAP-UX Client Services Configuring LDAP-UX Client Services If you are using an existing profile, setup configures your client, downloads the profile, and exits. In this case, continue by going to the section “Step 2: Install the PAM Kerberos Product” on page 41. 8. If you are creating a new profile, enter the DN and password of a directory user who can create a new profile, from Appendix A. 9. Choose the attribute map set to be used with the directory server. You can select SFU 2.
Installing LDAP-UX Client Services Configuring LDAP-UX Client Services (/etc/opt/ldapux/pcred) The principal defined in a keytab file can be shared among several services, such as Kerberized Interface Service or LDAP-UX using the host principal for authentication. The LDAP-UX proxy principal is used solely for LDAP-UX. It will prompt you for selecting the type of principal. Enter H if you wish to use a host/service principal. Enter P if you wish to use a proxy principal.
Installing LDAP-UX Client Services Configuring LDAP-UX Client Services 21. Enter the Profile Time To Live (TTL) value. This value defines the time interval between automatic downloads (refreshes) of new configuration profiles from the directory. Automatic refreshing ensures that the client is always configured using the newest configuration profile. If you want to disable automatic refresh or manually control when the refresh occurs, enter a value of 0.
Installing LDAP-UX Client Services Configuring LDAP-UX Client Services can use either the member or uniqueMember attribute. LDAP-UX can convert from the DN syntax to the POSIX syntax (an account name). For ADS, the typical member attribute would be either memberUid or preferably the member attribute. e. Follow the prompts to finish the setup. 23. Select if you want to create custom search descriptors for any of the supported name services.
Installing LDAP-UX Client Services Configuring LDAP-UX Client Services NOTE If your search filters overlap, enumeration requests will result in duplicate entries being returned. For example, if one search filter searched a subset of your organization and a second search filter searched your entire organization, an enumeration request would return duplicate entries. Refer to “Enumeration Requests” on page 117. 24.
Installing LDAP-UX Client Services Configuring LDAP-UX Client Services NOTE When you configure the default search base for the GCS, you must make sure that the base covers everything that you want to include. For example, for a forest containing two domain trees (ca.hp.com and ny.hp.com), if you specify ca.hp.com as the GCS search base, all of the data under the ny.hp.com domain tree will not be found. You must specify hp.com to cover the entire forest.
Installing LDAP-UX Client Services Configuring LDAP-UX Client Services this are shown later in this step. Additional information can be found in the Configuration Guide for Kerberos Products on HP-UX, available at http://docs.hp.com/hpux/internet. In order to support integration with Active Directory server, a specific version of the PAM-Kerberos product is required. On HP-UX 11i v1, version 1.11 of the PAM-Kerberos product is required. On HP-UX 11i v2, version 1.23 of the PAM-Kerberos product is required.
Installing LDAP-UX Client Services Configuring LDAP-UX Client Services depends on the configuration to locate the realm’s KDC. The following is an example of /etc/krb5.conf which has the realm CUP.HP.COM, and machine myhost.cup.hp.com as KDC: default_realm = CUP.HP.COM default_tgs_enctypes = DES-CBC-CRC default_tkt_enctypes = DES-CBC-CRC ldapux_multidomain = 1 (this line added only if using Mutiple Domains) ccache_type = 2 [realms] CUP.HP.COM = { kdc = MYHOST.CUP.HP.COM:88 kpasswd_server = MYHOST.CUP.HP.
Installing LDAP-UX Client Services Configuring LDAP-UX Client Services kshell kerberos-adm kerberos-adm krb5_prop kerberos-adm protocol kerberos-cpw protocol 544/tcp 749/tcp 749/udp 754/tcp 464/udp 464/tcp cmd # # # # # Kerberos Kerberos Kerberos Kerberos Kerberos remote shell 5 admin/changepw 5 admin/changepw slave propagation Password Change # Kerberos Password Change 4. Add a host key to the /etc/krb5.
Installing LDAP-UX Client Services Configuring LDAP-UX Client Services NOTE The sample file reflects the recommendation to keep the root user in /etc/passwd local on each client machine, and to allow for local account management of the root user. This guarantees local access to the system in case the network is down. Step 4: Configure the Name Service Switch (NSS) The Name Service Switch (NSS) needs to be modified to retrieve your account and group information from Active Directory.
Installing LDAP-UX Client Services Configuring LDAP-UX Client Services NOTE • White spaces between numbers are ignored. • Only one line of the list is accepted; however, the line can be wrapped. • The maximum number of ranges is 20. Step 7: Verify LDAP-UX Client Services for Single Domain This section describes some simple ways you can verify the installation and configuration of your LDAP-UX Client Services.
Installing LDAP-UX Client Services Configuring LDAP-UX Client Services grget -n groupname ls -l NOTE While you can use the following commands to verify your configuration, these commands enumerate the entire passwd or group database, which may reduce network and directory server performance for large databases: pwget (with no options) grget (with no options) listusers logins 3.
Installing LDAP-UX Client Services Configuring LDAP-UX Client Services 4. Log in to the client system from another system using rlogin or telnet. Log in as a user in the directory and as a user in /etc/passwd to make sure both work. 5. Optionally, test your pam_authz authorization configuration: If the pam_authz is configured without the pam_authz.policy file, verify the followings: a. Log into the client system from another system using rlogin or telnet.
Installing LDAP-UX Client Services Configuring LDAP-UX Client Services If any owner or group shows up as a number instead of a user or group name, the name service switch is not functioning properly. Check the file /etc/nsswitch.conf, your directory, and your profile. 8. If you have configured a multi-domain setup and you want to verify it, execute the following two steps. Otherwise, continue below with “Step 8: Configure Subsequent Client Systems” on page 49.
Installing LDAP-UX Client Services Configuring LDAP-UX Client Services If you are using multiple domains, download profiles for the GCS and each remote domain. Refer to “Command, Tool, and Migration Script Reference” on page 153, section titled “The get_profile_entry Tool” for information about downloading these profiles.
Installing LDAP-UX Client Services Configuring the LDAP-UX Client Services with SSL Support Configuring the LDAP-UX Client Services with SSL Support The LDAP-UX Client Services provides SSL (Secure Socket Layer) support to secure communication between LDAP clients and the Directory Servers. The LDAP-UX Client Services supports SSL with password as the credential, using simple bind to ensure confidentiality and data integrity between clients and servers.
Installing LDAP-UX Client Services Configuring the LDAP-UX Client Services with SSL Support The following steps show you an example on how to download the Certificate Authority (CA) certificate from Windows 2000 Certificate Authority Server using Netscape Communicator 4.75: Step 1. Log in to your system as root. Step 2. Use Netscape Communicator to connect to your Certificate Authority Server. The following shows an example of using a link to connect to your CA Server: http://ADS servername/CertSrv Step 3.
Installing LDAP-UX Client Services Configuring the LDAP-UX Client Services with SSL Support Step 11. Enter a short name to identify this CA in the Name box of new CA window screen. Step 12. Click the finish button to complete the installation of CA certificate. Step 13. The Windows 2000 CA certificate will be downloaded to the following two files on your LDAP-UX Client: /.netscape/cert7.db /.netscape/key3.db Step 14. You can simply copy the /.netscape/cert7.db file to /etc/opt/ldapux/cert7..db and /.
Installing LDAP-UX Client Services Configuring the LDAP-UX Client Services with SSL Support Step 5. Check the “Trust this CA to identify web sites”, “Trust this CA to identify email users”, and “Trust this CA to identify software developers” checkboxes in the Downloading Certificate window screen. Then click OK button. Step 6. The Netscape Directory CA certificate will be downloaded to the following two files on your LDAP-UX Client: /.mozilla/default/*.slt/cert8.db /.morilla/default/*.slt/key3.db Step 7.
Installing LDAP-UX Client Services Configuring the LDAP-UX Client Services with SSL Support certificate) from your certificate server as a Base64-Encoded certificate and use the certutil utility to create the cert8.db and key3.db security database files. Steps to create database files using the certutil utility The following steps show you an example on how to create the security database files, cert8.db and key3.db on your client system using the certutil utility: Step 1.
Installing LDAP-UX Client Services Configuring the LDAP-UX Client Services with SSL Support NOTE The -t "C,," represents the minimum trust attributes that may be assigned to the CA certificate for LDAP-UX to successfully use SSL to connect to the LDAP directory server. If you have other applications that use the CA certificate for other functions, then you may wish to assign additional trust flags. See http://www.mozilla.org/projects/security/pki/nss/tools/certutil.ht ml for additional information.
Installing LDAP-UX Client Services Downloading the Profile Periodically Downloading the Profile Periodically The product setup program, /opt/ldapux/setup, allows you to define a time interval after which the current profiles are being automatically refreshed. The start time for this periodic refresh is defined by the time the setup program was run and the value defined for ProfileTTL. Therefore, it does not allow you to define a specific time of day when the profiles should be downloaded (refreshed).
Installing LDAP-UX Client Services Downloading the Profile Periodically fi rm -f /etc/opt/ldapux/ldapux_profile.sav rm -f /tmp/profile.upd$$ 3. Create a crontab(1) file (or edit your existing crontab file) and specify how frequently you want to download the profile. For example, assuming the script above is in the file /ldapux/download_ldap_profile, the following crontab specification specifies that /ldapux/download_ldap_profile be executed nightly at midnight: 0 0 * * * /ldapux/download_ldap_profile 4.
3 Active Directory Multiple Domains This chapter contains information specific to multiple domains.
Active Directory Multiple Domains chapter. The following topics are included in this chapter: 60 • Domain Term Definitions • Retrieving Data from a Remote Domain • Downloading an Automatic Profile • Understanding the ldapux_client.conf Configuration File • Resolving Duplicate Entries • Changing Multiple Domain Configurations • Limitations of Multiple Domains in Version B.03.
Active Directory Multiple Domains Domain Term Definitions Domain Term Definitions The following section defines common multiple domain terms. Multiple Domains Supported multiple domains refer to domains in an ADS forest. Domains from different forests are not supported. Local Domains Local domain is the first domain configured using the LDAP-UX setup tool after choosing Windows 2000 or 2003 ADS as your directory server.
Active Directory Multiple Domains Retrieving Data from a Remote Domain Retrieving Data from a Remote Domain LDAP-UX can retrieve data from a remote domain using three methods: • Remote Domain Configuration This method allows you to configure a sequence in which LDAP-UX searched remote domains. If you know in which domains your data resides, you can use setup to configure a remote domain sequence.
Active Directory Multiple Domains Retrieving Data from a Remote Domain Choosing Remote Domain Configuration or GCS In order to limit the scope of the LDAP-UX remote domain search to certain domains of the forest, configure those specific domains using the remote domain configuration. This is the only way to exclude some domains from the LDAP-UX remote domain search.
Active Directory Multiple Domains Downloading an Automatic Profile Downloading an Automatic Profile When you select the GCS to retrieve data from remote domains, it is not necessary to specify which domains LDAP-UX is to search. However, you should create a profile for every domain in the forest so LDAP-UX has the information about where and how to establish the connection with their domain controllers in the forest. Not every LDAP-UX client has to create the profile entry in the directory.
Active Directory Multiple Domains Understanding the ldapux_client.conf Configuration File Understanding the ldapux_client.conf Configuration File When you set up LDAP-UX, the /etc/opt/ldapux_client.conf file is automatically created to specify where the directory is located, the profile data path, and the logging configuration. In previous releases, typically, this file has the following contents: Service: NSS LDAP_HOSTPORT="192.1.2.
Active Directory Multiple Domains Understanding the ldapux_client.conf Configuration File a,DC=ca, DC=com" PROGRAM="/opt/ldapux/config/create_profile_cache -i /etc/opt/ldapux/domain_profiles/ldapux_profile.ldif. gc -o /etc/opt/ldapux/domain_profiles/ldapux_profile.bin.gc The contents of this file are created as you run the setup tool.
Active Directory Multiple Domains Resolving Duplicate Entries Resolving Duplicate Entries In the Windows 2000 or 2003 environment, a user account can exist in multiple domains. Each account has a user principal name (UPN) in the format @. Users can log on using UPN without choosing a domain. Due to the limitation of the HP-UX operating system, LDAP-UX does not support UPN as in Windows 2000 or 2003. It is recommended that you configure a unique user name and uid number in the forest.
Active Directory Multiple Domains Resolving Duplicate Entries Example The following example explains what to expect when your user accounts are not unique in the forest. Assume the user account jimmy resides in domainA, domainB, and domainC simultaneously: • If domain A is the local domain, jimmy in domainA will log into HP-UX client.
Active Directory Multiple Domains Changing Multiple Domain Configurations Changing Multiple Domain Configurations The following sections explain how to modify your multiple domain configuration.
Active Directory Multiple Domains Changing Multiple Domain Configurations Re-ordering the Remote Domain Search Sequence The search sequence is the sequence in which you configured the remote domains during setup. This sequence is also shown in /etc/opt/ldapux/ldapux_client.conf. To re-order the remote domain search sequence, either run setup to re-configure the remote domains, or manually edit the /etc/opt/ldapux/ldapux_client.conf file to re-arrange the order.
Active Directory Multiple Domains Changing Multiple Domain Configurations To add these attributes to the global catalog: Step 1. On your Windows 2000 GCS, click Start, then Run. In the open dialog box, type mmc, then click OK. Step 2. Click the Microsoft Management Console menu, select Add/Remove Snap-in. Step 3. Click Add under the Standalone tab to get to the Add Standalone Snap-in dialog box. Step 4. In the Add Standalone Snap-In dialog box, select Active Directory Schema, then click Add and then Close.
Active Directory Multiple Domains Limitations of Multiple Domains in Version B.03.00 or later Limitations of Multiple Domains in Version B.03.00 or later • LDAP-UX Client Services only supports passwd and group in ADS multiple domains. • LDAP-UX Client Services using Windows 2000 or 2003 Active Directory Server does not support netgroup service data.
4 Administering LDAP-UX Client Services This chapter describes administrative procedures that will be used to keep clients operating efficiently and when expanding the computing Chapter 4 73
Administering LDAP-UX Client Services environment.
Administering LDAP-UX Client Services Using the LDAP-UX Client Daemon Using the LDAP-UX Client Daemon This section provides: • an explanation of the administration tool ldapclientd and the configuration file, ldapclientd.
Administering LDAP-UX Client Services Using the LDAP-UX Client Daemon Controlling the Client Use the following syntax to control the client: /opt/ldapux/bin/ldapclientd [-d ] [-o] > /opt/ldapux/bin/ldapclientd [-D ]|-E |-S [cache]> /opt/ldapux/bin/ldapclientd <-f| -k| -L| -h| -r> Daemon Performance Performance (client response time) is improved by the following techniques: • Caching entries to reduce the LDAP-UX client response time while retrieving the follo
Administering LDAP-UX Client Services Using the LDAP-UX Client Daemon one was already running. Message: Cache daemon is not running (or running but not ready). Meaning: This message can mean several things: • Attempted to use the control option features of ldapclientd when no ldapclientd daemon process was running, to control. • Attempted to start or control ldapclientd without superuser privilege. • The ldapclientd daemon process is too busy with other requests to respond at this time.
Administering LDAP-UX Client Services Using the LDAP-UX Client Daemon Configuration File Syntax # comment [section] setting=value setting=value . . . [section] setting=value setting=value . . . Where: comment ldapclientd ignores any line beginning with a # delimiter. section Each section is configured by setting=value information underneath. The section name must be enclosed by brackets ([ ]) as delimiters.
Administering LDAP-UX Client Services Using the LDAP-UX Client Daemon Section Details Within a section, the following syntax applies: [StartOnBoot] Determines if ldapclientd starts automatically when the system boots. setting=value: enable= By default, this is enabled after LDAP-UX has been configured by the LDAP-UX setup program /opt/ldapux/config/setup.
Administering LDAP-UX Client Services Using the LDAP-UX Client Daemon update_ldapux_conf_time=<10-2147483647> This determines how often, in seconds, ldapclientd re-reads the /etc/opt/ldapux/ldapux_client.conf client configuration file to download new domain profiles. The default value is 600 (10 minutes). cache_size=<102400-1073741823> The maximum number of bytes that should be cached by ldapclientd. This value is the maximum, upper limit, of memory that can be used by ldapclientd.
Administering LDAP-UX Client Services Using the LDAP-UX Client Daemon The time, in seconds, before a cache entry expires from the positive cache. Since personal data can change frequently, this value is typically smaller than some others. The default value is 120 (2 minutes). negcache_ttl=<1-2147483647> The time, in seconds, before a cache entry expires from the negative cache. The default value is 240 (4 minutes).
Administering LDAP-UX Client Services Using the LDAP-UX Client Daemon LDAP-UX using Windows 2000 or 2003 Active Directory Server does not support netgroup service data. [uiddn] This cache maps a user’s UID to their DN from the directory. setting=value enable= ldapclientd only caches entries for this section, when it is enabled. By default, caching is enabled. poscache_ttl=<0-2147483647> The time, in seconds, before a cache entry expires from the positive cache.
Administering LDAP-UX Client Services Using the LDAP-UX Client Daemon ldapclientd only caches entries for this section, when it is enabled. By default, caching is enabled. poscache_ttl=<0-2147483647> The time, in seconds, before a cache entry expires from the positive cache. Since new domains are rarely added to or removed from the forest, the cache is typically valid for a long time. The default value is 86400 (24 hours).
Administering LDAP-UX Client Services Using the LDAP-UX Client Daemon # Time for an in-active connection to the directory server to # be brought down and cleaned up. # connection_ttl=120 # # Number of threads in ldapclientd. # num_threads=10 # # Time to clean up socket files created by client applications # that were terminated abnormally. # socket_cleanup_time=300 # # Interval how often ldapclient should use when identifying and # cleaning up stale cache entries.
Administering LDAP-UX Client Services Using the LDAP-UX Client Daemon [domain_grp] enable =yes [automount] enable =yes [automountMap] enable=yes Chapter 4 85
Administering LDAP-UX Client Services Integrating with Trusted Mode Integrating with Trusted Mode This section describes features and limitations, PAM configuration changes and configuration parameter for integrating LDAP-UX with Trusted Mode. Overview Starting with LDAP-UX Client Services B.03.30, the product supports coexistence with Trusted Mode.
Administering LDAP-UX Client Services Integrating with Trusted Mode • For LDAP-based accounts that are not yet known to the system, you can configure an initial setting for the auditing flag. You can configure this flag such that when an account becomes known to the system for the first time, auditing for that account is immediately enabled or disabled. This flag is defined as the initial_ts_auditing parameter in the /etc/opt/ldapux/ldapux_client.conf file.
Administering LDAP-UX Client Services Integrating with Trusted Mode • Accounts stored and authenticated through the LDAP server adhere to the security policies of the directory server being used. These policies are specific to the brand and version of the directory server product deloyed. Examples of these policies include password expiration, password syntax checking, and account expiration. No policies of the HP-UX Trusted Mode product apply to accounts stored in the LDAP server.
Administering LDAP-UX Client Services Integrating with Trusted Mode Others • The authck -d command removes the /tcb/files/auth/... files created for LDAP-based accounts. When the LDAP-based account logs into the system again, a new /tcb/files/auth/... file with new audit ID is recreated. Therfore, it is not recommended to run the authck -d command when you configure LDAP-UX with Trusted Mode. • You cannot use the Trusted Mode management subsystem in SAM to manage LDAP-based accounts.
Administering LDAP-UX Client Services SASL GSSAPI Support SASL GSSAPI Support LDAP-UX Client Services B.04.00 includes support for the SASL / Generic Security Services Application Programming Interface (GSSAPI) authentication method for Kerberos v5. Currently, Kerberos v5 is the only security mechanism that is implemented to work with GSSAPI. For this release, we provide SASL/GSSAPI authentication method support only for Microsoft Windows 2000 or 2003 Active Directory.
Administering LDAP-UX Client Services SASL GSSAPI Support How SASL GSSAPI Works Figure 4-1 SASL GSSAPI Environment KDC Server AS 1 2 TGS 3 4 5 LDAP-UX Client Services 6 Windows 2000/ 2003 Active Direcotory The following describes how LDAP-UX binds a client using SASL GSSAPI to the LDAP directory server shown in Figure 4-1: 1. The LDAP-UX Client Service sends the principal name and password to the Authentication Server (AS). 2.
Administering LDAP-UX Client Services SASL GSSAPI Support 5. LDAP-UX Client Services sends the service ticket and binds to the LDAP directory server. 6. LDAP-UX Client Services verifies the received information and authenticates the LDAP client. Proxy User SASL/GSSAPI authentication is only for proxy user authentication for name service subsystem. When proxy is configured, you use either a user or service principal as a proxy user. User Principal The user principal must be configured in the KDC.
Administering LDAP-UX Client Services SASL GSSAPI Support The following is an example to use ldap_proxy_config -i command with proxy user without the realm information proxyusr and password proxywd: cd /opt/ldapux/config ./ldap_proxy_config -i proxyusr proxywd The following is an example to use ldap_proxy_config -d -c command to create a proxy user with the realm information john@CUP.HP.COM and the proxy user credential proxycrd: cd /opt/ldapux/config ./ldap_proxy_config -d john@CUP.HP.
Administering LDAP-UX Client Services SASL GSSAPI Support Keytab File LDAP-UX allows you to specify the keytab file when you use the SASL GSSAPI authentication. Run the setup program to specify the keytab file or use the kerberos_keytab_file option in /etc/opt/ldapux/ldapux_client.conf to specify the keytab file. If you do not specify a keytab file, LDAP-UX will use the default file specified in /etc/krb5.conf. If there is no default keytab file configured in /etc/krb5.conf, then the keytab file /etc/krb5.
Administering LDAP-UX Client Services SASL GSSAPI Support Changing Authentication methods If you wish to switch from your current authentication method, such as SIMPLE to SASL/GSSAPI, TLS:SIMPLE or TLS:SASL/GSSAPI, you must restart the ldapclientd daemon after making the configuration changes. This step is required to assure that the proper GSSAPI, Kereros and/or SSL initialization is completed.
Administering LDAP-UX Client Services PAM_AUTHZ Login Authorization Enhancement PAM_AUTHZ Login Authorization Enhancement The PAM_AUTHZ service module provides functionality that allows the administrator to control who can login to the system based on netgroup information found in the /etc/passwd and /etc/netgroup files. PAM_AUTHZ has been created to provide access control similar to the netgroup filtering feature that is performed by NIS. Starting LDAP-UX Client Services B.04.
Administering LDAP-UX Client Services PAM_AUTHZ Login Authorization Enhancement How Login Authorization Works The system administrator can define the access rules and store them in the policy file, /etc/opt/ldapux/pam_authz.policy. PAM_AUTHZ uses these access rules defined in the policy file to control the login authorization.
Administering LDAP-UX Client Services PAM_AUTHZ Login Authorization Enhancement 2. PAM_AUTHZ service module receives an authentication request from PAM framework. It processes all the access rules stored in the /etc/opt/ldapux/pam_authz.policy file. 3. If a rule indicates that the required information is stored in a LDAP server, PAM_AUTHZ constructs a request message and sends to the LDAP client daemon, ldapclientd. The LDAP client daemon performs the actual ldap query and returns the result to PAM_AUTHZ.
Administering LDAP-UX Client Services PAM_AUTHZ Login Authorization Enhancement Constructing an Access Rule in pam_authz.policy In the policy file, /etc/opt/ldapux/pam_authz.policy, an access rule consists of three fields as follows: :: All fields are mandatory. If any field is missing or contains the incorrect syntax, the access rule is considered to be invalid and is ignored by PAM_AUTHZ.
Administering LDAP-UX Client Services PAM_AUTHZ Login Authorization Enhancement Table 4-1 Field Syntax in an Access Rule (Continued) deny, allow unix_group
Administering LDAP-UX Client Services PAM_AUTHZ Login Authorization Enhancement Table 4-1 Field Syntax in an Access Rule (Continued) deny, allow other
Administering LDAP-UX Client Services PAM_AUTHZ Login Authorization Enhancement unix_user This option indicates that an administrator wants to control the login access by examining a user’s login name with a list of predefined users. If the login name matches one of the user names in the list, the authorization statement is evaluated to be true. The final access right is determined by evaluating the field.
Administering LDAP-UX Client Services PAM_AUTHZ Login Authorization Enhancement evaluated to be true. PAM_AUTH obtains the netgroup information by querying the name services specified in nsswitch.conf. For example: allow:netgroup:netgroup1,netgroup2,netgroup3 A user tries to login and he belongs to netgroup1. The above access rule is evaluated to be true. The user is granted login access ldap_group This option specifies that an access rule is based on the non-POSIXGroup membership.
Administering LDAP-UX Client Services PAM_AUTHZ Login Authorization Enhancement In the above example, if a user reports to paulw and the user’s job is related to marketing, then the user is granted the login access. The rule structure is very flexible about how to define access for certain groups of users. other PAM_AUTHZ ignores any access rules defined in the
Administering LDAP-UX Client Services PAM_AUTHZ Login Authorization Enhancement The following describes situations where PAM_AUTHZ skips an access rule and does not process it: • An access rule contains the wrong syntax. • PAM_AUTHZ processes the ldap_filter and ldap_gorup types of access rules by querying the LDAP directory server through ldapclientd daemon. If LDAP-UX Client Services is not running, PAM_AUTHZ skips all the ldap_filter and ldap_group types of rules.
Administering LDAP-UX Client Services Adding Additional Domain Controllers Adding Additional Domain Controllers Your Active Directory contains configuration profiles downloaded by each client system and name service data accessed by each client system. As your environment grows, you may need to add additional domain controllers to your environment. Follow these steps: Step 1. Use the dcpromo.exe tool to install and configure a new Active Directory domain controller.
Administering LDAP-UX Client Services Adding Users, Groups, and Hosts Adding Users, Groups, and Hosts Select one of the following methods to add data to ADS. • You can create user, group, and other service objects by using the object classes and attributes specified by RFC 2307. In this situation you must import an ldif file with all RFC 2307 object classes and attributes specified.
Administering LDAP-UX Client Services Adding Users, Groups, and Hosts 5. ADSI Edit appears in the Add/Remove Snap-In dialog box. Click OK. 6. In the Microsoft Management Console, click ADSI Edit and select Connect to... from the Action menu. 7. In the Connection dialog box, check Naming Context, and select Domain NC from the drop-down list at the right. Then click OK.. 8. Domain NC appears on the right pane. Double-click it to expand the list. 9. To change group attributes: a.
Administering LDAP-UX Client Services Displaying the Proxy User’s Distinguished Name Displaying the Proxy User’s Distinguished Name You can display the proxy user’s distinguished name (DN) by running /opt/ldapux/config/ldap_proxy_config -p. The following command displays the current proxy user: cd /opt/ldapux/config .
Administering LDAP-UX Client Services Verifying the Proxy User Verifying the Proxy User The proxy user information is stored encrypted in the file /etc/opt/ldapux/pcred and in kernel memory, referred to as SCS (Secure Credential Store). To determine if these are synchronized and check if the proxy user can authenticate to the directory, run /opt/ldapux/config/ldap_proxy_config -v as follows: cd /opt/ldapux/config .
Administering LDAP-UX Client Services Creating a New Proxy User Creating a New Proxy User Use the following steps to create a new proxy user and change your client systems to use the new proxy user. Step 1. Add the new proxy user to your directory with appropriate access controls. Step 2. Configure each client to use the new proxy user by running /opt/ldapux/config/ldap_proxy_config. Refer to the Example below. Step 3.
Administering LDAP-UX Client Services Displaying the Current Profile Displaying the Current Profile You can display the profile in use by any client by running /opt/ldapux/config/display_profile_cache on that client. The current profile is in the binary file /etc/opt/ldapux/ldapux_profile.bin. cd /opt/ldapux/config ./display_profile_cache You can also find out from where in the directory the client downloaded the profile by displaying the file /etc/opt/ldapux/ldapux_client.
Administering LDAP-UX Client Services Creating a New Profile Creating a New Profile To create a new profile, run /etc/ldapux/config/setup. When setup requests the DN of the profile, give a DN that does not exist and setup prompts you for the parameters to build a new profile. The setup program also configures the local client to use the new profile. Alternatively, you can use your directory administration tools to make a copy of an existing profile and modify it.
Administering LDAP-UX Client Services Modifying a Profile Modifying a Profile You can modify an existing profile directly using the Active Directory Services Interface (ADSI). Refer to Appendix B, “LDAP-UX Client Services Object Classes,” on page 147 for a complete description of the PosixDUAProfile and PosixNamingProfile object classes, their attributes, and what values each attribute can have.
Administering LDAP-UX Client Services Changing Which Profile a Client is Using Changing Which Profile a Client is Using Each client uses the profile specified in its startup file /etc/opt/ldapux/ldapux_client.conf. To make a client use a different profile in the directory, edit this file and change the DN specified in the PROFILE_ENTRY_DN line. Then download the profile as described in “Downloading the Profile Periodically” on page 57.
Administering LDAP-UX Client Services Creating an /etc/krb5.keytab File Creating an /etc/krb5.keytab File In the ADS multiple domain environment, your HP-UX client machine will communicate with multiple Windows 2000 or 2003 domain controllers. To set up Kerberos authentication, your HP-UX host needs to have a service key known by every domain controller, which also acts as KDC.
Administering LDAP-UX Client Services Considering Performance Impacts Considering Performance Impacts The advantage of an LDAP directory over flat files for naming and authentication services is its design for quick access to information in large databases. Still, with very large databases, administrators, and users should be aware of the following performance impacts: Enumeration Requests Enumeration requests are directory queries that request all of a database, for example all users or all groups.
Administering LDAP-UX Client Services Considering Performance Impacts NOTE The search time limit set during the setup procedure specifies the search timeout on the client side. To service enumeration requests, this parameter may need to be adjusted accordingly. 1. On your domain controller, click Start, then Run. In the Open box, enter ntdsutil, then click OK. 2. Enter ldap policies, and then press the Enter key.
Administering LDAP-UX Client Services Considering Performance Impacts For example, if your default search DN is set to your domain root DC=cup, DC=hp, DC=com, you can improve performance if you change the search base DN to search user and group information to CN=Users, DC=cup, DC=hp, DC=com for the passwd and group services.
Administering LDAP-UX Client Services Client Daemon Performance Client Daemon Performance Compared to previous networked name service systems, LDAP directory servers support a number of new features. And the general purpose nature of LDAP allows it to support a variety of applications, beyond those just used by a networked OS.
Administering LDAP-UX Client Services Client Daemon Performance does not exist, every time a user displays information about this file, using the ls command, a request to the directory server will be generated. The ldapclientd daemon currently supports caching of passwd, group, netgroup and automount map information. ldapclientd also maintains a cache which maps user’s accounts to LDAP DNs. This mapping allows LDAP-UX to support groupOfNames and groupOfUniqueNames for defining membership of an HP-UX group.
Administering LDAP-UX Client Services Client Daemon Performance Table 4-2 (Continued) Map Name group Benefits Frequent file system access may request information about groups that own particular files. Caching greatly reduces this impact. Example Side-Effect Removing a member of a group may not be visible to the file system, until after the cache expires. During this window, a user may be able to access files or other resources based on his/her group membership, which had been revoked.
Administering LDAP-UX Client Services Client Daemon Performance system activity is low, then connections that have been idle for a specified period of time (configurable in the ldapclientd.conf file) then those connections will be dropped, to free up directory server resources. Aside from ldapclientd connection time-out configuration, it is also possible to define a maximum number of connections that ldapclientd may establish.
Administering LDAP-UX Client Services Troubleshooting Troubleshooting This section describes problems you may encounter and troubleshooting techniques. Enabling and Disabling LDAP-UX Logging When a program or service is behaving incorrectly, enabling logging is one way to examine the events that occur to determine where the problem is. Enable LDAP-UX Client Services logging on a particular client as follows: Step 1. Edit the local startup file /etc/opt/ldapux/ldapux_client.
Administering LDAP-UX Client Services Troubleshooting You may want to move the existing log file and start with an empty file: mv /var/adm/syslog/local0.log /var/adm/syslog/local0.log.save Restart the syslog daemon with the following command: (Refer to syslogd (1M)or details.) kill -HUP ‘cat /var/run/syslog.pid‘. Enabling and Disabling PAM Logging When something is behaving incorrectly, enabling logging is one way to examine the events that occur to determine where the problem is.
Administering LDAP-UX Client Services Troubleshooting kill -HUP ‘cat /var/run/syslog.pid‘ Step 7. Remove the debug options from /etc/pam.conf. Step 8. Examine the log file at /var/adm/syslog/debug.log to see what actions were performed and if any are unexpected. Look for lines containing PAM. TIP Enable PAM logging only long enough to collect the data you need because logging can significantly reduce performance and generate large log files.
Administering LDAP-UX Client Services Troubleshooting If the output shows LDAP is not being searched, check /etc/nsswitch.conf to make sure LDAP is specified. If username is not found, make sure that user is in the directory and, if using a proxy user, make sure the proxy user is properly configured. If nsquery(1) displays the user’s information, make sure/etc/pam.conf is configured correctly for Kerberos. If /etc/pam.conf is configured correctly, check the directory’s policy management status.
Administering LDAP-UX Client Services Troubleshooting Try searching for a user’s information in the directory as the proxy user with a command similar to following: cd /opt/ldapux/bin ./ldapsearch-h servername -b “baseDN” -D -w\ passwd msSFUName=username using the name of your directory server (from display_profile_cache), search base DN (from display_profile_cache), proxy user (from ldap_proxy_config -p), proxy user password, and a user name from the directory.
Administering LDAP-UX Client Services Troubleshooting name: John R Bill Jones sAMAccountName: biljonz sAMAccountType: 805306368 userAccountControl: 546 uSNChanged: 15284 uSNCreated: 15283 whenChanged: 20001222132148.0Z whenCreated: 20001222132148.0Z gecos: John R Bill Jones,6394,DEV gidNumber: 1771 loginShell: /bin/ksh msSFUHomeDirectory: /tblv006/home/biljonz msSFUName: biljonz syncNisDomain: cup uidNumber: 467 If you do not get this output, your proxy user may not be configured properly.
Administering LDAP-UX Client Services Troubleshooting 130 Chapter 4
5 Modifying User Information This chapter describes the following tasks users need to perform: Chapter 5 • Changing Passwords • Changing Personal Information 131
Modifying User Information Changing Passwords Changing Passwords Users can change their password with the passwd(1) command. Depending on how PAM is configured and depending on where the user’s information is located (in the directory or in /etc/passwd), users may be prompted for their password twice as PAM searches in the configured locations for the user’s information.
Modifying User Information Changing Personal Information Changing Personal Information Personal information (“gecos” information), such as full name, phone number, and location, can be changed with the chfn(1) command which changes /etc/passwd. The login shell can be changed with the chsh(1) command, which also changes /etc/passwd. Refer to the LDAP-UX Client Services Release Notes to determine if these commands change entries in the directory with this release.
Modifying User Information Changing Personal Information 134 Chapter 5
6 Mozilla LDAP C SDK This chapter describes the Mozilla LDAP SDK for C and the SDK file components. This chapter contains the following sections: • • Chapter 6 “Overview” on page 136. “The Mozilla LDAP C SDK File Components” on page 137 briefly describes many of files that comprise the LDAP C SDK.
Mozilla LDAP C SDK Overview Overview The LDAP-UX Client Services provides the Mozilla LDAP C SDK 5.14.1 support. The LDAP C SDK is a Software Development Kit that contains a set of LDAP Application Programming Interfaces (API) to allow you to build LDAP-enabled clients. The functionality implemented in the SDK closely follows the interface outlined in RFC 2251. Using the functionality provided with the SDK, you can enable your clients to connect to LDAP v3-compliant servers and perform the LDAP functions.
Mozilla LDAP C SDK The Mozilla LDAP C SDK File Components The Mozilla LDAP C SDK File Components Table 7-1 shows the Mozilla LDAP C SDK 5.14.1 file components on the HP-UX 32 or 64 bit PA machine: Table 6-1 Mozilla LDAP C SDK File Components on the PA machine Files Description /usr/lib/libldap.sl (32-bit) /usr/lib/pa20_64/libldap.sl (64-bit) Main LDAP C SDK API libraries that link to the /opt/ldapux/lib libraries. /opt/ldapux/lib/libnspr4.sl (32-bit) /opt/ldapux/lib/libnss3.
Mozilla LDAP C SDK The Mozilla LDAP C SDK File Components Table 6-1 Mozilla LDAP C SDK File Components on the PA machine Files Description /opt/ldapux/contrib/ldapsdk/source.tar.gz Mozilla LDAP C SDK source (for license compliance). /opt/ldapux/bin/ldapdelete /opt/ldapux/bin/ldapmodify /opt/ldapux/bin/ldapsearch /opt/ldapux/bin/ldapcmp /opt/ldapux/bin/ldapcompare Tools to delete, modify, and search for entries in a directory. See the Netscape Directory Server Administrator’s Guide for details.
Mozilla LDAP C SDK The Mozilla LDAP C SDK File Components Table 6-2 Mozilla LDAP C SDK File Components on the IA machine Files /opt/ldapux/lib/hpux32/libnspr4.so (32-bit ) /opt/ldapux/lib/hpux32/libnss3.so (32-bit ) /opt/ldapux/lib/hpux32/libplc4.so (32-bit ) /opt/ldapux/lib/hpux32/libsoftokn3.so (32-bit ) /opt/ldapux/lib/hpux32/libssl3.so (32-bit ) /opt/ldapux/lib/hpux32/libfreebl_pure32_3.so /opt/ldapux/lib/hpux32/libplds4.so (32-bit ) Description LDAP C SDK dependency libraries.
Mozilla LDAP C SDK The Mozilla LDAP C SDK File Components Table 6-2 Mozilla LDAP C SDK File Components on the IA machine Files Description /opt/ldapux/contrib/ldapsdk/source.tar.gz Mozilla LDAP C SDK source (for license compliance). /opt/ldapux/bin/ldapdelete /opt/ldapux/bin/ldapmodify /opt/ldapux/bin/ldapsearch /opt/ldapux/bin/ldapcmp /opt/ldapux/bin/ldapcompare Tools to delete, modify, and search for entries in a directory. See the Netscape Directory Server Administrator’s Guide for details.
Mozilla LDAP C SDK The Mozilla LDAP C SDK File Components Table 6-3 Mozilla LDAP C SDK API Header Files (Continued) Header Files NOTE Chapter 6 Description /usr/include/disptmpl.h Support for LDAP display templates. Allows applications to convert LDAP entries into displayable text strings and HTML. /usr/include/lber.h Support for creating messages that follow the Basic Encoding Rules syntax. These APIs are used when building extended LDAP operations or controls. This file is a support file for ldap.
Mozilla LDAP C SDK The Mozilla LDAP C SDK File Components 142 Chapter 6
A Configuration Worksheet Use this worksheet to plan your LDAP-UX Client Services configuration. For installation and configuration details, refer to Chapter 2, “Installing LDAP-UX Client Services,” on page 9 for details.
Configuration Worksheet Each of the following should be configured once for each domain, except “Proxy user DN,” which only needs to be configured once regardless of the number of domains in the system.
Configuration Worksheet Table A-2 LDAP-UX Client Services Configuration Worksheet Explanation LDAP-UX Client Services Configuration Worksheet Appendix A Directory server host: The host name or IP address where your directory server is running. Example: sys001.hp.com (12.34.56.78) Directory server port: The TCP port number your directory server is using. If you use SSL, the default port number is 636. If you do not use SSL, the default port number is 389.
Configuration Worksheet 146 Appendix A
B LDAP-UX Client Services Object Classes This appendix describes the object classes used by LDAP-UX Client Services for configuration profiles.
LDAP-UX Client Services Object Classes In release B.02.00, LDAP-UX Client Services used two object classes for configuration profiles: • PosixDUAProfile • PosixNamingProfile With release B.03.00, the PosixDUAProfile and PosixNamingProfile object classes have been replaced by a single STRUCTURAL object class DUAConfigProfile. In addition, four new attributes are added.
LDAP-UX Client Services Object Classes The object class DUAConfigProfile is defined as follows: objectclass DUAConfigProfile superior top requires cn allows authenticationMethod, attributeMap, bindTimeLimit, credentialLevel, defaultSearchBase, defaultSearchScope, defaultServerList, followReferrals, objectclassMap, preferredServerList, profileTTL, searchTimeLimit, serviceAuthenticationMethod, serviceCredentialLevel, servicesearchDescriptor Appendix B 149
LDAP-UX Client Services Object Classes Profile Attributes Profile Attributes The attributes of PosixDUAProfile and PosixNamingProfile are defined as follows: cn is the common name of the profile entry. attributeMap is a mapping from RFC 2307 attributes to alternate attributes. Use this if your entries do not conform to RFC 2307. Each entry consists of: Service:Attribute=Altattribute where Service is one of the supported services: passwd, group, shadow, or PAM.
LDAP-UX Client Services Object Classes Profile Attributes credentialLevel is the identity clients use when binding to the directory. The value must be one of the following: proxy, anonymous, or proxy anonymous. proxy means use the configured proxy user. anonymous means use anonymous access. proxy anonymous means use the configured proxy user and if that fails, bind anonymously. If this attribute has no value, anonymous is the default.
LDAP-UX Client Services Object Classes Profile Attributes serviceSearchDescriptor is one to three custom search descriptors for each service. The format is Service:BaseDN ?Scope?(Filter) where Service is one of the supported services passwd, group, shadow, or PAM. BaseDN is the base DN at which to start searches. Scope is the search scope and can be one of the following: one, base, sub. Filter is an LDAP search filter, typically the object class. Each service can have up to three custom search descriptors.
C Command, Tool, and Migration Script Reference This appendix describes the commands and tools associated with the LDAP-UX Client Services: Appendix C 153
Command, Tool, and Migration Script Reference 154 • The “LDAP-UX Client Services Components” section describes many of the files that comprise this product. • The “Client Management Tools” section describes commands to manage your client systems. • The “LDAP Directory Tools” section briefly describes the tools ldapsearch, ldapmodify, and ldapdelete. • The “Name Service Migration Scripts” section describes the shell and Perl scripts that migrate your name service data to your LDAP directory.
Command, Tool, and Migration Script Reference LDAP-UX Client Services Components LDAP-UX Client Services Components The LDAP-UX Client Services product, comprising the following components, can be found under /opt/ldapux and /etc/opt/ldapux, except where noted. LDAP-UX Client Services libraries are listed on table C-2 and C-3. Table C-1 LDAP-UX Client Services Components Component Appendix C Description /etc/opt/ldapux/ldapux_client.
Command, Tool, and Migration Script Reference LDAP-UX Client Services Components Table C-1 LDAP-UX Client Services Components (Continued) Component /opt/ldapux/config/get_profile_entry Program to download a configuration profile from a directory. /opt/ldapux/config/display_profile_ cache Program to display the current configuration profile. /opt/ldapux/config/create_profile_ entry Program to create a new configuration profile.
Command, Tool, and Migration Script Reference LDAP-UX Client Services Components Table C-1 LDAP-UX Client Services Components (Continued) Component Appendix C Description /etc/opt/ldapux/ldapux_profile.bin Local domain (the primary domain) configuration profile file. /etc/opt/ldapux/domain_profiles Remote domains configuration profile file. /etc/opt/ldapux/domain_profiles/ ldapux_profile.bin.gc Global Catalog Server (GCS) profile file. Specifies which server (and port) serves as the GCS.
Command, Tool, and Migration Script Reference LDAP-UX Client Services Components a. Only certified for Netscape Directory Server 4.X or above on HP-UX. b. Applicable only for Netscape Directory Server 4.X or above on HP-UX. NOTE For LDAP C SDK libraries info, refer to Chapter 6, “Mozilla LDAP C SDK,” on page 135 for details. Table C-2 shows LDAP-UX Client Services libraries on the 11.0 or 11i v1 machine: Table C-2 LDAP-UX Client Services Libraries on the HP-UX 11.
Command, Tool, and Migration Script Reference LDAP-UX Client Services Components Table C-3 shows LDAP-UX Client Services libraries on 32 or 64 bit of the HP-UX 11i v2 PA machine: Table C-3 LDAP-UX Client Services Libraries on the HP-UX 11i v2 PA machine Files /usr/lib/libldap_send.1 (32-bit ) /usr/lib/libldap_util.1 (32-bit ) /usr/lib/libnss_ldap.1 (32-bit) /usr/lib/libldapci.1 (32-bit ) /usr/lib/libldap.1 (32-bit ) Description LDAP -UX Client Services libraries. /usr/lib/security/libpam_ldap.
Command, Tool, and Migration Script Reference LDAP-UX Client Services Components Table C-4 shows LDAP-UX Client Services libraries on 32 or 64 bit of the HP-UX 11i v2 IA machine: Table C-4 LDAP-UX Client Services Libraries on the HP-UX 11i v2 IA machine Files /usr/lib/hpux32/libldap_send.so.1 (32-bit ) /usr/lib/hpux32/libldap_util.so.1 (32-bit ) /usr/lib/hpux32/libnss_ldap.so.1 (32-bit) /usr/lib/hpux32/libldapci.so.1 (32-bit ) /usr/lib/hpux32/libldap.so.
Command, Tool, and Migration Script Reference Client Management Tools Client Management Tools This section describes the following programs for managing client systems. Most of these programs are called by the setup program during system configuration. • create_profile_entry—creates a new profile in the directory. • create_profile_cache—creates a new active profile from an LDIF profile. This is also called by the get_profile_entry tool.
Command, Tool, and Migration Script Reference Client Management Tools where infile is the LDIF file containing a profile, by default /etc/opt/ldapux/ldapux_profile.ldif and outfile is the name of the binary output file, by default /etc/opt/ldapux/ldapux_profile.bin. The LDIF file must contain an entry for the object class DUAConfigProfile. Examples The following command creates the binary profile file /etc/opt/ldapux/ldapux_profile.bin from the existing LDIF file /etc/opt/ldapux/ldapux_profile.
Command, Tool, and Migration Script Reference Client Management Tools where infile is a binary profile file, /etc/opt/ldapux/ldapux_profile.bin by default, and outfile is the output file, stdout by default. The binary profile contains mappings for all backend commands (even those that are unused or unsupported by LDAP-UX Client Services with Active Directory); all of which are displayed by display_profile_cache.
Command, Tool, and Migration Script Reference Client Management Tools Examples • The following command downloads the profile for the NSS specified in the client configuration file /etc/opt/ldapux/ldapux_client.conf and places the LDIF in the file /etc/opt/ldapux/ldapux_profile.ldif.
Command, Tool, and Migration Script Reference Client Management Tools where options can be any of the following: CAUTION -e erases the currently configured proxy user from the file /etc/opt/ldapux/pcred. Has no effect on the proxy user information in the directory itself. -i configures the proxy user interactively from stdin. Enter the command with -i then press the Enter key. Next enter the proxy user DN then press the Enter key.
Command, Tool, and Migration Script Reference Client Management Tools • The following example displays the current proxy user: ldap_proxy_config -p PROXY_DN: CN=Proxy User,CN=users,DC=cup,DC=hp,DC=com • The following example checks the configured proxy user information and checks whether or not the client can bind to the directory as the proxy user with LDAP-UX Client Services B.03.
Command, Tool, and Migration Script Reference Client Management Tools where: k [n|d] Required. The search key may be either n for name string or d for digit (a numeral search). -s Required. Indicates what backends are to be searched for information. -l Query the backend directly. Bypass the APIs and skip the name service switch. -h Provides Help on this command. -H <#> Specifies Help level (0-5). Larger numbers provide more information.
Command, Tool, and Migration Script Reference Client Management Tools igrp1 nss_status.............. NSS_SUCCESS pw_name...........(iuser1) pw_passwd.........(*) pw_uid............(101) pw_gid............(21) pw_age............() pw_comment........() pw_gecos..........(gecos data in files) pw_dir............(/home/iuser1) pw_shell..........(/usr/bin/sh) pw_audid..........(0) pw_audflg.........
Command, Tool, and Migration Script Reference Client Management Tools pw_dir............(/home/iuser2) pw_shell..........(/usr/bin/sh) pw_audid..........(0) pw_audflg.........(0) • An example beq command using group name igrp1 as the search key, grp (group) as the service, and ldap as the library is shown below: ./beq -k n -s grp -l /usr/lib/libnss_ldap.1 igrp1 nss_status.............. NSS_SUCCESS gr_name...........(igrp1) gr_passwd.........(*) gr_gid............(21) pw_age............
Command, Tool, and Migration Script Reference Client Management Tools Examples The following command displays the fully qualified domain name information for a given user john: ./get_ads_dom john The output shows below after you run the above command: Domain for user john is: usa.cup.hp.com The uid2dn Tool This tool, found in /opt/ldapux/contrib/bin, displays the user’s Distinguish Name (DN) information for a given UID. Syntax uid2dn [UID] where UID is a user’s UID information.
Command, Tool, and Migration Script Reference Client Management Tools Examples The following command displays the homedirectory attribute information for the passwd service: ./get_attr_map.pl passwd homedirectory The following command displays the uidnumber attribute information for the passwd service: ./get_attr_map.pl passwd uidnumber NOTE HP does not support the get_ads_dom, uid2dn and get_attr_map tools at the present time.
Command, Tool, and Migration Script Reference LDAP Directory Tools LDAP Directory Tools This section briefly describes the tools ldapsearch, ldapmodify, ldapdelete. ldapsearch, ldapmodify, and ldapdelete are described in detail in the respective LDAP directory literature. ldapsearch You use the ldapsearch command line utility to locate and retrieve LDAP directory entries.
Command, Tool, and Migration Script Reference Name Service Migration Scripts Name Service Migration Scripts This section describes the shell and Perl scripts that can migrate your name service data either from source files or NIS maps to your Active Directory. These scripts are found in /opt/ldapux/migrate/ads. The two shell scripts migrate_all_online.ads.sh and migrate_all_nis_online.ads.sh migrate all your source files or NIS maps, while the Perl scripts migrate_passwd_ads.pl, migrate_hosts_ads.
Command, Tool, and Migration Script Reference Name Service Migration Scripts If you change the default naming context, modify the file migrate_common.ph and change it to reflect your naming context. NOTE Since users and groups are migrated to the same container, they must have unique names (common name) for the migration to succeed. After the password and group data migration, the POSIX user accounts are disabled with no password.
Command, Tool, and Migration Script Reference Name Service Migration Scripts also prompt you for whether to leave the output as LDIF or to add the entries to your directory. These scripts call the Perl scripts described under “Migrating Individual Files” on page 175. You will need to modify these scripts to ensure that any calls to Perl scripts not listed in Table C-6 are commented out. Migrating Individual Files The following Perl scripts migrate each of your source files in /etc to LDIF.
Command, Tool, and Migration Script Reference Name Service Migration Scripts Migration Scripts The migration scripts are described in Table C-7 below. Table C-7 Migration Scripts Script Name migrate_base.pl creates base DN information migrate_group_ads.pl migrates groups in /etc/group migrate_hosts_ads.pl 176 Description a migrates hosts in /etc/hosts migrate_networks_ads.pl migrates networks in /etc/networks migrate_passwd_ads.plb migrates users in /etc/passwd migrate_protocols_ads.
Command, Tool, and Migration Script Reference Name Service Migration Scripts a. Systems have been configured with the same hostname, then the migration script migrate_host.pl, will create multiple entries in its resulting LDIF file with the same DN for the hostname for each of the IP addresses. Since DNs need to be unique in an LDAP directory, users should first manually merge the IP addresses with one designated host record and delete the duplicated records in their LDIF file.
Command, Tool, and Migration Script Reference Name Service Migration Scripts msSFUName: jbloggs cn: Joe Bloggs syncNisDomain: cup loginShell: /usr/bin/sh uidNumber: 101 gidNumber: 20 msSFUHomeDirectory: /home/jbloggs gecos: Joe Bloggs,Cupertino,888-9999, sAMAccountName: jbloggs The following commands convert /etc/group into LDIF and place the result in /tmp/group.ldif: $ export LDAP_BASEDN=”DC=cup,DC=hp,DC=com” $ migrate_group.pl /etc/group /tmp/group.ldif $ cat /tmp/group.
D Sample PAM Configuration File This appendix provides a sample PAM configuration file. This pam.conf file is intended as an example only. Refer to pam.conf(4) for more details.
Sample PAM Configuration File The following is a sample PAM configuration file used on the HP-UX 11.0 or 11i v1 system: # # PAM configuration # # This pam.conf file is intended as an example only. # see pam.conf(4) for more details # ################################################################ # This sample file will authenticate the user who belongs to # # either Kerberos or Unix system.
Sample PAM Configuration File dtlogin dtlogin dtaction dtaction OTHER # # Password # login login passwd passwd dtlogin dtlogin dtaction dtaction OTHER session session session session session sufficient required sufficient required required /usr/lib/security/libpam_krb5.1 /usr/lib/security/libpam_unix.1 /usr/lib/security/libpam_krb5.1 /usr/lib/security/libpam_unix.1 /usr/lib/security/libpam_unix.
Sample PAM Configuration File dtlogin auth required libpam_hpsec.so.1 dtlogin auth sufficient libpam_krb5.so.1 dtlogin auth required libpam_unix.so.1 try_first_pass dtaction auth required libpam_hpsec.so.1 dtaction auth sufficient libpam_krb5.so.1 dtaction auth required libpam_unix.so.1 try_first_pass ftp auth required libpam_hpsec.so.1 ftp auth sufficient libpam_krb5.so.1 ftp auth required libpam_unix.so.1 try_first_pass OTHER auth required libpam_unix.so.
E Sample /etc/krb5.conf File This appendix provides a sample krkb5.conf file, which supports two domains.
Sample /etc/krb5.conf File [libdefaults] default_realm = CA.HP.COM default_tgs_enctypes = DES-CBC-CRC default_tkt_enctypes = DES-CBC-CRC ldapux_multidomain = 1 ccache_type = 2 [realms] CA.HP.COM = { kdc = HPSVRC.CA.HP.COM:88 kpasswd_server = HPSVRC.CA.HP.COM:464 } NY.HP.COM = { kdc = HPSVRD.NY.HP.COM:88 kpasswd_server = HPSVRD.NY.HP.COM:464 } [domain_realm] .ca.hp.com = CA.HP.COM .ny.hp.com = NY.HP.COM [logging] kdc = FILE:/var/log/krb5kdc.log admin_server = FILE:/var/log/kadmin.
F Sample /etc/pam.conf File for HP-UX 11i v1 Trusted Mode This Appendix provides a sample PAM configuration file, /etc/pam.
Sample /etc/pam.conf File for HP-UX 11i v1 Trusted Mode coexistence of LDAP-UX and Trusted Mode. If your directory server is the Microsoft Windows 2000 Active Directory Server and your LDAP client is in the Trusted Mode, the /etc/pam.conf file must be configured as shown in the following example file. Use the following steps to create the /etc/pam.conf example file on the HP-UX 11i v1 system: Step 1. copy the /etc/pam.krb5 file to the /etc/pam.conf file. Step 2. Edit the /etc/pam.
Sample /etc/pam.
Sample /etc/pam.
G Sample /etc/pam.conf File for HP-UX 11i v2 Trusted Mode This Appendix provides a sample PAM configuration file, /etc/pam.
Sample /etc/pam.conf File for HP-UX 11i v2 Trusted Mode coexistence of LDAP-UX and Trusted Mode. If your directory server is the Microsoft Windows 2000 or 2003 Active Directory Server and your LDAP client is in the Trusted Mode, the /etc/pam.conf file must be configured as shown in the following example file. Use the following steps to create the /etc/pam.conf example file on the HP-UX 11i v2 system: Step 1. copy the /etc/pam.krb5 file to the /etc/pam.conf file. Step 2. Edit the /etc/pam.
Sample /etc/pam.
Sample /etc/pam.
Glossary Access Control Instruction A specification controlling access to entries in a directory. Access Control List One or more ACIs. ACI See See Access Control Instruction ACL See See Access Control List. IETF Internet Engineering Task Force; the organization that defines the LDAP specification. See http://www.ietf.org. Configuration profile An entry in an LDAP directory containing information common to many clients, that allows clients to access user, group and other information in the directory.
Glossary NIS NIS See See Network Information Service NSS See See Name Service Switch PAM See See Pluggable Authentication Mechanism Pluggable Authentication Mechanism (PAM) A framework that allows different authentication service modules to be made available without modifying applications. See pam_ldap(5), pam(3), and pam.conf(4) for more information. Profile See See Configuration profile Remote Domains All domains in the forest, other than the local domain, are referred to as remote domains.
Index Symbols /etc/group, 15 /etc/krb5.conf, 183 /etc/krb5.keytab, 116 /etc/nsswitch.conf, 12, 20, 49 /etc/nsswitch.ldap, 20, 155 /etc/pam.
Index F file migrating, 174 file migration, 174 finger, 6 fingers, 117 followReferrals, 151 ftp, 6 G GCS, 61 adding to search scope, 70 removing from a search scope, 70 get_profile_entry tool, 163 Global Catalog Server.
Index name service data migrating, 173 Name Service Switch.
Index syslog daemon, 125, 126 T telnet, 6 test clients, 46 test name service, 46 time limit on directory binding, 37 time limit on searches, 37 tools ADSI, 107 beq, 166 client management, 161 create_profile_cache, 161 create_profile_entry, 161 create_profile_schema, 162 directory, 137, 138, 140, 141, 156 display_profile_cache, 162, 169, 170 get_profile_entry, 163 ldap_proxy_config, 164 ldapdelete, 172 ldapmodify, 133, 172 ldapsearch, 172 migration, 173 Perl, 157 troubleshooting, 124 directory logging, 126 L