
LDAP-UX Client Services B.04.00 Administrator's Guide


Installing And Configuring LDAP-UX Client Services
Configure Subsequent Client Systems
Chapter 272
:
group: files ldap
:
:
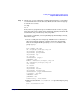
3. Verify:
#grget -n xgroup1
xgroup1:*:999: xuser2
If xuser2 shows up as a member of xgroup1, then your setup is
correct.
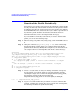
Configure Subsequent Client Systems
Once you have configured your directory and one client system, you can
configure subsequent client systems using the following steps. Modify
any of these files as needed.
Step 1. Use swinstall to install LDAP-UX Client Services on the client system.
This does not require rebooting the client system.
Step 2. Copy the following files from a configured client to the client being
configured:
• /etc/opt/ldapux/ldapux_client.conf
• /etc/opt/ldapux/pcred only if you have configured a proxy user, not if
you are using only anonymous access
• /etc/pam.conf
• /etc/nsswitch.conf
• /etc/opt/ldapux/acred if the /etc/opt/ldapux/acred file exists
• cert7.db or cert8.bd and key3.db flles if SSL is enabled
Set all file access mode permission to be the same as those of the first
client being configured.
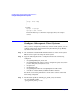
Step 3. Download the profile by running get_profile_entry as follows:
cd /opt/ldapux/config
./get_profile_entry -s nss