
LDAP-UX Client Services B.04.00 Administrator's Guide


Installing And Configuring LDAP-UX Client Services
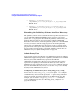
Configure LDAP-UX Client Services with Publickey Support
Chapter 2 53
./get_profile_entry -s nss
Step 5. Run the /opt/ldapux/config/display_profile_cache tool to check
the configuration of the serviceAuthenticationMethod attribute:
./display_profile_cache
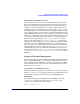
For example:
If the serviceAuthenticationMethod:keyserv:sasl/digest-md5
entry is added to the profile entry in the LDAP directory, you can see the
following information when you run the display_profile_cache tool:
serv-auth: keyserv:sasl/digest-md5
auth opts: username: uid
realm:
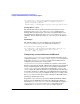
For subsequent LDAP-UX client systems that share the same profile
configuration, use the following steps to download and activate the
profile:
Step 1. Login as root.
Step 2. Go to /opt/ldapux/config:
cd /opt/ldapux/config
Step 3. Use /opt/ldapux/config/get_profile_entry to download the
modified LDIF profile:
./get_profile_entry -s nss
Step 4. Run the /opt/ldapux/config/display_profile_cache tool to check
the configuration of the serviceAuthenticationMethod attribute:
./display_profile_cache
Configuring Name Service Switch
Configure the Name Service Switch (NSS) to enable the LDAP support
for publickey.
You can save a copy of /etc/nsswitch.conf file and modify the original
to add ldap support to the publickey service. See /etc/nsswitch.ldap
for a sample.
The following shows the sample file, /etc/nsswitch.ldap: