
Using Microsoft Certificates with HP-UX IPSec A.03.00

9
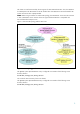
1. Use the ipsec_config add csr command to create the certificate request as documented in
the HP-UX IPSec Administrator's Guide.
On host1, HP used the following command:
ipsec_config add csr -subject cn=host1.hpipsec.hp.com
2. If you do not have a web browser on you HP-UX system that can access the Windows CA's web
interface, copy the certificate request file, /var/adm/ipsec/ipsec.csr, to a system with
access.
3. Start a web browser and connect to the Microsoft Certificate Services on the CA system using the
following URL:
http://ca_system/certsrv
Where ca_system is the CA system name or IP address.
The Microsoft Certificate Services utility starts and displays the Welcome page.
Select Request a certificate.
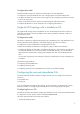
4. From the Request a certificate page, select advanced certificate request.
5. From the Advanced Certificate Request page, select Submit a certificate request by using a base-
64-encoded CMC or PKCS#10 file.
The Certificate Services utility opens the Submit a Certificate Request or Renewal Request page.
6. Paste the contents of the CSR file (the contents of the ipsec.csr file) in the Saved Request
window. Alternatively, you can select Browse for a file to insert and specify the name of the CSR
file.
7. If you are using an enterprise CA, the page includes a drop-down menu for a Certificate Template.
Select the name of the template created in “Configuring certificate services for IPSec on an issuing
CA,” such as the name L2TP/IPSec (Offline request)
Leave the Additional Attributes window blank.
Click Submit.
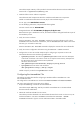
By default, an enterprise CA is configured to automatically approve certificate requests. If this is
not the case, the Certificate Services displays a Certificate Pending page with a request ID
number. Record this ID number; you will need it to approve the request.
Use a procedure described in the Microsoft documentation to approve the request, such as using
the Windows Certification Authority MMC or the Windows certutil command.
If the enterprise CA is configured with the default parameters, it automatically approves the
certificate request and displays the Certificate Issued page.
8. The Certificates Issued page enables you to download the certificate to a file and select the
encoding method.
Do not specify Download certificate chain.
Click Download certificate to download the certificate to a file.
9. The Windows system opens a File Download - Security Warning box. Click Save. In the Save As
dialog box, specify the file location. The default file name is certnew.cer. Click Save.