
Using Microsoft Certificates with HP-UX IPSec A.02.01
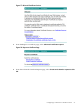
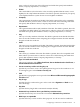


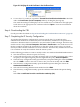

Figure 25 Certificate Store Dialog Box
6. The Certificate Import Wizard displays a completion message. Click Finish.
Click OK to close the Certificate box.
Alternatively, if the CA's certificate is already stored in a file on the CA system, you can copy
the file to the client. On the client system, right click the certificate file and select Install Certificate
to start the Certificate Import Wizard and complete the certificate installation.
Step 5: (Optional) Verifying the Certificates
Use the following procedure to verify and view the contents of the local certificate and the CA's
certificate:
1. Start the MMC Certificates snap-in.
From the Microsoft Start menu, click Run and type MMC. Click OK.
From the MMC window, click File→Add/Remove Snap-in.
From the Add/Remove Standalone Snap-in window, click Add.
From the Add Standalone Snap-in window, select Certificates. Click Add.
In the Certificates snap-in window, select Computer Account. Click Next.
In the Select computer window, select Local computer. Click Finish.
Close the Add Standalone Snap-in window by clicking Close.
Close the Add/Remove Snap-in window by clicking OK.
2. To view the local certificate, go to the left navigation pane and expand the Certificates
(Local Computer) by clicking the plus sign (+).
Expand the Personal folder by clicking the plus sign (+).
Expand the Certificates subfolder by clicking the plus sign (+). An icon for the certificate
appears in the right pane, as shown in Figure 26 (identifying information has been obscured).
Right click the icon for the certificate and select Open to view more information about the
certificate.
Configuring a Certificate for a Windows Client 29