
HP-UX IPFilter A.03.05.13 Administrator's Guide: HP-UX 11i v3

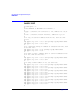

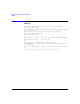
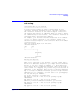
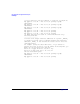
Table Of Contents
- HP-UX IPFilter Version A.03.05.13 Administrator's Guide
- Legal Notices
- Table of Contents
- Preface: About This Document
- 1 Installing and Configuring HP-UX IPFilter
- Overview of HP-UX IPFilter Installation
- Step 1: Checking HP-UX IPFilter Installation Prerequisites
- Step 2: Loading HP-UX IPFilter Software
- Step 3: Determining the Rules for IPFilter
- Step 4: Adding Rules to the Rules Files
- Step 5: Loading IPFilter and NAT Rules
- Step 6: Verifying the Installation and Configuration
- Kernel Tunable Parameters
- Supported and Unsupported Interfaces
- Troubleshooting HP-UX IPFilter
- 2 HP-UX IPFilter on HP-UX 11i Version 3
- 3 Rules and Keywords
- IPFilter Configuration Files
- Basic Rules Processing
- IPFilter Keywords
- pass and block: Controlling IP Traffic
- in and out: Bidirectional Filtering
- quick: Optimizing IPFilter Rules Processing
- on: Filtering by Network Interfaces
- from and to: Filtering by IP Addresses and Subnets
- log: Tracking Packets on a System
- proto: Controlling Specific Protocols
- opt and ipopts: Filtering on IP Options
- icmp-type: Filtering ICMP Traffic by Type
- port: Filtering on TCP and UDP Ports
- keep state: Protecting TCP, UDP, and ICMP Sessions
- flags: Tight Filtering Based on TCP Header Flags
- keep frags: Letting Fragmented Packets Pass
- with frags: Dropping Fragmented Packets
- with short: Dropping Short Fragments
- return-rst: Responding to Blocked TCP Packets
- return-icmp: Responding to Blocked ICMP Packets
- dup-to: Drop-Safe Logging
- NAT Keywords
- 4 Dynamic Connection Allocation
- 5 Firewall Building Concepts
- Blocking Services by Port Number
- Using Keep State
- Using Keep State with UDP
- Using Keep State with ICMP
- Logging Techniques
- Improving Performance with Rule Groups
- Localhost Filtering
- Using the to
- Creating a Complete Filter by Interface
- Combining IP Address and Network Interface Filtering
- Using Bidirectional Filtering Capabilities
- Using port and proto to Create a Secure Filter
- 6 HP-UX IPFilter Utilities
- 7 HP-UX IPFilter and FTP
- 8 HP-UX IPFilter and RPC
- 9 HP-UX IPFilter and IPSec
- 10 HP-UX IPFilter and Serviceguard
- A HP-UX IPFilter Configuration Examples
- B HP-UX IPFilter Static Linking
- C Performance Guidelines
- Index

HP-UX IPFilter Configuration Examples
nat-setup
Appendix A 173
nat-setup
Configuring NAT on your network.
================================
To start setting up NAT, we need to define which is your
"internal" interface and which is your "external" interface.
The "internal" interface is the network adapter connected to
the network with private IP addresses which you need to change
for communicating on the Internet. The "external" interface is
configured with a valid internet address.
For example, your internal interface might have an IP address
of 10.1.1.1 and be connected to your ethernet, whilst your
external interface might be a PPP connection with an IP number
of 204.51.62.176.
Thus your network might look like this:
<Internal Network>
[pc] [pc]
| |
+-+---------+------+
|
[firewall]
|
|
Internet
<External Network>
Writing the map-rule.
---------------------
When you're connected to the Internet, you will either have a
block of IP addresses assigned to you, maybe several different
blocks, or you use a single IP address, i.e. with dialup PPP.
If you have a block of addresses assigned, these can be used to
create either a 1:1 mapping (if you have only a few internal IP
addresses) or N:1 mappings, where groups of internal addresses
map to a single IP address and unless you have enough Internet
addresses for a 1:1 mapping, you will want to do "portmapping"
for TCP and UDP port numbers.
For an N:1 situation, you might have:
map ppp0 10.1.0.0/16 -> 209.23.1.5/32 portmap tcp/udp
10000:40000
map ppp0 10.1.0.0/16 -> 209.23.1.5/32 portmap
where if you had 16 addresses available, you could do:
map ppp0 10.1.0.0/16 -> 209.23.1.0/28 portmap tcp/udp
10000:40000
map ppp0 10.1.0.0/16 -> 209.23.1.0/28 portmap