
Backing Up and Restoring Data on HP-UX EVFS Volumes Using HP OpenView Storage Data Protector 6.0
$ mount -F vxfs /dev/evfs/vg01/ldp_test /dp_test
$ mount -F vxfs /dev/evfs/vg01/ldp_backup /dp_backup
Step 6 Create a sample directory with sample files in the source directory.
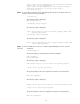
Step 7 To verify if the HP-UX EVFS is enabled on the source and target volumes, enter the following
command and check the EVFS volume state displayed in the output:
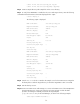
$ evfsvol display -a
The following output is displayed:
EVFS Volume Name: /dev/evfs/vg01/ldp_test
Mapped Volume Name: /dev/vg01/ldp_test
EVFS Volume State: enabled
EMD Size (Kbytes): 520
Max User Envelopes: 1024
Data Encryption Cipher: aes-128-cbc
Digest: sha1
Owner Key ID: root.root
Recovery Agent Key IDs:
Total Recovery Agent Keys: 0
User Key IDs:
Total User Keys: 0
EVFS Volume Name: /dev/evfs/vg01/ldp_backup
Mapped Volume Name: /dev/vg01/ldp_backup
EVFS Volume State: enabled
EMD Size (Kbytes): 520
Max User Envelopes: 1024
Data Encryption Cipher: aes-128-cbc
Digest: sha1
Owner Key ID: root.root
Recovery Agent Key IDs:
Total Recovery Agent Keys: 0
User Key IDs:
Total User Keys: 0
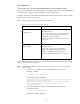
Step 8 Pass the dir/file which is created as the sample source for the Data Protector. Target the
file library device under the target directory on which the target EVFS volume is mounted.
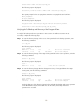
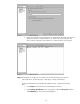
Step 9 Start the back up session.
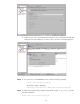
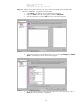
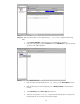
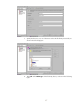
Step 10 Connect to Data Protector Cell manager. To connect to the GUI version of the HP OpenView
Storage Data Protector, rlogin to the evfs6.hp.com system (system on which the data
protector cell manager is installed), and invoke the required path
(/opt/omni/bin/xomni) for the Cell Manager, as shown in the following example:
evfs6# export DISPLAY=<hostname>:0.0
34