Backing Up and Restoring Data on HP-UX EVFS Volumes Using HP OpenView Storage Data Protector 6.0 Legal Notices................................................................................................................................... 1 Executive Summary .............................................................................................................................. 1 Introduction............................................................................................................
Legal Notices © Copyright 2007 Hewlett-Packard Development Company, L.P. Confidential computer software. Valid license from HP required for possession, use or copying. Consistent with FAR 12.211 and 12.212, Commercial Computer Software, Computer Software Documentation, and Technical Data for Commercial Items are licensed to the U.S. Government under vendor's standard commercial license. The information contained herein is subject to change without notice.
Executive Summary For enterprise customers, backing up and restoring data stored on HP-UX Encrypted Volume and File Systems (EVFS) volumes are critical. However, the available native backup tools such as cpio and dd pose some limitations. To overcome these limitations and to offer a reliable, easy, and efficient method to back up and restore data on HP-UX EVFS volumes, HP recommends using the HP OpenView Storage Data Protector 6.0 (Data Protector) software.
• • In the case of input files, which are larger than the physical size of the tape device, the data spans across multiple tape devices. In addition, the block size (bs) must be specified accurately as an exact multiple of the physical device size. Failure to specify the exact block size can result in data inconsistency, or data overlap. For more information on this limitation, see dd(1). The dd tool does not provide an option to perform an incremental backup operation.
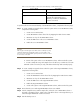
Table 1 Source and Target for Full Volume Backup of Encrypted Data on HP-UX EVFS Volumes. Source/Target Description Source HP-UX EVFS volume open for raw access Target Tape device To perform a full volume backup of encrypted data from an HP-UX EVFS volume to a tape device, complete the following steps: Step 1 To configure an HP-UX EVFS volume on the source system, complete the following tasks: 1. Create a source LVM volume. 2. Create HP-UX EVFS volume device files by mapping the LVM volume to EVFS.
Step 5 Close raw access to the source HP-UX EVFS volume by entering the evfsvol close command to begin the procedure to return the volume to its original state. Step 6 Enable the HP-UX EVFS volume using the evfsvol enable command, and remount the file system on the HP-UX EVFS volume. For more information on using HP OpenView Storage Data Protector to perform a full volume encrypted backup, see Test Scenario 1A.
Target HP-UX EVFS volume open for raw access To restore the backed up data on a tape device (originally created from an HP-UX EVFS volume) to an HP-UX EVFS volume by using the HP OpenView Storage Data Protector, complete the following steps: Note: You must restore the backed up keys of an HP-UX EVFS volume when you restore the backed up data on the HP-UX EVFS volumes. For more information on how to restore the backed up keys of HP-UX EVFS volumes, see Recovering Keys of an HP-UX EVFS Volume.
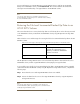
Table 3 Source and Target for a File Level Incremental Backup of an HP-UX EVFS Volume Source/Target Description Source HP-UX EVFS volume Target File library device or a device that supports file system back up in a directory on which the HP-UX EVFS volume is mounted. To perform a file level incremental backup of an HP-UX EVFS volume, complete the following steps: Step 1 To create a sample encrypted volume with a file system on the source HP-UX EVFS volume, complete the following tasks: 1.
For more information on using HP OpenView Storage Data Protector to perform an incremental backup of an HP-UX EVFS volume, see Test Scenario 2A. This scenario illustrates the full and the subsequent incremental backup of encrypted data on an HP-UX EVFS volume. Note: You can also specify the pre-exec command to perform a file level incremental backup. Specifying the pre-exec command includes enabling the source HP-UX EVFS volume.
Backing Up Keys of an HP-UX EVFS Volume This section describes how to back up the keys of an HP-UX EVFS volume by using HP OpenView Storage Data Protector. EVFS uses symmetric volume encryption keys to encrypt the volume data. EVFS also uses public and private keys to encrypt the volume encryption keys, and it uses passphrases to encrypt private keys. Hence, it is critical to back up the keys along with the data.
Restoring the Backed Up Keys of an HP-UX EVFS Volume This section describes how to restore the backed up keys of an HP-UX EVFS volume by using HP OpenView Storage Data Protector. The backed up keys that are restored include public keys, private keys, and passphrase files in the default key storage directory (/etc/evfs/pkey). HP recommends that you restore the backed up keys after you restore the backed up data on an HP-UX EVFS volume.
For more information on using HP OpenView Storage Data Protector to recover the backed up keys of an HP-UX EVFS volume, see Test Scenario 3B.
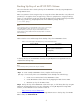
Data Protector Cell Manager HP 9000 System running HP-UX 11i v2 Client System (Disk Agent and Media Agent) Integrity System running HP-UX 11i v2 Backup Medium Test Scenario 1 Tape device: HP:C7438A Tapes used :DDS-2 and DDS-4 Test Scenario 2 File library device in the directory on which the target HP-UX EVFS volume is mounted.
$ lvcreate -L 5120 -n ldp_raw vg01 The following output is displayed: Logical volume "/dev/vg01/ldp_raw" has been successfully created with character device "/dev/vg01/rldp_raw". Logical volume "/dev/vg01/ldp_raw" has been successfully extended. Volume Group configuration for /dev/vg01 has been saved in /etc/lvmconf/vg01.conf 2.
Step 4 To create a sample directory to mount the HP-UX EVFS volume, enter the following command: $ mkdir /dp_raw Step 5 To mount the file system, enter the following command: $ mount -F vxfs /dev/evfs/vg01/ldp_raw /dp_raw Step 6 Create sample files in the directory on which the source HP-UX EVFS volume is mounted. In this example, 5.
----- EVFS Volume Name -----|--- State ---|---------------- Rates ---------------| kbpsr kbpsw dkbps ekbps /dev/evfs/vg01/ldp_raw raw 209 18 676 90 Step 11 Connect to Data Protector Cell manager. To connect to the GUI version of the HP OpenView Storage Data Protector, rlogin to the evfs6.hp.
4. Select the components that must be installed on the client system, as shown in the following figure. In this example, the Disk Agent and Media Agent are installed on the client system. 5. Select Finish to complete installation of the required components on the client system.
Step 13 Connect the tape device to the client system, evfs2.hp.com, and insert the tape. Step 14 To auto configure, scan and format the tape device that is connected to the client system using HP OpenView Storage Data Protector, complete the following tasks: 1. Select Devices & Media in the Data Protector Cell Manager Context List. 2. Right-click Devices in the left pane, and select Autoconfigure Devices, as shown in the following figure. 3.
4. Select the backup devices (tape device) to be auto configured, as shown in the following figure: 5.
6. Scan the configured tape device, as shown in the following figure: 7.
8. Format the tape device. Step 15 To perform a full raw volume backup of the HP-UX EVFS volume to the tape, complete the following tasks: 1. Select Backup in the Data Protector Cell Manager Context List, as shown in the following figure. 2. In the left scoping pane, expand Backup Specifications. 3.
4. In the Create New Backup dialog box, select the required template from the list of available templates, as shown in the following figure. 5. You can skip the following steps in the wizard that specify the properties of the backup by selecting Next.
6. In the Backup Object Summary page, select Manual add..., as shown in the following figure. 7.
8. In the General Selection page, select the client with the disk image that must be backed up, as shown in the following figure: 9. In the General Object Options property page, you must specify the options for reporting, data protection, and catalog protection, as shown in the following figure. You can also specify the pre-exec and post-exec scripts.
10. Click Next. 11. In the Disk Image Object Options property page, specify the disk image section, /dev/evfs/vg01/rldp_raw, which must be backed up.
12. Click Add, and then click Finish. 13. In the Backup Object Summary page, review the summary of the backup specification and click Next, as shown in the following figure: 14. Select the Start Backup icon, and click Next, as shown in the following figure: 15.
The Session Information Message displays the status of the backup. If the size of the backup data is larger than the size of the tape, the Data Protector prompts for a mount request. To respond to a mount request, insert the second tape and click Confirm Mount Request. 16. Continue with the backup session till the HP-UX EVFS volume is backed up completely.
check the state of the HP-UX EVFS volume: $ evfsadm stat /dev/evfs/vg01/ldp_raw The following output is displayed: ----- EVFS Volume Name -----|--- State ---|---------------- Queues --------------| orr owr odr oer /dev/evfs/vg01/ldp_raw raw 0 0 0 0 ----- EVFS Volume Name -----|--- State ---|--------------- Counters -------------| bpr bpw bpd bpe /dev/evfs/vg01/ldp_raw raw 5254838 4697538 2704 4710186 ----- EVFS Volume Name -----|--- State ---|---------------- Rates ---------------| kbpsr kbpsw dkbps ekbps
evfs6# evfsvol enable /dev/evfs/vg01/ldp_raw The system prompts for the user paraphrase. Enter the user paraphrase. Enter user passphrase: The following output is displayed: Encrypted volume "/dev/evfs/vg01/ldp_raw" has been successfully enabled - 6.
3. Select the HP-UX EVFS volume, /dev/evfs/vg01/ldp_raw, which must be restored, as shown in the following figure: 4. Select the target client system on which the data must be restored, as shown in the following figure. (The EVFS volume must be open for raw access. The Data Agent must be installed on the target client system.
5. Start the restore session. The Data Protector displays a Session Information message that notifies the successful completion of a restore session, as shown in the following figure.
evfs6# evfsvol enable /dev/evfs/vg01/ldp_raw The following output is displayed: Successfully closed raw access to EVFS volume "/dev/evfs/vg01/ldp_raw" The system prompts for the user passphrase. Enter the user passphrase and confirm it.
Test Scenario 2 Test Scenario 2A - File Level Incremental Backup of an Encrypted Volume This scenario illustrates the steps performed when successfully testing a file level incremental backup of an HP-UX EVFS volume, by using HP OpenView Storage Data Protector. The data is read in the clear from an encrypted volume and the backup image is written to a disk partition, which is an encrypted volume. Table11 lists the sample source and target for Test Scenario 2A.
Logical volume "/dev/vg01/ldp_backup" has been successfully created with character device "/dev/vg01/rldp_backup". Logical volume "/dev/vg01/ldp_backup" has been successfully extended. Volume Group configuration for /dev/vg01 has been saved in /etc/lvmconf/vg01.
The following output is displayed: Encrypted volume "/dev/evfs/vg01/ldp_backup" has been successfully created Step 4 To enable the source and target HP-UX EVFS volumes, enter the following commands: $ evfsvol enable /dev/evfs/vg01/ldp_test The system prompts for the user passphrase. Enter the user passphrase.
$ mount -F vxfs /dev/evfs/vg01/ldp_test /dp_test $ mount -F vxfs /dev/evfs/vg01/ldp_backup /dp_backup Step 6 Create a sample directory with sample files in the source directory.
evfs6# /opt/omni/bin/xomni Starting GUI... Please wait, this may take some time... Step 11 To add the client system, evfs2.hp.com, as the client to the HP OpenView Storage Data Protector Cell Manager, complete the following tasks: 1. Select Clients in the Data Protector Cell Manager Context List. 2. Right click Clients in the left scoping pane, and select Add Clients. 3. Enter the client name, and click Add, as shown in the following figure: 4. Select the components to be installed.
Step 12 To add a file library device in the target directory, /dp_backup, complete the following tasks: 1. Select Devices & Media in the Data Protector Cell Manager Context List. 2. In the left scoping pane, right-click Devices and select Add Device to open the wizard, as shown in the following figure: 3. Enter the name of the file library device, /dp_backup, in the Device Name text box. 4. Enter the description of the file library device as Backup Volume in the Description text box. 5.
7. Specify the directory or a set of directories where the file library must reside, as shown in the following figure: 8.
9. Review the summary of the file library device configuration. The name of the device is displayed in the list of configured devices, as shown in the following figure. The device name also appears in the media pool to which the device was assigned. Step 13 A full backup of an object must exist before an incremental backup of the object is performed. Hence, the first backup of a data object is always a full backup. To perform a full backup using HP OpenView Data Protector, complete the following tasks: 1.
3. In the Create New Backup dialog box, select the default Blank File System Backup, as shown in the following figure: 4.
5. In the Destination property page, select the device, /dp_backup, that is configured for backup, as shown in the following figure: 6. Select the required backup options in the Backup Specification page, as shown in the following figure. You can also specify the dates to schedule backups.
7. Verify the Review Summary page to check the backup specifications, and make the necessary changes, as shown in the following figure: 8.
9. Select the appropriate backup type. To perform the backup of the selected object for the first time, select backup type as FULL, as shown in the following figure: The Session Information message displays the status of the backup and notifies when the backup is successfully completed. Step 14 To verify if the backup is successful, complete the following tasks: 1.
2. To view the directory listings of the directory that is mounted on the target HP-UX EVFS volume, enter the following command after the backup operation: $ ll /dp_backup/ The following output is displayed: total 400 -rw-r--r-1 root root 0f6a4871545823b0e566155000f.fd drwxr-xr-x 2 root root 204800 Dec 15 11:34 96 Dec 15 10:30 lost+found The data is backed up in the file device with an .fd extension.
7. Select the required backup options in the Backup Specification page, as shown in the following figure. You can also specify the dates to schedule the backups. 8.
9. Select Start Backup to initiate the backup session, as shown in the following figure: 10. Select the appropriate back up type.
The Session Information message displays the status of the backup and notifies when the backup is successfully completed. Step 16 To verify if the backup is successful, complete the following tasks: 1. To view the directory listings of the directory that is mounted on a target encrypted volume, enter the following command before the backup operation: $ ll /dp_backup/ The following output is displayed: total 0 drwxr-xr-x 2 root root 96 Dec 15 10:30 lost+found 2.
$ ll /dp_backup The following output is displayed: total 800 -rw-r--r--rw-r--r-drwxr-xr-x 1 root 1 root 2 root root root root 204800 Dec 15 11:34 0f6a4871545823b0e566155000f.fd 204800 Dec 15 11:48 0f6a4871545823e3f5661550012.fd 96 Dec 15 10:30 lost+found The data is backed up in the file device with an .fd extension. You can also use the strings utility to search and validate a specific key string in the file, and verify if the backup is successful.
Data Encryption Cipher: Digest: Owner Key ID: Recovery Agent Key IDs: Total Recovery Agent Keys: User Key IDs: Total User Keys: aes-128-cbc sha1 root.root EVFS Volume Name: Mapped Volume Name: EVFS Volume State: EMD Size (Kbytes): Max User Envelopes: Data Encryption Cipher: Digest: Owner Key ID: Recovery Agent Key IDs: Total Recovery Agent Keys: User Key IDs: Total User Keys: /dev/evfs/vg01/ldp_backup /dev/vg01/ldp_backup enabled 520 1024 aes-128-cbc sha1 root.
4. Specify the target client in the Destination property page, where the data must be restored, as shown in the following figure: 5. Specify the target location, /dp_backup, in the Destination property page, where the data must be restored, as shown in the following figure.
6. Click Restore to initiate the restore session. The Session Information message displays the status of the recovery and notifies the successful recovery of data. You can also specify the warning and error message that must be displayed during the restore session. Step 3 To verify if the recovery of data is successful, complete the following tasks: 1.
Test Scenario 3 Test Scenario 3A - Backup of Keys of an HP-UX EVFS Volume This scenario illustrates the steps performed when successfully testing the backup of keys of an HP-UX EVFS volume by using HP OpenView Storage Data Protector. Table13 lists the sample source and target for Test Scenario 3A. Table 13 Sample Source and Target for Test Scenario 3A Source/Target Sample Source Sample Target Description Key directory structure, /etc/evfs/pkey, on the client system, evfs2.hp.
The following output is displayed: Public/Private key pair "root.root" has been successfully generated The keys are created in the default key storage directory (/etc/evfs/pkey). 2. To create an EMD area, enter the following command: $ evfsvol create /dev/evfs/vg01/ldp_raw The system prompts for the owner passphrase. Enter the owner passphrase. Enter owner passphrase: The following output is displayed: Encrypted volume "/dev/evfs/vg01/ldp_raw" has been successfully created 3.
5. Select the backup device for the backup, as shown in the following figure: - For the Test Scenario 1, the tape device is selected - For the Test Scenario 2, the file library device is selected. 6. Continue with the remaining steps in the wizard, and click Finish. 7. Select Start Backup to initiate the backup session, as shown in the following figure.
8. Select the Backup Type required. To perform the backup of the keys, select backup type as FULL. The Session Information message displays the status of the backup and notifies when the backup is successfully completed. Test Scenario 3B - Restoring the Backed Up Keys of an HP-UX EVFS Volume This scenario illustrates the steps performed when successfully restoring the backed up keys of an HPUX EVFS volume by using HP OpenView Storage Data Protector.
The following output is displayed: Logical volume "/dev/vg01/ldp_raw" has been successfully created with character device "/dev/vg01/rldp_raw". Logical volume "/dev/vg01/ldp_raw" has been successfully extended. Volume Group configuration for /dev/vg01 has been saved in /etc/lvmconf/vg01.conf 2.
4. In the Destination property page, specify the target location where the backed up keys must be restored, as shown in the following figure. You can restore the backed up keys to the original location, a different location on the same client system, or a different client system. In this test scenario, evfs6.hp.com was selected as the target client system, where the backed up keys were restored. 5. Click Restore to initiate the restore session.
Step 1 To view the directory listings on the source client system, evfs2.hp.com, (where the keys are originally located), enter the following command before the backup operation: $ ll /etc/evfs/pkey/root The following output is displayed: total 32 -rw-------rw-r--r-- 1 root 1 root sys sys 775 Oct 24 16:57 root.priv 424 Oct 24 16:57 root.pub Step 2 To view the directory listings on the target client system, evfs6.hp.