
Exploring DRD Rehosting in HP-UX 11i v2 and 11i v3 (July 2010)
9
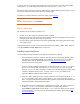
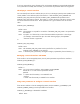
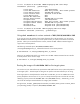
======= 07/28/09 15:08:55 MDT BEGIN Displaying DRD Clone Image
Information (user=root) (jobid=srcsys)
* Clone Disk: /dev/disk/disk10
* Clone EFI Partition: AUTO file present, Boot loader present
* Clone Rehost Status: SYSINFO.TXT present
* Clone Creation Date: 07/01/09 15:54:35 MDT
* Clone Mirror Disk: None
* Mirror EFI Partition: None
* Mirror Rehost Status: SYSINFO.TXT not present
* Original Disk: /dev/disk/disk9
* Original EFI Partition: AUTO file present, Boot loader present
* Original Rehost Status: SYSINFO.TXT not present
* Booted Disk: Original Disk (/dev/disk/disk9)
* Activated Disk: Original Disk (/dev/disk/disk9)
======= 07/28/09 15:09:08 MDT END Displaying DRD Clone Image
Information succeeded. (user=root) (jobid=srcsys)
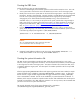
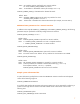
Using drd unrehost to review contents of EFI/HPUX/SYSINFO.TXT
If you want to review the contents of the system information file in the EFI partition, you can use the
drd unrehost command to copy it to a file system location you specify and remove it from the EFI
partition. When you are satisfied with the contents, execute the drd rehost command again to
copy it back to the EFI partition.
The following command copies /EFI/HPUX/SYSINFO.TXT to
/var/opt/drd/tmp/file_to_review and removes it from the EFI partition:
# drd unrehost –f /var/opt/drd/tmp/file_to_review
When you are satisfied with the file, you need to rerun the drd rehost command to return the file
to the EFI partition of the inactive image:
# drd rehost –f /var/opt/drd/tmp/file_to_review
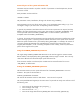
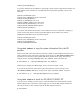
Booting the image with SYSINFO.TXT on the target system
You need to use your SAN software to unpresent the SAN LUN from the source system and present it
to the target system. The techniques for doing this are specific to the SAN software you are using.
If the target system is already booted on another disk or SAN LUN, you can use setboot to set the
primary bootpath to the new LUN. If not, you can interrupt the boot process to choose the new LUN,
identifying it by the presence of SYSINFO.TXT in the /EFI/HPUX directory. Alternatively, you can
use one of the techniques mentioned below for Integrity VMs or Blades.
During the boot, the auto_parms(1M) enhancements provided by PHCO_36525 or PHCO_38232
(or superseding patches) will process /EFI/HPUX/SYSINFO.TXT.