
Exploring DRD Rehosting in HP-UX 11i v2 and 11i v3 (July 2010)


27
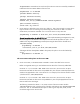
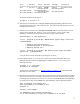
Class I H/W Path Driver S/W State H/W Type Description
==========================================================================
disk 1 0/0/1/0.1.0 sdisk CLAIMED DEVICE HP Virtual Disk
/dev/dsk/c0t1d0 /dev/dsk/c0t1d0s2
/dev/rdsk/c0t1d0 /dev/rdsk/c0t1d0s2
/dev/dsk/c0t1d0s1 /dev/dsk/c0t1d0s3
/dev/rdsk/c0t1d0s1 /dev/rdsk/c0t1d0s3
The primary bootpath can then be set:
# setboot -p 0/0/1/0.1.0
10. After the new VM is booted, the /var/opt/drd/registry/registry.xml file must be
removed from both the source VM and the new VM. (The need to manually remove this file will
be addressed in the future.)
11. After the new VM is booted, the /EFI/HPUX/SYSIDENT.TXT file can safely be left in the EFI
partition of the rehosted disk. However, if you wish to remove it, you can use the “drd
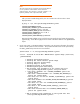
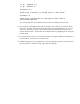
unrehost” command, specifying the boot disk as the target of the command:
# drd unrehost -t /dev/disk/disk3
======= 09/25/08 21:25:09 MDT BEGIN Rehost System Image (user=root)
(jobid=drdivm2)
* Checking System Restrictions
* Validating Target to Be Unrehosted
* Removing Sysinfo file
======= 09/25/08 21:25:16 MDT END Rehost System Image succeeded.
(user=root) (jobid=drdivm2)
A copy of the file can also be saved by specifying the -f option.
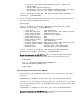
12. If the release of HP-UX 11i v3 on the source system is earlier than September 2008, error
messages might be issued when vgdisplay or lvlnboot are run. In this case, run the
following commands:
# vgscan –k –f /dev/vg00
# lvlnboot –R /dev/vg00
See the section on Boot Resiliency in
LVM New Features in HP-UX 11i v3 (in the White Paper
documents) for more details.
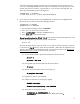
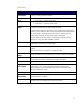
13. After the new VM is booted, you might want to remove non-root volume groups that were present
on the source VM but not on the target. Because the root disk is the only disk currently assigned
to the target VM, the simplest way to do this is to rename /etc/lvmtab (and /etc/lvmtab_p,
if it exists) and re-create /etc/lvmtab and /etc/lvmtab_p with the vgscan command:
# mv /etc/lvmtab /etc/lvmtab.save
# mv /etc/lvmtab_p /etc/lvmtab_p.save
# vgscan –a
Creating "/etc/lvmtab".
*** LVMTAB has been created successfully.
*** Do the following to resync the information on the disk.