
Exploring DRD Rehosting in HP-UX 11i v2 and 11i v3 (July 2010)


Caution:
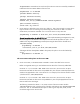
Only use the -x overwrite=true option when you are
sure the target disk is correct, the target disk is not currently in
use, and the target disk can be overwritten.
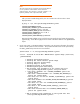
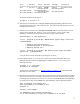
# drd clone -v -x overwrite=true -t /dev/disk/disk3
======= 09/25/08 16:34:03 MDT BEGIN Clone System Image (user=root)
(jobid=drdivm1)
* Reading Current System Information
* Selecting System Image To Clone
* Selecting Target Disk
* The disk "/dev/disk/disk3" contains data which will be
overwritten.
* Selecting Volume Manager For New System Image
* Analyzing For System Image Cloning
* Creating New File Systems
* Copying File Systems To New System Image
* Making New System Image Bootable
* Unmounting New System Image Clone
* System image: "sysimage_001" on disk "/dev/disk/disk3"
======= 09/25/08 17:09:46 MDT END Clone System Image succeeded.
(user=root) (jobid=drdivm1)
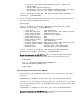
4. On the source VM, create a system information file for the new VM. You need at least the
following information:
• The hostname of the new VM
• The MAC address of the new VM, determined in Step 1 above when the new VM was
created
• The IP address of the new VM’s network interface—UNLESS it will managed by DHCP
• The subnet mask of the new VM’s network interface—UNLESS it will be managed by
DHCP
In addition, you will probably want to supply a gateway interface for the network interface if
it is not managed by DHCP, as well as information about NIS and/or DNS servers.
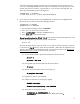
Copy the template sysinfo file that is delivered by DRD,
/etc/opt/drd/default_sysinfo_file, to a location where you will edit it. The
following command copies the template to /var/opt/drd/tmp/drdivm2.sysinfo:
# cp /etc/opt/drd/default_sysinfo_file \
/var/opt/drd/tmp/drdivm2.sysinfo
Using the comments in the file, the information supplied in the
Creating the system information
file section, or sysinfo(4), edit the copied file, commenting out the
“SYSINFO_INTERACTIVE=ALWAYS” line and adding lines for the information in the bulleted
list above.