
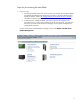
Exploring DRD Rehosting in HP-UX 11i v2 and 11i v3 (July 2010)

HP-UX 11i v2 - Special considerations
The Boot Resiliency feature for LVM is not available on HP-UX 11i v2 (11.23.)
Two approaches can be used to address the lack of Boot Resiliency in HP-UX 11i v2:
(a) Simple Generating VM: Use a source VM with a very simple I/O configuration when
provisioning the target VM. This simple source VM may be one that is not actually used to
run applications; rather, it is used as a generator of new VMs.
The simple source VM for HP-UX 11i v2 should be configured with an avio_stor disk that is
the boot disk for the source, and an avio_stor disk that is the clone target, and no additional
disks. The two device files should be specified (using the hpvmcreate or hpvmmodify
command) with the (bus, device, target) triples (0,1,0) for the root disk and (0,1,1) for the
clone target. Details for moving the clone target to the target VM are provided below.
(b) Single-user-mode Repair: In this case, no restrictions are made on the source VM. The target
VM will initially be booted into single user mode to adjust the LVM metadata for the boot
disk. Details on this approach are provided below.
Special considerations for avoiding reboots of Integrity VMs
In general, storage can be added and deleted to Integrity VMs without a reboot. However, addition
of a virtual storage controller does require that the hpvm guest be restarted. Virtual storage
controllers are created automatically when a storage device needing that controller is added to the
guest. Thus, reboots can be avoided by creating at least one disk of each storage type that will be
needed before the VM is deployed in production. For example, if both SCSI disks and avio_stor disks
will be used, create one of each before the VM is deployed in production.
Note also that explicitly specifying the triple “bus, device, target” in the addition of a storage device
will result in creation of a new controller if one with that “bus, device” pair does not already exist.
See hpvmresources(5) for further information on resource specification in the hpvmmodify(1M)
command.
In addition, if all devices using a given controller have been deleted, the controller itself will be
deleted upon the next restart of the virtual machine.
Steps for provisioning the new VM
In the discussion below, the source VM is drdivm1 and the new VM being provisioned is drdivm2.
The initial steps are performed on the VM host:
1. On the VM host, create a new VM with a network interface only. This will provide the MAC
address assigned by the VM host to the virtual Network Interface Card. The MAC address will
be needed later in setting up the boot disk for the new VM.
The following command creates the VM “drdivm2“, with one CPU, 2 GB of memory, and a virtual
network interface to the switch “myvswtch“:
# hpvmcreate -P drdivm2 -c 1 -r 2G \
-a network:avio_lan::vswitch:myvswtch