
Exploring DRD Rehosting in HP-UX 11i v2 and 11i v3 (July 2010)


More information on EFI commands can be found in Appendix D of HP Integrity BL860C Server
Blade HP Service Guide.
9. You can use the EFI shell command, bcfg, described in Chapter 4 of
HP Integrity BL860C Server
Blade HP Service Guide to set the primary boot path, but you may find it easier to use the
setboot command after HP-UX is booted to set the booted disk as the primary boot path. The
device file of the boot disk can be determined from vgdisplay of the root group.
10. After the new blade is booted on the clone LUN, the
/var/opt/drd/registry/registry.xml file must be removed. (The requirement that this
file must be removed will be eliminated in the future.)
11. After booting up the new blade, you might want to remove the /EFI/HPUX/SYSINFO.TXT file
from the EFI partition. To do so, enter the command:
# drd unrehost –t <dsf_of_root_disk>
Note:
A special variable has been set in
/EFI/HPUX/SYSINFO.TXT to prevent processing of the file
on subsequent events. Removal of the file clarifies to system
administrators that the disk is no longer subject to rehosting
.
12. If the release of HP-UX on the source system was earlier than September 2008, error messages
might be issued when vgdisplay or lvlnboot are run. In this case, run the commands:
# vgscan –k –f /dev/vg00
# lvlnboot –R /dev/vg00
See the section on Boot Resiliency in
LVM New Features in HP-UX 11i v3 (in the White Papers
documents) for more details.
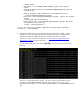
13. Only the root disk is presented to the new blade. However, if other disks were in use for other
volume groups on the source system, they will still appear in /etc/lvmtab and /etc/fstab
and might need to be removed. For example, the command, vgdisplay -v, might report
errors such as the following:
vgdisplay: Volume group not activated.
vgdisplay: Cannot display volume group "/dev/vg01".
vgdisplay: Volume group not activated.
vgdisplay: Cannot display volume group "/dev/vgswap".
The following commands can be used to remove the non-root volume groups that were in use on
the source system:
# mv -f /etc/lvmtab /etc/lvmtab.save3
# mv -f /etc/lvmtab_p /etc/lvmtab_p.save3
# vgscan –a
You might also want to import other volume groups from disks that have been presented to the
new system.