
HP-UX Secure Resource Partitions (SRP) A.02.00 Administrator's Guide
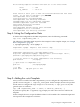

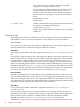
The following template variables have been set to the values shown:
iface = lan1
ip_address = 192.0.2.1
Press return or enter "yes" to make the selected modifications with these
values. Do you wish to continue? [yes] RETURN
add compartment rules succeeded
creating directory /var/hpsrp/myCmpt ...
add compartment root directory succeeded
add RBAC admin role for compartment succeeded
add RBAC compartment login role succeeded
add startup directories succeeded
add prm rules succeeded
add compartment network service rules succeeded
add ipaddress 192.0.2.1 succeeded
add compartment root directory succeeded
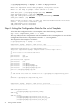
Step 4: Listing the Configuration Data
To list the data configured for the SRP compartment, enter the following command:
srp -list compartment_name -v
The following is the abbreviated output for this example. For the complete output, see “Sample
Base Configuration” (page 89).
# /opt/hpsrp/bin/srp -list myCmpt -v
Compartment: myCmpt Template: base Service: cmpt
----------------------------------------------------------------------
Compartment Configuration (/etc/cmpt/myCmpt.rules):
@tag-start compartment="myCmpt" template="base" service="cmpt" id="1" ;
#include "/opt/hpsrp/etc/cmpt/base.srp_incl"
// lock out access to the other compartment's root directory
perm nsearch /var/hpsrp
// open access to compartment root
perm all /var/hpsrp/myCmpt
// to DNS
grant bidir udp peer port 53 init
:
:
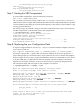
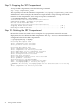
Step 5: Adding the sshd Template
After you have created a base SRP compartment, you can configure the compartment to host
specific services using the -t template_name option. In this example, the user also specifies
that he wants to configure the cmpt and provision services (-s cmpt,provision). The
general syntax is as follows:
srp -add compartment_name -t sshd [-s service[,service]...]
If you do not specify the -s argument, srp prompts you with a list of services valid for the
template.
In this example, the user accepts the default values for all variables. The command output and
user input for this example are as follows:
Step 4: Listing the Configuration Data 31