HP 9000 Containers A.03.01 on HP Integrity Server Administrator Guide HP-UX 11i v3 Abstract This document describes configuration, file system layout, management, troubleshooting, and known limitations of HP 9000 Containers. The document is intended for system administrators, who want to configure and administer HP 9000 containers, and solution architects involved in transitioning applications from legacy HP 9000 servers to HP-UX 11i v3 on HP Integrity servers using HP 9000 Containers.
© Copyright 2011, 2013 Hewlett-Packard Development Company, L.P. Confidential computer software. Valid license from HP required for possession, use or copying. Consistent with FAR 12.211 and 12.212, Commercial Computer Software, Computer Software Documentation, and Technical Data for Commercial Items are licensed to the U.S. Government under vendor's standard commercial license. The information contained herein is subject to change without notice.
Contents 1 Introduction...............................................................................................9 1.1 Overview............................................................................................................................9 1.2 Features of HP 9000 Containers...........................................................................................9 1.3 HP 9000 container types...................................................................................................
.5.4 Configuring additional devices...................................................................................26 4.5.5 Configuring mount points...........................................................................................26 4.5.6 Restoring or deleting HP 9000 startup services..............................................................26 4.5.7 Configuring DCE services...........................................................................................26 4.5.
6.2.1 Upgrading to HP 9000 classic container......................................................................41 6.2.2 Upgrading to HP 9000 system container......................................................................42 7 HP 9000 Containers file system layout........................................................45 7.1 HP 9000 system container file system...................................................................................45 7.2 HP 9000 classic container file system.............
10 Integration with SG.................................................................................67 10.1 Setting up the SG cluster...................................................................................................67 10.2 Configuring system on each node in the cluster...................................................................67 10.3 Selecting the package model............................................................................................67 10.
Index.........................................................................................................
1 Introduction This chapter provides an overview of HP 9000 Containers including its features and types. 1.1 Overview HP 9000 Containers is a set of tools designed to enable quick transition of application environment from an HP 9000 server with PA-RISC processor to an HP Integrity server.
NOTE: HP-UX 11.00 and HP-UX 10.20 environments usually work inside HP 9000 containers, but these environments are not officially supported. 1.3 HP 9000 container types HP 9000 Containers A.03.01 allows you to create two container types: HP 9000 system containers (feature-rich) and HP 9000 classic containers (for compatibility with HP 9000 Containers A.01.0x). Table 2 (page 10) lists the differences between the two types.
◦ Complete information about the application inventory such as list of applications, executables, libraries, configuration files, or dependencies is not available. ◦ The number of servers targeted for migration is large and resources are limited to carry out individual application transition. ◦ There is a dependency on legacy stand-alone development environments, which are not supported by HP XPADE. For more information about HP XPADE, see http://www.hp.com/ go/xpade.
• • The CPU requirements vary with the workload characteristics. Workloads that have a higher requirement inside HP 9000 containers are the following: ◦ Applications that spawn several short lived processes or threads. ◦ Applications that concurrently run several CPU bound processes. ◦ Script intensive applications. ◦ Java based applications. ◦ Applications that have intensive floating points. ◦ Applications that load and unload several libraries dynamically.
Table 3 Comparison of transition using stand-alone ARIES and HP 9000 Containers Stand-alone ARIES transition HP 9000 Containers transition Must identify and transfer application dependencies manually All dependencies are included in the HP 9000 file image that is used to create a container There is no PA-RISC environment on the Integrity server except for system libraries and applications The container has PA-RISC virtualized user-space environment Must use a separate product called XPADE for PA-RISC
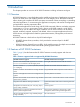
2 Installing and configuring HP 9000 Containers This chapter explains installation and configuration of HP 9000 Containers, prerequisites, and recommended patches. 2.1 Prerequisites HP-UX 11i v3 March 2011 or later Install HP-UX 11i v3 March 2011 Base OE or Data Center OE. NOTE: • While installing the operating environment, configure the /var file on a file system separate from the root file system. • HP recommends that you host applications only inside containers.
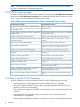
PHKL_41967 PHKL_42716 PHNE_42470 PHSS_42623 PHSS_42863 PHCO_43198 : : : : : : 11.31 11.31 11.31 11.31 11.31 11.31 fs_select cumulative patch vfs_vnops cumulative patch cumulative ARPA Transport patch mksf(1M) cumulative patch Aries cumulative patch audcmnds cumulative patch HP also recommends the latest version of the following bundles: FileSystem-SRP HPUXTransportSRP HPUX-Streams-SRP AuditExt The latest version can be downloaded from http://www.software.hp.com. 2.
3 Transition of application environments from HP 9000 server to HP 9000 container This chapter explains the steps for transitioning application environments from an HP 9000 server to an HP 9000 container on an HP Integrity server running HP-UX 11i v3.
Using fbackup to create image of HP 9000 files The steps for archiving all the required directories in a single session using the fbackup command are explained here. If the image is created on a live production server, opt for multiple sessions to reduce memory and I/O overhead. For more information about fbackup, see fbackup(1M). 1. Prepare a graph file with the include-exclude list.
3. Log in to the target server and run the kernel parameter configuration script: $ /opt/HP9000-Containers/bin/hp9000_conf_tunables \ The hp9000_conf_tunables script provides an option to choose between batch mode and interactive mode. In the batch mode, a set of selected tunable parameters is updated automatically. In the interactive mode, users can select the list of tunable parameters to be updated based on the values on the PA-RISC server. 4. 5.
If the container is created on the primary node of an SG cluster and the container package model is used, it is mandatory for the HP 9000 root directory to be a mount point. Create additional logical volumes and file systems as necessary, under the HP 9000 root directory for performing mounts in future (for /var, application data, and so on). Provide about 4 GB of additional space under container /var and about 4 GB under container /usr for internal use by HP 9000 Containers. 3.
4 Creating and configuring HP 9000 system container This chapter explains how to create and configure an HP 9000 system container. 4.
4.3.2 Using Ignite-UX network recovery archive You can use an existing Ignite-UX network recovery archive to recover an HP 9000 image on the target server. However, you cannot use Ignite-UX to do the image recovery because it cannot be restored to an alternate root directory. To recover an HP 9000 image from an Ignite-UX network recovery archive: 1. 2. 3. 4. Identify the archive. By default, it is located on the Ignite-UX server in the /var/opt/ignite/ recovery/archives/ directory.
< /dev/rtape/tape1_BEST> 2. Ignore any errors related to the recovery of the dev directory that are recorded in the log file. 4.3.5 Using other tools for recovery archive IMPORTANT: If you use third-party tools for recovery, ensure that proper permissions and ownerships (UID or GID) are preserved. Some tools do not preserve setuid and setgid bits. For example, verify permissions of the /usr/sbin/sendmail file to ensure that the setuid and setgid bits are preserved. 4.3.
Root user configuration A system container has a root user with fewer privileges than the root user of the HP-UX 11i v3 host system. Enter the root password when prompted. DNS configuration By default, the DNS configuration for an HP 9000 system container is the same as that in the HP 9000 image. To change the configuration, specify the new values of the DNS parameters when prompted. Disallowed commands configuration HP 9000 Containers A.03.
Error messages If you get an error message, Could not generate swlist: • Verify whether the /var/adm/sw directory exists under . • Verify whether the /var/adm/sw directory or directories under it such as /var/adm/sw/ products is a symbolic link.
For more information about how to reconfigure IP address, see Section 8.6 (page 52). 4.5.3 Configuring additional IP addresses Applications inside an HP 9000 container might require multiple IP addresses. Analyze the configuration in the /var/opt/HP9000-Containers/etc/rc.config.d/ netconf file to find the number of configured IP addresses on the HP 9000 server.
dce_config command. If this is not feasible, the only option is to reuse the hostname and IP address from the HP 9000 server. Edit IP address configuration in the /etc/opt/security/pe_site file if required. 4.5.8 Configuring root cron jobs During HP 9000 container creation, all cron jobs configured by root are moved out because they might contain system administration-related jobs, which might not be supported inside the container.
1. Open the display screens file: For example, /etc/X11/X0screens 2. 3. Comment out any line containing /dev/crt. Add configuration: ServerOptions ServerMode XVfb 4. 5. Open the /etc/dt/config/Xservers file. Comment out line containing /usr/bin/X11/X :0 or modify it to /usr/bin/X11/Xvfb :0 -fbdir /tmp. If X-server is required in only one container on the system, and not required in global, then it can be configured with graphics devices using the following steps: 1. Open the /etc/cmpt/.
NOTE: This enables MKNOD privilege inside the container, but ensure that the mknod command is not used for any other purposes other than by DDFA itself. In general, using mknod inside the container is not supported and can result in undefined system state. 4.5.15 Disabling Autofs If Autofs is not used, disable this service to save container startup and shutdown time. Open the file /etc/rc.config.d/nfsconf and set AUTOFS=0. 4.5.16 Configuring telnet for HP-UX 10.xx containers HP-UX 10.
All startup messages must say OK. Look for any startup error messages in the /var/hpsrp/ /etc/rc.log file. Verify the status of the container: $ srp –status -v Log in to the container from the host: $ srp_su Also, attempt to log in using the telnet and ssh commands. Start applications using the normal procedures and perform exhaustive functional and performance testing to ensure compatibility. Stop the container: $ srp –stop 4.
-machine_id -machine_ident -machine_serial -partition_ident # start config for machine specific parameters # end config for machine specific parameters To apply this configuration to all executables, use wildcard / in place of executable path name.
5 Creating HP 9000 classic container This chapter explains how to create and configure an HP 9000 classic container. 5.1 Setting up user environment for image recovery A classic container shares the /etc directory and login mechanism with the HP-UX 11i v3 host system. Therefore, merge HP 9000 users and groups to the host before the recovery process. To set up user environment: 1. Recover the HP 9000 /etc directory.
5.3 Recovering HP 9000 image This section explains the steps for recovering HP 9000 image. 5.3.1 Configuring mount points To recover the files within the container onto mount points (if applicable), create them on the HP-UX 11i v3 host. For example, $ mkdir /var $ chown bin:bin /var $ mount –F vxfs /var 5.3.2 Using Ignite-UX network recovery archive You can use an existing Ignite-UX network recovery archive to replicate the files on the target server.
1. Do one of the following: —In the case of file archive, copy the file to the HP-UX 11i v3 server (or make it visible via an NFS-mount). Do not keep the archive in the root directory on the system. Recover the archive: $ /opt/HP9000-Containers/bin/hp9000_recover_image \ — In the case of tape archive, insert the tape into the Integrity server and present the tape to the HP-UX 11i v3 system. For example, /dev/rtape/tape1_BEST.
The container creation can take up to 30 minutes. To list configuration: $ srp –list -v | more To change configuration, when required: $ srp –replace To revert the configuration, when required: $ srp –delete delete_changes_ok=y 5.5 Additional container configuration This section explains container configurations that might be required for certain environments. 5.5.
5.5.6 Configuring root cron jobs During HP 9000 container creation, all cron jobs configured by root are moved out because they might contain system administration-related jobs, which might not be supported inside the container. If you want to run any of these jobs in HP 9000 container, reconfigure the jobs using the crontab command or restore entries from the /var/opt/HP9000-Containers/var/ spool/cron/crontabs/root backup file. 5.5.
5.5.11 Configuring sendmail daemon You can run the sendmail daemon on the host HP-UX 11i v3 system (not inside the HP 9000 classic container). Because the /etc directory is shared with the host, you must copy any specific configuration from HP 9000 /etc/mail/sendmail.cf, /etc/mail/aliases, and so on to the global /etc/mail directory. 5.5.12 Configuring xinetd service A workaround for the unavailability of inetd services inside a classic HP 9000 container is to use xinetd.
5.8 Workarounds for common issues Some applications, especially database servers and old Java applications, have known issues inside HP 9000 containers. To verify whether any of the workarounds are applicable to the migrated environment, see Section 12.6 (page 80). 5.
6 Upgrading HP 9000 Containers versions This chapter describes the steps for upgrading the current version of HP 9000 Containers to the latest version. 6.1 Upgrading from HP 9000 Containers A.03.0x You can install HP 9000 Containers A.03.0y on a system, which has containers created using HP 9000 Containers A.03.0x (where x is less than y). Before installing the new version of HP 9000 Containers, backup any configuration files that are manually modified.
requirement is mandatory. The tag format is the same as that used for primary IP address of the container. For example, if there is an IPv4 address configured for use in mysrp container such as IP_ADDRESS[3]=<2nd IP>, associate a tag using: IPV4_CMGR_TAG[3]=’compartment=”mysrp” template=”base” service=”network” id=”2”’ 3. Increment the id value for each such IP address.
9000 image cannot be recreated, delete the container configuration and reconfigure it with the system container type. To delete the container configuration and reconfigure: 1. 2. Back up HP-UX 11i v3 server image before the upgrade. Stop the container: $ srp –stop 3. Back up container network configuration and rules files for future reference: $ cp –p /etc/rc.config.d/netconf/etc/rc.config.d/netconf.bkp $ cp –p /etc/cmpt/.rules \ /etc/cmpt/.rules.bkp 4.
$ swinstall –x autoreboot=true Enable SRP: $ srp_sys –setup PRM can be enabled if you want to host other containers on the same system. 7. 8. Install the latest version of HP 9000 Containers. Install the recommended patches listed in Section 2.2 (page 15). When the upgrade is completed, reboot the system. After reboot, create the HP 9000 system container by following the steps in Chapter 4 (page 21).
7 HP 9000 Containers file system layout This chapter explains the file system layout for HP 9000 system and classic container types, and the operations performed on the file systems while creating a container. 7.1 HP 9000 system container file system HP 9000 system container has a private HP 9000 file system in the /var/hpsrp/ directory. The container does not have write permission to the directories that are outside its file system.
Figure 1 HP-UX 11i v3 Integrity file system configured with HP 9000 system container There are two directories on the host system that are shared (using read only loopback mounts) with HP 9000 system containers—/usr/lib/hpux32 and /usr/lib/hpux64. These directories bring in ARIES libraries (for running PA-RISC executables) and other native Integrity libraries (for running native commands and tools) inside the container. 7.
• /var/yp • All subdirectories of /var/spool except /var/spool/cron In addition, there might be a requirement to share file system mount points to be accessed from within the HP 9000 container. For information about how to implement mount point sharing, see Section 8.5 (page 50). File system sharing is implemented through LOFS, also known as loop-back mounts, to HP 9000 container directories from corresponding native directories. LOFS mounts are performed as a part of the HP 9000 container startup.
• Deletes unsupported system daemons from /sbin/init.d (and the corresponding RC links). • Copies the HP 9000 container-specific RC script (hp9000_rc) and RC links to /var/hpsrp/ /sbin/init.d. • Moves root crontab file so that system administration-related cron jobs do not get automatically enabled inside the container. • Creates ARIES resource configuration files under the container root directory .ariesrc and .aries64rc. 7.
8 Administration of HP 9000 Containers Most of the administration tasks for HP 9000 Containers must be performed from the HP-UX 11i v3 host system (referred as the global container in the following sections). 8.1 Administrator privileges By default, the root user on the host system is assigned the administrator privileges for managing the lifecycle (start, stop, export, import, delete, and modify) of the container.
8.3.2 HP 9000 classic container User management must be performed in the global container. As a part of HP 9000 container configuration, a group -login is created, which has access to the container. All local users from HP 9000 /etc/passwd file are added to this auxiliary group. Add a new user for the container 1. 2. 3. Log in to the global container as root and run the useradd command. There is no need to prefix the directory in this step while specifying the home directory.
8.5.1 Configuring NFS and Autofs clients HP 9000 system container NFS and Autofs are supported inside an HP 9000 system container. Therefore, you can configure them inside the container file system just the way you do it on the HP 9000 server. HP 9000 classic container NFS and Autofs are not supported inside an HP 9000 classic container. You can configure them on the host system and then expose it to the container. Configure /etc/fstab, /etc/auto_master, and /etc/auto.direct files on the host.
HP 9000 classic container An HP 9000 classic container does not support the mount command inside it. Hence, configure the mount point on the HP-UX 11i v3 host system, perform a mount, and make it visible inside the container using the hp9000_link_dir tool.
1. Find the number of IP addresses already assigned to the container: $ srp –list -s network –v 2. 3. Find the id value for the next IP address. For example, if an additional IP, apart from the container primary address, is not assigned yet, the next id will be 2. Add the new IP address: $ srp –add -s network –id “” If the IP address is managed by SG, answer no to the following question: Add IP address to netconf file? [yes] no 8.6.
$ srp_su root –c “chroot \ ” 8.10 Patching HP 9000 Containers Patching applications that use custom installers must work inside HP 9000 system and classic container types. HP 9000 classic containers do not support patching using SD. HP 9000 system containers support SD patching, but with differences as explained in the following sections. 8.10.
Compartment rules provide a better way to restrict the commands. However, read permission on these files is disabled and SD operations such as swinstall, swverify, and swremove fail for products that include these commands. For example, a quality pack might contain several products some of which might contain files that belong to the list of restricted commands and installation or rollback of the pack can turn out to be tedious.
/var/opt/HP9000-Containers/deleted_services /usr/lbin/sw/post_session/hp9000_replace_cmds /var/opt/HP9000-Containers/hp9000sys_delete_commands 8.11 Run level support This section describes the run level support for HP 9000 system and classic container types. Table 4 (page 56) lists the differences between the two types.
8.12.2 Exporting and importing an HP 9000 classic container HP 9000 classic container shares a part of the file system with the HP-UX 11i v3 host on which it resides. So, take the file system backup at system level, not at container level. To backup the container configuration alone: $ srp –export -b To delete and reimport the container configuration: $ srp –delete -b $ srp –import –xfile 8.12.
8.12.5 Backup applications with HP 9000 classic containers In addition to the limitations for the system container type, classic container requires additional care because directories such as /etc and /dev are shared with the host system. HP recommends using backup applications from the global container rather than from a classic container. WARNING! Do not attempt to restore a complete image from an HP 9000 server to an HP 9000 classic container because it destroys the contents in HP-UX 11i v3 /etc.
$ /opt/audit/AudReport/bin/srp_auditdp_copy \ –r -R To view the copied records from within a system container: $ audisp Legacy system containers have a major limitation; the login and logoff events are not included in audit logs. The workaround is to write an init.
9 Using Container Manager The Container Manager component that is integrated in HP SMH provides a GUI to manage system, workload, and HP 9000 containers. The following tasks are supported by HP 9000 Containers with the Container Manager: • Enable or disable system-wide configuration of containers • Monitor container status and activity • Create and delete containers • Start and stop containers • Modify container configuration • Export and import containers 9.
Figure 4 Container Manager home page For further help regarding Container Manager, click ? located at the upper right corner. 9.3 Setting up the environment for container Enable the core subsystem properties before creating containers by either using the srp_sys command (with the –enable or –setup option) or by carrying out the following steps using the Container Manager: 1. 2. 3. 4. Select the System Properties tab. Enable SRP core subsystems.
Figure 5 Container Manager—System properties 9.4 Creating an HP 9000 container To create an HP 9000 container: 1. 2. In the Container Manager home page, click Create a container. By default, the selected Container Type is System. Select hp9000sys for creating an HP 9000 system container and hp9000cl for creating an HP 9000 classic container. Figure 6 (page 63) shows the container types. Figure 6 Container Manager—Select container type 3. Click Next.
Figure 7 Container Manager—Create a new container 4. Enter the container name. NOTE: You cannot use the keywords system, workload, hp9000sys, or hp9000cl as container names. 5. 6. Enter the parameters. After entering the container details, click Create. A window pops up and shows the container creation logs getting generated on the host. If the container is successfully created, a message is displayed. If the creation of container fails, a corresponding message is displayed. 7.
Figure 8 Container Manager—Container Listing 3. To modify configuration, click Modify Container. To add a new instance, click + add new instance. Figure 9 (page 65) shows the container properties. Figure 9 Container Manager—View or modify container properties 4. A new window displays the output of the modification. After modifying the configuration, click Close This Window. 9.
9.6 Starting and stopping an HP 9000 container You can start a container if its status is stopped. The status of each container is displayed on the Container Manager home page. Figure 10 (page 66) shows the Start option. Figure 10 Container Manager—Start a container To start a container, select the container and click Start in the task bar on the right. To stop a container, select the container and click Stop in the task bar on the right.
10 Integration with SG HP SG allows you to create high availability clusters of HP 9000 or HP Integrity servers. SG is not supported inside an HP 9000 container. But, it can be installed in the global container (that is, on the host system) and configured for applications running inside containers.
10.4 Selecting application that manages file system and network interface When you use the application package model, HP recommends using SG to manage the network interface and file system mounts. In the case of container package model, use HP-UX Containers to manage the network interface and file system mounts. To use the SG network failover capability, the network interface must be managed by SG.
Examine the /var/hpsrp//etc/rc.log file to verify whether the applications configured in the RC scripts are started properly. 3. 4. Log in to the HP 9000 container and test applications. Stop the HP 9000 container after testing is completed: $ srp –stop Examine the /var/hpsrp//etc/rc.log file to verify whether the applications configured in the RC scripts are stopped. 5.
Creating monitor scripts Place the monitor scripts for applications in a directory under . You can use the existing monitor scripts if they are compatible with the SG version on the Integrity server. For information about how to migrate older packages, see Migrating packages from legacy to modular style at www.hp.com/go/hpux-SG-docs. Configuring SG package To configure SG package: 1.
Configuring SG package Configuration from the HP 9000 server can be reused with minor modifications as long as the configuration is compatible with the SG version on the host system. For more information about how to migrate older packages, see Migrating packages from legacy to modular style at www.hp.com/go/hpux-SG-docs. 1. Use the srp_su command for starting and monitoring applications: a.
11 Limitations of HP 9000 Containers The following sections explain the limitations of HP 9000 Containers. 11.1 Application limitations Does not support kernel intrusive applications and applications that use privileged instructions Applications that are kernel intrusive and that use privileged instructions do not work inside an HP 9000 container. This includes device drivers and applications that read or write /dev/kmem, or use DLKMs.
• Does not support multiple HP 9000 containers on the same host. • Does not support coexistence with native containers. • Some server applications, which register RPC services might need a virtual hostname configuration (that matches the global host name) to work. For more information, see Section 12.6 (page 80). 11.3 Access limitations Limitations specific to HP 9000 classic containers Using the telnet command to log in to an HP 9000 classic container is not supported. Instead, you can use ssh.
11.7 Unsupported tasks and utilities Most of the unsupported tasks in an HP 9000 container are related to system administration and can be performed outside the container (in the global container).
• Portable file system • Printer management (classic container limitation only) • Privilege management • PRM management • Processor set management • Processor binding • RAID control • Reboot, shutdown system • Resource (CPU, memory, disk, and so on) monitoring • Routing configuration and advertisement • SAM, SMH • SCSI control • Serviceguard configuration and management • SD based installation and patching (specific to classic container) • Storage or disk management • STREAMS
12 HP 9000 Containers troubleshooting This chapter explains how to troubleshoot HP 9000 Containers, lists common problems you might encounter, and suggests how to resolve them. 12.1 Verifying HP 9000 container health Verifying container status Log in to the global container as root and run the following command: $ srp -status -v Verify whether the connectivity to the HP 9000 container is properly working from both the global container and another system.
Verifying host name and node name Legacy containers have issues when long host name or node name is used for either the global container or 9000 containers. Examine the /etc/rc.config.d/netconf and /var/hpsrp/ /etc/rc.config.d/netconf files for these parameters. There is a workaround for using long host name in the global; run the $ kctune uname_eoverflow=0 command. 12.
If the node name on the global container (host system) is longer than 8 characters in length (and the kernel parameter expanded_node_host_names is set to 1), only two login sessions are allowed to legacy containers on the system. The workaround is to run the following command: $ kctune uname_eoverflow=0 If you fail to access HP 9000 system containers using telnet, verify whether the value of kernel parameters npty and nstrpty are sufficient.
12.6 Known issues and workarounds Table 5 (page 80) lists some known issues and workarounds for HP 9000 Containers. The patches and products listed in Section 2.2 (page 15) resolve some of the known issues when using containers. Table 5 Known issues and workarounds Issue Workaround Legacy lsof command fails inside HP 9000 containers. Install the lsof depot on the host system and copy the /usr/local/bin/lsof file into the container. Some Java 1.2 and Java 1.
Table 5 Known issues and workarounds (continued) Issue Workaround Oracle database server core dumps and the stack trace shows function name sjontlo_threa_main. Contact HP for details about ARIES patch that resolves the issue. PRM FSS cannot be used along with Oracle Database Resource Manager. See http://www.hp.com/go/ hpux-prm-docs—> Using HP PRM with Oracle databases. Switch to PSETs if the resource manager is in use. HP GlancePlus returns no information for PRM groups configured with PSETs.
Table 5 Known issues and workarounds (continued) Issue Workaround The srp –export operation does not include files that are larger than 8 GB in size. Back up the large files separately. The srp –import operation changes ownership of files if same users exist on the host system with different UIDs (or same groups with different GIDs). During import, do not configure any users on the host system apart from the default users.
For information about HP ARIES troubleshooting, see http://www.hp.com/go/ARIES. For any assistance with troubleshooting ARIES issues, contact HP-UX Support Center at http:// www.hp.com/go/hpsc. 12.8 Troubleshooting HP-UX Containers For information about troubleshooting HP-UX Containers, see HP-UX Containers A.03.01 Administrator's Guide and for more information about known defects and workarounds, see HP-UX Containers (SRP) A.03.01 Release Notes at www.hp.com/go/hpux-srp-docs. 12.
/sbin commands) or under /var/opt/HP9000-Containers inside the container. These can be copied back for testing. For example, $ cp -p /var/opt/HP9000-Containers/usr/sbin/ /usr/sbin • Use container rules to disallow execution. To allow execution of the command, remove the entry of the command from the /opt/HP9000-Containers/config/ hp9000.disallowed.cmds file. Then run the $ setrules command.
# Enable trace scheduling -sched_trace # End • Reduce memory overhead: # Reduce memory footprint -mem_min # End • Enable the use of native code for common APIs (with ARIES patch PHSS_42863 or later): # Turn on API optimization -opt_api_trans # End • Enable preservation of shared library translations across unloads (with ARIES patch PHSS_42863 or later): # Turn on shared library preservation -shlib_preserve # End # Increase ARIES p
--database=/tmp/ARIES_profdb/db,unique \ --scope=process \ --des=all \ --process=all \ --thread=all \ --output-file=/tmp/ARIES_profdb/aries_profile.txt, \ per- process,unique \ unset PA_BOOT64_DEBUG unset PA_BOOT32_DEBUG 5. 6. 86 Run the test and save /tmp/ARIES_profdb. Contact HP support for detailed analysis of the report.
13 Support and other resources 13.1 Information to collect before you contact HP Be sure to have the following information available before you contact HP: • Software product name • Hardware product model number • Operating system type and version • Applicable error message • Third-party hardware or software • Technical support registration number (if applicable) 13.
• HP 9000 Containers Software Access http://www.software.hp.com • HP Process Resource Manager http://www.hp.com/go/prm • HP Virtualization Continuum for HP-UX http://www.hp.com/go/vse • HP Serviceguard for HP-UX http://www.hp.com/go/serviceguard • HP-UX Manuals http://www.hp.com/go/hpux-core-docs 13.5 Typographic conventions This document uses the following typographical conventions: 88 %, $, or # A percent sign represents the C shell system prompt.
NOTE A note contains additional information to emphasize or supplement important points of the main text. 13.
14 Documentation feedback HP is committed to providing documentation that meets your needs. To help us improve the documentation, send any errors, suggestions, or comments to Documentation Feedback (docsfeedback@hp.com). Include the document title and part number, version number, or the URL when submitting your feedback.
Glossary ARIES Automatic Retranslation and Integrated Environment Simulation. CIFS Common Internet File System. DCE Distributed Computing Environment. DDFA Data Communications and Terminal Controller Device File Access. DHCP Dynamic Host Control Protocol. DLKM Dynamically Loadable Kernel Module. DNS Domain Name Server. DP Data Protector FSS Fair Share Scheduler. GID Group Identifier. gWLM Global Workload Manager. HP-UX OS HP-UX Operating System. ISV Independent Software Vendor.
UDP User Datagram Protocol. UID User Identifier. VM Virtual Machine. vPar Virtual Partition. VxFS Veritas File System. VxVM Veritas Volume Manager. WDB Wildebeest Debugger. WLM Workload Manager. XVfb X Virtual Frame Buffer.
Index A additional container configuration, 25, 36 Additional requirements, 16 assign administrator privileges, 49 auditing, 29 Auto start setting, 23, 35 B Backup applications, 57 HP 9000 classic containers, 58 HP 9000 system containers, 57 batch mode, 19 C change container configuration, 25 choosing container name, 19 chroot, 9 commands unsupported restricted, 54 complete recovery, 23, 35 Configuration parameters, 23 configure additional devices, 26 additional IP addresses, 26 additional privileges, 28
HP 9000 container, 9 add new IP address, 52 primary IP address, 52 shut down, 49 start, 49 HP 9000 Containers, 9 administration, 49 auditing, 58 limitations, 73 HP 9000 root directory, 35 HP 9000 server, 12, 17 HP 9000 system container, 27 cloning, 57 HP 9000 system containers, 25 HP ARIES dynamic binary translator, 9 HP Integrity server, 9, 17 HP virtualization solutions, 12 HP XPADE, 11 HP-UX Containers SRP, 9 hp9000cl, 35 hp9000sys, 23 hp9000sys template, 23 HPSC, 15 I Ignite-UX , 17 Ignite-UX network r
HP 9000 classic containers, 17 Set up user environment, 33 SG, 13, 26 integration, 67 SG cluster, 24 Share based allocation, 12 Shared Memory, 24 sizing HP 9000 container, 11 SSH authorization keys HP 9000 classic container, 50 HP 9000 system container, 50 SSHD, 16 stack size, 30 stand-alone ARIES, 12 standard mode, 27 T tape archive, 23, 35 tar, 17, 18, 34 testing HP 9000 classic container, 38 HP 9000 system container, 29 third-party tools for recovery, 23 traditional migration, 11 Transition of applicati