
Setting Up CIFS Server (Samba) In an LDAP Environment


Setting Up CIFS Server (Samba) in an LDAP Environment
10
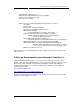
Part Three: Extending the schema for CIFS
Server
Install a version of CIFS Server with LDAP enabled
Download the free CIFS Server version A.01.11.01 or later from
http://software.hp.com/portal/swdepot/displayProductInfo.do?productNumber=B8725AA
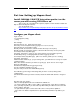
Extend the schema with the sambaAccount subschema
cd /opt/samba/LDAP
ftp yournetscapeds-server
user root
password xxxxx
cd /var/opt/netscape/servers/slapd-<yourservername>/config/schema
bin
put 98samba.ldif 98samba.ldif
quit
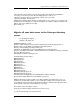
You will need to login to your Netscape DS server and restart slapd for these extensions to
be recognized:
/var/opt/netscape/servers/slapd-<yourservername>/restart-slapd
You should also restart your ldapux client on the system that CIFS Server will be running on:
/opt/ldapux/bin/ldapclientd –r
You can also extend the schema online, without the need to shutdown and restart
the ldap server or client by using the following command:
ldapmodify -D <Directory Manager DN> -w <Password> -h <Hostname> -p <Port> -f
<Samba Schema File>
For instance:
cd /opt/ldapux/bin
./ldapmodify -D "cn=Directory Manager" -w ldapldap -h rkm-nt -p 389 -f
/opt/samba/LDAP/98samba.ldif