
HP CIFS Server Administrator Guide Version A.03.01.03 (5900-2006, October 2011)
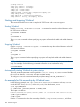
Table Of Contents
- HP CIFS Server Administrator Guide Version A.03.01.03
- Contents
- About this document
- 1 Introduction to the HP CIFS Server
- 2 Installing and configuring HP CIFS Server
- HP CIFS Server requirements and limitations
- Step 1: Installing HP CIFS Server software
- Step 2: Running the configuration script
- Step 3: Modify the configuration
- Step 4: Starting HP CIFS Server
- Other Samba configuration issues
- 3 Managing HP-UX file access permissions from Windows NT/XP/2000/Vista/Windows 7
- Introduction
- UNIX file permissions and POSIX ACLs
- Using the Windows NT Explorer GUI to create ACLs
- Using the Windows Vista Explorer GUI to create ACLs
- POSIX ACLs and Windows 2000, Windows XP, Windows Vista, and Windows 7 clients
- HP CIFS Server Directory ACLs and Windows 2000, Windows XP, Windows Vista, and Windows 7 clients
- In conclusion
- 4 Windows style domains
- Introduction
- Configure HP CIFS Server as a PDC
- Configure HP CIFS Server as a BDC
- Domain member server
- Create the Machine Trust Accounts
- Configure domain users
- Join a Windows client to a Samba domain
- Roaming profiles
- Configuring user logon scripts
- Home drive mapping support
- Trust relationships
- 5 Windows 2003 and Windows 2008 domains
- 6 LDAP integration support
- Overview
- Network environments
- Summary of installing and configuring
- Installing and configuring your Directory Server
- Installing LDAP-UX Client Services on an HP CIFS Server
- Configuring the LDAP-UX Client Services
- Enabling Secure Sockets Layer (SSL)
- Extending the Samba subschema into your Directory Server
- Migrating your data to the Directory Server
- Configuring the HP CIFS Server
- Creating Samba users in directory
- Management tools
- 7 Winbind support
- 8 Kerberos support
- 9 HP CIFS deployment models
- Introduction
- Samba Domain Model
- Windows Domain Model
- Unified Domain Model
- 10 Securing HP CIFS Server
- 11 Configuring HA HP CIFS
- 12 HP-UX configuration for HP CIFS
- 13 Tool reference
- Glossary
- Index
$ ll /tmp/shareA/JohnTest
When you run the ll command, the output is as follows:
-rwxr--r-- 1 DomA\John DomA\GroA 290 Nov 0 12:05 tmp/shareA/JohnTest
In the above output, the file owner is DomA\John,and the group owner is DomA\GroA. The first
part of owner and group owner, DomA, is the domain name, the \ is the winbind separator. The
last part, John and GroA are the actual user name and group name from the windows domain.
Use the ll -n command to show the UID and GID of file ownership as follows:
$ ll -n /tmp/shareA/JohnTest
-rwxr--r-- 1 10002 10005 290 Nov 0 12:05 tmp/shareA/JohnTest
When you run the ll -n command, the UID(10002) and GID (10005) are displayed in the
output. Both UID and GID are in the range of values that are specified in the smb.conf file for
winbind to use.
wbinfo utility
You can use the wbinfo tool to get information from the winbind daemon. To use wbinfo, you
must configure and start up the winbind daemon, winbindd. See “wbinfo ” (page 166) section in
Chapter 13, “Tool Reference” for detailed information of this tool.
wbinfo utility 109