HP CIFS Server 2.2i Administrator’s Guide version A.01.11.01 HP-UX 11.0, 11i v1 and 2 Manufacturing Part Number : B8725-90063 E0604 U.S.A. © Copyright 2004 Hewlett-Packard Company..
Legal Notices The information in this document is subject to change without notice. Hewlett-Packard makes no warranty of any kind with regard to this manual, including, but not limited to, the implied warranties of merchantability and fitness for a particular purpose. Hewlett-Packard shall not be held liable for errors contained herein or direct, indirect, special, incidental or consequential damages in connection with the furnishing, performance, or use of this material. Warranty.
Contents 1. Introduction to the HP CIFS Server Preface . . . . . . . . . . . . . . . . . . . . . . . . . . . . . . . . . . . . . . . . . . . . . . . . . . . . . . . . . . . . . . . . 3 Introduction to HP CIFS . . . . . . . . . . . . . . . . . . . . . . . . . . . . . . . . . . . . . . . . . . . . . . . . . . 4 What is the CIFS Protocol? . . . . . . . . . . . . . . . . . . . . . . . . . . . . . . . . . . . . . . . . . . . . . . 4 The Open Source Software (OSS) Samba Suite . . . . . . . . . . . . . . . . . . .
Contents Step 4: Starting the HP CIFS Server . . . . . . . . . . . . . . . . . . . . . . . . . . . . . . . . . . . . . . . Automatically Starting the HP CIFS Server . . . . . . . . . . . . . . . . . . . . . . . . . . . . . . . Other Samba Configuration Issues . . . . . . . . . . . . . . . . . . . . . . . . . . . . . . . . . . . . . . . . . Translate Open-Mode Locks into HP-UX Advisory Locks . . . . . . . . . . . . . . . . . . . . . Performance Tuning using Change Notify . . . . . . . . . . . . . . . . . . .
Contents Primary Domain Controllers . . . . . . . . . . . . . . . . . . . . . . . . . . . . . . . . . . . . . . . . . . . . 87 Domain Members . . . . . . . . . . . . . . . . . . . . . . . . . . . . . . . . . . . . . . . . . . . . . . . . . . . . . 87 Create the Machine Trust Accounts . . . . . . . . . . . . . . . . . . . . . . . . . . . . . . . . . . . . . . . . 89 Configure Domain Users . . . . . . . . . . . . . . . . . . . . . . . . . . . . . . . . . . . . . . . . . . . . . . . . .
Contents Migrating All Your Files . . . . . . . . . . . . . . . . . . . . . . . . . . . . . . . . . . . . . . . . . . . . . . Migrating Individual Files . . . . . . . . . . . . . . . . . . . . . . . . . . . . . . . . . . . . . . . . . . . . . Extending Samba subschema into Your Directory Server. . . . . . . . . . . . . . . . . . . . . . Configuring the HP CIFS Server . . . . . . . . . . . . . . . . . . . . . . . . . . . . . . . . . . . . . . . . . LDAP Configuration Parameters. . . . . . . . . . . . . . . .
Contents Configuring Kernel Parameters for HP CIFS . . . . . . . . . . . . . . . . . . . . . . . . . . . . . . . 189 Swap Space Requirements . . . . . . . . . . . . . . . . . . . . . . . . . . . . . . . . . . . . . . . . . . . . . 190 Memory Requirements . . . . . . . . . . . . . . . . . . . . . . . . . . . . . . . . . . . . . . . . . . . . . . . . 191 Glossary . . . . . . . . . . . . . . . . . . . . . . . . . . . . . . . . . . . . . . . . . . . . . . . . . . . . . . . 193 Index . . . . . . . . . . . . . .
Contents viii
About This Document This document describes how to install, configure, and administer the HP CIFS Server product. This document, as well as previously released documents may be found on-line at http://www.docs.hp.com. Intended Audience This document is intended for users who are already familiar with the HP CIFS Server product. For additional information about the HP CIFS Server, please refer to other HP CIFS Server documentation on-line at http://www.docs.hp.com.
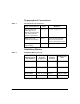
Typographical Conventions Table 1 Documentation Conventions Type of Information Font Examples Representations of what appears on a display, program/script code and command names or parameters. Monotype > user logged in. Emphasis in text, actual document titles. Italics Users should verify that the power is turned off before removing the board. Headings and sub-headings.
What Is in This Document This manual describes how to install, configure, administer and use the HP CIFS Server product. The organization of this manual is as follows: Table 3 Document Organization Chapter Description Introduction to the HP CIFS Server Use this chapter to know about HP CIFS Server, Samba, the open source software suite which the HP CIFS Server is based. Installing and Configuring the HP CIFS Server Use this chapter to learn how to install and configure the HP CIFS Server product.
Table 3 Document Organization (Continued) Chapter GNU GPL License Description Use this chapter to learn the GNU General Public License. HP Welcomes Your Comments HP welcomes your comments and suggestions on this document. We are truly committed to provide documentation that meets your needs. You can send comments to: netinfo_feedback@cup.hp.com Please include the following information along with your comments: xii • The complete title of the manual and the part number.
1 Introduction to the HP CIFS Server This chapter provides a general introduction to this document, HP CIFS, information about Samba, the Open Source Software suite upon which Chapter 1 1
Introduction to the HP CIFS Server the HP CIFS server is based, HP enhancements to the Samba source, along with the various documentation resources available for HP CIFS.
Introduction to the HP CIFS Server Preface Preface The information in this manual is intended for network managers or network security administrators who install and administer the HP CIFS server. This manual describes how to install, configure, and troubleshoot the HP CIFS software product on HP 9000 systems.
Introduction to the HP CIFS Server Introduction to HP CIFS Introduction to HP CIFS HP CIFS provides HP-UX with a distributed file system based on the Microsoft Common Internet File System (CIFS) protocols. HP CIFS implements both the server and client components of the CIFS protocol on HP-UX. The current HP CIFS Server (version A.01.08) is based on the well-established open-source software Samba, version 2.2.
Introduction to the HP CIFS Server Introduction to HP CIFS Despite its name, CIFS is not actually a file system unto itself. More accurately, CIFS is a remote file access protocol; it provides access to files on remote systems. It sits on top of and works with the file systems of its host systems. CIFS defines both a server and a client: the CIFS client is used to access files on a CIFS server.
Introduction to the HP CIFS Server The Open Source Software (OSS) Samba Suite The Open Source Software (OSS) Samba Suite The HP CIFS server source is based on Samba, an Open Source Software (OSS) project developed in 1991 by Andrew Tridgell in Australia. This section includes a very brief introduction to the Samba product.
Introduction to the HP CIFS Server The Open Source Software (OSS) Samba Suite Samba Documentation: Printed and Online When using the HP CIFS product, HP recommends that you refer to Using Samba, by Robert Eckstein, David Collier-Brown and Peter Kelly along with the supplemental HP CIFS product documentation available in the /opt/samba/docs directory shipped with the product. Using Samba is shipped with the HP CIFS Server and can be found in /opt/samba/swat/using_samba.
Introduction to the HP CIFS Server The Open Source Software (OSS) Samba Suite NOTE 8 Please note that non-HP Samba documentation sometimes includes descriptions of features and functionality planned for future releases of Samba. The authors of these books do not always provide information indicating which features are in existing releases and which features will be available in future Samba releases.
Introduction to the HP CIFS Server HP CIFS Enhancements to the Samba Server Source HP CIFS Enhancements to the Samba Server Source The HP CIFS server product consists of Samba source code which has been enhanced with a variety of functional enhancements. The sections that follow will provide an overview of each of these enhancements. In some cases, separate sections of information will be provided. One section will be for version A.01.07 of the server and another for version A.01.08.
Introduction to the HP CIFS Server HP CIFS Enhancements to the Samba Server Source Refer to Chapter 2 in this document for detailed information about configuring ACL support. Refer to Chapter 3 in this document for more detailed descriptions of UNIX file permissions and of VxFS POSIX ACLs. In addition, HP CIFS works with CIFS UNIX extensions. For more information about CIFS UNIX extensions, refer to the Installing and Administering HP CIFS Client manual.
Introduction to the HP CIFS Server HP CIFS Enhancements to the Samba Server Source Distributed File System (DFS) Server Functionality (version A.01.08) These enhancements are new for version A.01.08.
Introduction to the HP CIFS Server HP CIFS Enhancements to the Samba Server Source • Support Windows NT logon scripts • View resources on a Samba PDC using Microsoft’s “Server manager for Domain” tool • Support local and roaming profiles • Support the specified logon home share to a Samba server Exceptions: Version A.01.
Introduction to the HP CIFS Server HP CIFS Enhancements to the Samba Server Source Domain Members Chapter 1 • A domain member server can be a Windows NT Server, a Windows NT workstation, a Windows 2000 or XP machine or a HP CIFS machine • Users on a domain member machine can access network resources within the domain.
Introduction to the HP CIFS Server HP CIFS Server Documentation: Printed and Online HP CIFS Server Documentation: Printed and Online The full set of HP CIFS server documentation consists of one non-HP book available at most technical bookstores, and this printed and online HP CIFS server manual. The HP manual is Installing and Administering the HP CIFS Server. The non-HP book is: Using Samba, Robert Eckstein, David Collier-Brown and Peter Kelly (O’Reilly, 2000), ISBN: 1-56592-449-5.
Introduction to the HP CIFS Server HP CIFS Server Documentation: Printed and Online The HP CIFS configuration files are in /etc/opt/samba. The HP CIFS log files and any temporary files are created in /var/opt/samba. For more information about HP CIFS files and directories, refer to chapter 2 of this manual. Installing HP CIFS The HP CIFS Server product is installed using the swinstall utility. The steps to install this product are documented in chapter 2 of this manual.
Introduction to the HP CIFS Server HP CIFS Server Documentation: Printed and Online Setting Up Printers For an explanation of the process of how printing takes place on a HP CIFS server, print commands, printing variables, and a minimal printing setup, refer to chapter 7, “Printing and Name Resolution” in Using Samba. This chapter also contains more in-depth information about Samba printing options and print to Windows client printers.
Introduction to the HP CIFS Server HP CIFS Server Documentation: Printed and Online HP CIFS Documentation Roadmap Use the following road map to locate the Samba and HP CIFS documentation that you need. Table 1-1 HP CIFS Product Server Description Document Title: Chapter: Section Installing and Administering the HP CIFS Server: Chapter 1, “Introduction to the HP CIFS Server” Samba Meta FAQ No. 2, “General Information about Samba” Samba FAQ No. 1, “General Information” Samba Server FAQ: No.
Introduction to the HP CIFS Server HP CIFS Server Documentation: Printed and Online Table 1-1 (Continued) HP CIFS Product Server Installation Document Title: Chapter: Section Installing and Administering the HP CIFS Server: Chapter 2. “Installing and Configuring the HP CIFS Server” Samba FAQ: No 2, “Compiling and Installing Samba on a UNIX Host.” Client Installation Installing and Administering the HP CIFS Client: Chapter 2.
Introduction to the HP CIFS Server HP CIFS Server Documentation: Printed and Online Table 1-1 (Continued) HP CIFS Product Document Title: Chapter: Section SMB & CIFS File Protocols Samba Meta FAQ No. 3, “About the SMB and CIFS Protocols” SMB & CIFS Network Design Using Samba: Chapter 1, “Learning the Samba” Samba Meta FAQ No. 4, “Designing an SMB and CIFS Network” Samba Man Pages http://us1.samba.org/samba/docs Samba Meta FAQ No.
Introduction to the HP CIFS Server HP CIFS Server Documentation: Printed and Online Table 1-1 (Continued) HP CIFS Product Document Title: Chapter: Section Server Troubleshooting Installing and Administering the HP CIFS Server: Chapter 3, “Troubleshooting the HP CIFS Client” Using Samba, “Chapter 9, Troubleshooting Samba” Samba FAQs No. 4, “Specific Client Application Problems” and No 5, “Miscellaneous” DIAGNOSIS.
Introduction to the HP CIFS Server HP CIFS Server Documentation: Printed and Online Table 1-2 HP CIFS Server Files and Directories (Continued) File/Directory Chapter 1 Description /opt/samba/bin This is the directory that contains the binaries for HP CIFS Server, including the daemons and utilities. /opt/samba/docs This is the directory that contains documentation in various formats including html (htmldocs) and text (textdocs). /opt/samba/examples This directory contains example smb.
Introduction to the HP CIFS Server HP CIFS Server Documentation: Printed and Online Table 1-2 HP CIFS Server Files and Directories (Continued) File/Directory 22 Description /etc/opt/samba This directory contains configuration files which the HP CIFS Server uses, primarily the smb.conf file. /etc/opt/samba/smb.conf This is the main configuration file for the HP CIFS Server which is discussed in great detail elsewhere. /etc/opt/samba/smb.conf.default This is the default smb.
2 Installing and Configuring the HP CIFS Server This chapter describes the procedures to install and configure the HP CIFS Server software.
Installing and Configuring the HP CIFS Server • HP CIFS Server Requirements and Limitations • Step 1: Installing HP CIFS Server Software • Step 2: Running the Configuration Script • Step 3: Modify the Configuration • Step 4: Starting the HP CIFS Server NOTE If the HP CIFS Server software has been pre-installed on your system, you may skip Step 1 above and go directly to “Step 2: Running the Configuration Script” NOTE You can download the most recent version of HP CIFS Server from the www.
Installing and Configuring the HP CIFS Server HP CIFS Server Requirements and Limitations HP CIFS Server Requirements and Limitations Prior to installing the HP CIFS product, check that your system can accommodate the following product requirements and limitations. HP-UX 11.0 Memory and Disc Requirements Although an 11.x 32-bit and 64-bit HP-UX system can boot with as little as 64MB RAM and 1GB of disc space, the performance of such a configuration would be prohibitive.
Installing and Configuring the HP CIFS Server HP CIFS Server Requirements and Limitations HP CIFS Server Installation Requirements The HP CIFS server product installation requires about 52 MB of disc space for the 11i v2 PA system and 65MB of disc space for the 11i v2 IA machine. The HP CIFS server product is composed of the following: • HP CIFS server source code files: 17.
Installing and Configuring the HP CIFS Server Step 1: Installing HP CIFS Server Software Step 1: Installing HP CIFS Server Software HP CIFS Server Upgrades: If you are upgrading an existing HP CIFS Server configuration, HP recommends that you create a backup copy of your current environment. The SD install procedure may alter or replace your current configuration files.
Installing and Configuring the HP CIFS Server Step 1: Installing HP CIFS Server Software swinstall This opens the Software Selection Window and Specify Source Window. 4. Change the Source Host Name if necessary, enter the mount point of the drive in the Source Depot Path field, and activate the OK button to return to the Software Selection Window. Activate the Help button to get more information. The Software Selection Window now contains a list of available software bundles to install. 5.
Installing and Configuring the HP CIFS Server Step 2: Running the Configuration Script Step 2: Running the Configuration Script Prior to running the configuration script, you must obtain the name of your domain or workgroup, choose either a “workgroup model” or “domain security model” role for your server and decide which security level you would like to use. After you have this information, run the samba_setup configuration script. 1. Run the Samba configuration script using the command below.
Installing and Configuring the HP CIFS Server Step 2: Running the Configuration Script • Workgroups do not utilized the centralized authentication of domains. Samba_setup will require workgroups to choose either server, share, or user-level security.
Installing and Configuring the HP CIFS Server Step 2: Running the Configuration Script This information will be requested by the configuration script in Step 4: Starting the HP CIFS Server, located later in this chapter. 4. Enter the name of the domain or workgroup that you want this server to be part of. The script will modify the smb.conf file according to the information that you have entered.
Installing and Configuring the HP CIFS Server Step 3: Modify the Configuration Step 3: Modify the Configuration HP CIFS Server requires configuration modifications for the following functionality: • ACL Support • Case Sensitivity for the Client and Server for UNIX Extensions • DOS Attribute Mapping • Print Services for version A.01.07 • Print Services for version A.01.
Installing and Configuring the HP CIFS Server Step 3: Modify the Configuration This example supports only VxFS POSIX ACLs on the entire share. Attempts to get or set ACLs from the client will only succeed if VxFS POSIX ACLs are supported on that file system. If only UNIX permissions are supported, attempts to get or set ACLs from the client will fail. • Example four: acl schemes = hpux_posix unix HP CIFS will attempt to use VxFS POSIX ACLs. If ACLs are not present, it will use UNIX permissions.
Installing and Configuring the HP CIFS Server Step 3: Modify the Configuration case sensitive = yes For the CIFS Client, in the /etc/opt/cifsclient/cifsclient.cfg file, ensure the following default is set: caseSensitive = yes Configure DOS Attribute Mapping There are three parameters, map system, map hidden, and map archive, that can be configured in Samba to map DOS file attributes to owner, group, and other execute bits in the UNIX file system.
Installing and Configuring the HP CIFS Server Step 3: Modify the Configuration Configure A Printer Share This is a special share to automatically create printing services. Refer to chapter 7 in Using Samba for more detailed information on how to set up printing in Samba servers. If you create a share named [printers] in the smb.conf file, the server will automatically read in your printer capabilities file and create a printing share for each printer that appears in that file.
Installing and Configuring the HP CIFS Server Step 3: Modify the Configuration Install Printer Drivers. Install the drivers using a Windows 95/98 client only. Other versions of Windows clients will be supported in future releases. The printer does not have to be attached to the machine to install the drivers.This step is getting the appropriate driver files into the Windows directory. Go to the Printers windows of My Computer and double-click on the Add Printer icon.
Installing and Configuring the HP CIFS Server Step 3: Modify the Configuration Modify the smb.conf file. Modify the smb.conf file by adding three options: • Printer driver • Printer driver file • Printer driver location Example smb.conf entries: [global] printer driver file = /opt/samba/print/printers.def [hpdeskjet] printer driver=HP DeskJet 560C Printer printer driver=Hp DeskJet 560C Printer printer driver location=\\%L\PRINTERS$ Configuring Print Services for HP CIFS Version A.01.
Installing and Configuring the HP CIFS Server Step 3: Modify the Configuration -or2. Create a [printers] share in the /etc/opt/samba/smb.conf file. Refer to the following example: [hpdeskjet] path = /tmp printable = yes Where “hpdeskjet” is the name of the printer to be added. Creating a [printers] share Configure a [printers] share in the /etc/opt/samba/smb.conf file.
Installing and Configuring the HP CIFS Server Step 3: Modify the Configuration 1. Create a [print$] share in the smb.conf file that points to an empty directory named “/etc/opt/samba/printers” on the HP CIFS Server. Refer to the following example: [print$] path = /etc/opt/samba/printers browseable = yes guest ok = yes read only = yes write list = netadmin In this example, the parameter “write list” specifies that administrative lever user accounts will have write access for updating files, on the share. 2.
Installing and Configuring the HP CIFS Server Step 3: Modify the Configuration Device settings can not be displayed. The driver for the specified printer is not installed, only spooler properties will be displayed. Do you want to install the driver now? 3. Click “yes” in the error dialog and the printer properties window will be displayed, with an APW. 4. Select the printer driver e.g. hp LaserJet 5i. You will be asked for the driver files. Give the path where the driver files are located.
Installing and Configuring the HP CIFS Server Step 3: Modify the Configuration NOTE HP does not recommend filesharing of the root. Only subdirectories under the root should be set up for filesharing. Setting Up a DFS Tree on a HP CIFS Server After the DFS Tree is set up using this procedure, users on DFS clients can browse the DFS tree located on the HP CIFS Server at \\servername\DFS. 1. Select a HP CIFS Server to act as the Distributed File System (DFS) root directory. 2.
Installing and Configuring the HP CIFS Server Step 3: Modify the Configuration Symbolic link names should be all lowercase. All clients accessing a DFS share should have the same user name and password. An example for setting up DFS links follows: 1. Use the ln command to set up the DFS links for “linka” and “linkb” on the /export/dfsroot directory. Both “linka” and “linkb” point to other servers on the network.
Installing and Configuring the HP CIFS Server Step 3: Modify the Configuration MC/ServiceGuard High Availability Support Highly Available HP CIFS Server allows the HP CIFS Server product to run on an MC/ServiceGuard cluster of nodes. MC/ServiceGuard allows you to create high availability clusters of HP 9000 server computers. Template files for version A.01.08 have been revised to allow any number of cluster nodes and other advantages over previous schemes.
Installing and Configuring the HP CIFS Server Step 4: Starting the HP CIFS Server Step 4: Starting the HP CIFS Server Run the script below to start Samba. /opt/samba/bin/startsmb When the command successfully starts Samba, a message is displayed indicating the specific processes that have been started. When the script is successful, the exit value is 0. If the script fails, the exit value is 1. Samba installation and configuration are complete.
Installing and Configuring the HP CIFS Server Other Samba Configuration Issues Other Samba Configuration Issues Translate Open-Mode Locks into HP-UX Advisory Locks The HP CIFS Server A.01.07, and subsequent versions, can translate open mode locks into HP-UX advisory locks. This functionality prevents HP-UX processes from obtaining advisory locks on files with conflicting open mode locks from CIFS clients.
Installing and Configuring the HP CIFS Server Other Samba Configuration Issues To counteract the possible performance impact, you can control how often Samba scans for changes in the directories it has been requested to monitor. The parameter that controls how often Samba scans for changes is Change Notify Timeout. The parameter value represents the number of seconds between the start of each scanning cycle. The default value is 60.
Installing and Configuring the HP CIFS Server Internationalization Internationalization This section describes European and Japanese character support for the HP CIFS server. European Character Support HP CIFS provides European character support for Windows 95, XP and NT clients. HP CIFS also supports MS-DOS and Windows 3.x clients using the PC850 code page.
Installing and Configuring the HP CIFS Server Internationalization — Windows 95 Japanese — Windows NT 4.0 Japanese • To enable HP CIFS Japanese capabilities, start HP CIFS with smb.conf variables set as follows: codingsystem = SJIS client code page = 932 • Japanese is supported for the following: — File/directory names — File contents — Printing Japanese is not supported for share names, domain names, user login names or user passwords.
3 Chapter 3 Managing HP-UX File Access Permissions from Windows NT/XP/2000 49
Managing HP-UX File Access Permissions from Windows NT/XP/2000 Introduction Introduction This chapter describes how to use Windows NT, XP and 2000 clients to view and change standard UNIX file permissions and VxFS POSIX Access Control Lists (ACL) on a HP CIFS server. A new configuration option, acl_schemes, is also introduced.
Managing HP-UX File Access Permissions from Windows NT/XP/2000 UNIX File Permissions and POSIX ACLs UNIX File Permissions and POSIX ACLs The HP CIFS Server enables the manipulation of UNIX file permissions or VxFS POSIX ACLs from Windows NT, XP or Windows 2000 clients. With this capability most management of UNIX file permissions or POSIX ACLs can be done from the familiar Windows Explorer interface.
Managing HP-UX File Access Permissions from Windows NT/XP/2000 UNIX File Permissions and POSIX ACLs Table 3-1 (Continued) UNIX Permission r-- NT access type Special Access In addition to the permission modes shown above, UNIX file permissions also distinguish between the file owner, the owning group of the file, and other (all other users and group). UNIX File Owner Translation in NT ACL A UNIX file system owner has additional permissions that others users do not have.
Managing HP-UX File Access Permissions from Windows NT/XP/2000 UNIX File Permissions and POSIX ACLs For example, if an owning group named sales on the UNIX file system has read and execute (r-x) permissions on a file, the Windows NT client will display the permissions for group sales as: Special Access(RXO) UNIX Other Permission Translation in NT ACL In UNIX, the other permission entry represents permissions for any user or group that is not the owner, and doesn't belong to the owning group.
Managing HP-UX File Access Permissions from Windows NT/XP/2000 UNIX File Permissions and POSIX ACLs Table 3-2 (Continued) NT access type UNIX Permission Special Access(RW) rw- Read(RX) r-x Special Access(WX) -wx Special Access(RWX) rwx Special Access r-- When mapping to UNIX file permissions from NT, you will not be able to add new NT ACL entries because only the owner, owning group and other ACL entries are supported by UNIX permissions. UNIX ignores unrecognized entries.
Managing HP-UX File Access Permissions from Windows NT/XP/2000 UNIX File Permissions and POSIX ACLs If you use pre-defined NT access types to set permissions on a Samba share, the permissions that are displayed later will not match what you set in NT. For example, Full Control will become rwx on the Samba server, and when it is displayed on the Windows NT client, it will show up as Special Access (RWX).
Managing HP-UX File Access Permissions from Windows NT/XP/2000 UNIX File Permissions and POSIX ACLs The VxFS POSIX ACL File Permissions VxFS POSIX ACLs are a superset of UNIX file permissions. VxFS POSIX ACLs extend the concept of UNIX file permissions in three ways. • VxFS POSIX ACLs allow for more entries than the basic owner, group and other UNIX file permissions. • VxFS POSIX ACLs support default Access Control Entry (ACE) for directory permissions.
Managing HP-UX File Access Permissions from Windows NT/XP/2000 UNIX File Permissions and POSIX ACLs Chapter 3 • The extra VxFS POSIX ACEs show up as NT ACEs on the Windows NT client. The permission mode translates like a UNIX permission mode. With this feature you can also add new user and group entries from the Windows NT client. The limitations to this feature will be discussed in the next section.
Managing HP-UX File Access Permissions from Windows NT/XP/2000 Using the NT Explorer GUI to Create ACLs Using the NT Explorer GUI to Create ACLs Use the Windows NT Explorer GUI to set new ACLs. This section describes how to add new entries to the ACE list: • Figure 3-3 58 Click the add button in the File/Directory Permissions dialog box of the Windows NT GUI to bring up the Add Users and Groups dialog box.
Managing HP-UX File Access Permissions from Windows NT/XP/2000 Using the NT Explorer GUI to Create ACLs NOTE Figure 3-4 The List Names From field displays the source of the list of group names. It may also show the name of your domain. Do not use the domain list to add new ACLs. Windows NT Explorer List Names From Field Instead, what you need is a list of groups and users that can be recognized by the underlying UNIX file system.
Managing HP-UX File Access Permissions from Windows NT/XP/2000 Using the NT Explorer GUI to Create ACLs • Figure 3-5 Windows NT Explorer Add Users and Groups Dialog Box • 60 Go to the List Names From dropdown list in the Add Users and Groups dialog box. One screen choice is to list names on your Samba server. This is the list HP recommends. Select any name on the list that is labelled local UNIX group. Those groups are actually UNIX groups on the Samba server.
Managing HP-UX File Access Permissions from Windows NT/XP/2000 Using the NT Explorer GUI to Create ACLs • Figure 3-6 Optionally, click the Show Users button and all the UNIX users on the Samba server will be added to the list as well. You will always be able to add an ACE for the local Unix groups and the users in this list. Add UNIX Groups and Users • You can type user and group names into the Add Names text field to add users and groups.
Managing HP-UX File Access Permissions from Windows NT/XP/2000 Using the NT Explorer GUI to Create ACLs To continue the example above, you could create an ACE for the administrator user on the NT client and, on the Samba server, the ACE would be created for the root user. The client will display the corresponding ACE as being for the root user, not the administrator user.
Managing HP-UX File Access Permissions from Windows NT/XP/2000 POSIX ACLs and Windows 2000/XP Clients POSIX ACLs and Windows 2000/XP Clients The HP CIFS Server A.01.07, and subsequent versions, allow Windows 2000/XP clients to view and set POSIX ACL permissions. The information in this section assumes you are familiar with Windows 2000/XP permissions.
Managing HP-UX File Access Permissions from Windows NT/XP/2000 POSIX ACLs and Windows 2000/XP Clients Table 3-4 UNIX Permission Maps Windows 2000/XP Client Permissions UNIX Permission Permission Shown on Windows 2000/XP Clients r-x Read and Execute All Read Permissions as in the first cell Execute or Traverse Folder rw- Read, Write All Read Permissions as in the first cell All Write Permissions as in the second cell NOTE rwx Full Control Full Control and All permission bits are ticked --- No b
Managing HP-UX File Access Permissions from Windows NT/XP/2000 POSIX ACLs and Windows 2000/XP Clients Setting Permissions from Windows 2000/XP Clients The following table shows how each Windows 2000/XP client permission is mapped to the UNIX permission when permissions are set from a client: Table 3-5 Windows 2000/XP Permissions Maps UNIX Permissions Windows 2000/XP Chapter 3 UNIX Permission Full Control rwx Write -w- Modify rwx Read and Execute r-x Read r-- List Folder / Read Data (Advanced)
Managing HP-UX File Access Permissions from Windows NT/XP/2000 POSIX ACLs and Windows 2000/XP Clients Table 3-5 Windows 2000/XP Permissions Maps UNIX Permissions Windows 2000/XP Take Ownership (Advanced) UNIX Permission * see explanation following table * The Delete, Change Permissions, and Take Ownership permissions represent the file and group ownership. You can only see these permissions, but you cann’t set them from Windows 2000/XP clients.
Managing HP-UX File Access Permissions from Windows NT/XP/2000 POSIX ACLs and Windows 2000/XP Clients Step 2. Click on the Security tab Displaying the Owner of a File Step 1. Click on Advanced Step 2.
Managing HP-UX File Access Permissions from Windows NT/XP/2000 HP CIFS Server Directory ACLs and Windows 2000/XP Clients HP CIFS Server Directory ACLs and Windows 2000/XP Clients Directory ACL Types Under POSIX, directory ACL contains both access and default ACEs. Access ACEs control the access to the directory itself. Default ACEs define what permissions are set for new files and subdirectories created under the current directory.
Managing HP-UX File Access Permissions from Windows NT/XP/2000 HP CIFS Server Directory ACLs and Windows 2000/XP Clients Step 2. Click on the Security tab Figure 3-7 Basic ACL View Viewing Advanced ACLs from Windows 2000 Clients Step 1. Right-click on a file or a directory and select Properties Step 2.
Managing HP-UX File Access Permissions from Windows NT/XP/2000 HP CIFS Server Directory ACLs and Windows 2000/XP Clients Step 3. Click on the Advanced button Figure 3-8 Advanced ACL View Mapping Windows 2000/XP Directory Inheritance Values to POSIX Under POSIX, default ACEs can apply to both files and subdirectories.
Managing HP-UX File Access Permissions from Windows NT/XP/2000 HP CIFS Server Directory ACLs and Windows 2000/XP Clients • Subfolders and files only • Subfolders only • Files only When a user attempts to change or add a directory ACE from the Windows Advanced ACE screen, the HP CIFS Server maps the Windows Inheritance Values to the corresponding POSIX ACE type.
Managing HP-UX File Access Permissions from Windows NT/XP/2000 HP CIFS Server Directory ACLs and Windows 2000/XP Clients You must use the Windows Advanced permission screen (Directory-> Properties->Security Tab->Advanced Button) to view or change POSIX directory ACLs. This section describes how to modify a directory ACE from the Widnows 2000 or XP client: Step 1. Right-click on a directory and select Properties Step 2. Click on the Security tab Step 3. Click on the Advanced button Step 4.
Managing HP-UX File Access Permissions from Windows NT/XP/2000 HP CIFS Server Directory ACLs and Windows 2000/XP Clients Step 6. Select the appropriate ACE type from Apply to dropdown list in the dialog box. Choose the selection according to how it will be mapped to POSIX ACEs. Please refer to “Mapping Table for Inheritance Values to POSIX” for detail information Step 7. Click on OK, you will be taken back to the Advanced ACE screen. Repeat the step 4 through step 6 to modify other ACEs Step 8.
Managing HP-UX File Access Permissions from Windows NT/XP/2000 HP CIFS Server Directory ACLs and Windows 2000/XP Clients If you modify an ACE entry and clear both Allow and Deny check boxes, the Windows 2000 or XP client removes that ACE and does not send it to the HP CIFS Server. To prevent a directory owner from losing access, both access and default ACEs for the owner should be set to Full Control permissions.
Managing HP-UX File Access Permissions from Windows NT/XP/2000 HP CIFS Server Directory ACLs and Windows 2000/XP Clients In the example 1, if a default owning group ACE entry, r-x, is removed from the Advanced Windows ACE screen, the HP CIFS Server generates the missing default owning group ACE entry based on the existing access owning group ACE, rwx, The following shows the result of changes for the directory ACEs on the HP CIFS Server: # file:testdir # owner:testuser # owning group:users access:owner:rwx
Managing HP-UX File Access Permissions from Windows NT/XP/2000 HP CIFS Server Directory ACLs and Windows 2000/XP Clients # file:testdir # owner:testuser # owning group:users access:owner:rwx access:owning group:r-x access:other:rwx defualt:owner:rwx default:owning group:r-x default:other:r-Example 2: In the example 3, assume that the existing directory ACEs for testdir on the HP CIFS Server are: # file:testdir # owner:testuser # owning group:users # other group:testgroup access:owner:rwx access:owning group
Managing HP-UX File Access Permissions from Windows NT/XP/2000 HP CIFS Server Directory ACLs and Windows 2000/XP Clients # other group:testgroup access:owner:rwx access:owning group:r-x defualt:owner:rwx default:owning group:r-- Adding Directory ACLs From Windows 2000/XP Clients This section describes how to add a directory ACE from the Widnows 2000 or XP client: Step 1. Right-click on a directory and select Properties Step 2. Click on the Security tab Step 3. Click on the Advanced button Step 4.
Managing HP-UX File Access Permissions from Windows NT/XP/2000 HP CIFS Server Directory ACLs and Windows 2000/XP Clients Step 8. You will be taken to the ACE Advanced view screen, click on OK or Apply button to add the new ACE Figure 3-11 Selecting a new ACE user or group IMPORTANT POSIX ACEs with zero permission can be modified by adding an ACE and setting the desired permissions for that user or group. A new ACE can be added by using the Add button on the Windows ACL interface.
Managing HP-UX File Access Permissions from Windows NT/XP/2000 HP CIFS Server Directory ACLs and Windows 2000/XP Clients With HP CIFS Server version A.01.10, the POSIX default owner and default owning group ACEs are shown in the Windows interface as Creator Owner and Creator Group even if the permissions on the access and default ACEs are the same. However, everyone is shown as only one ACE if the access and default permissions are the same.
Managing HP-UX File Access Permissions from Windows NT/XP/2000 Configuring Samba ACL Support Configuring Samba ACL Support For HP CIFS Version A.01.07 In non-HP Samba versions, you could only turn Samba's NT ACL Support on or off on a serverwide basis. When turned on, UNIX file permission support was enabled for all Samba shares. There was no support for any ACL scheme, including VxFS POSIX ACLs. Instead, you configured the old NT ACL support through the smb.conf variable nt acl support.
Managing HP-UX File Access Permissions from Windows NT/XP/2000 Configuring Samba ACL Support If a Windows client makes a request to see the ACL for a file on an HFS file system in that share, Samba attempts to use the POSIX ACL system call. It will fail and return an error indicating that the ACL scheme is not supported on that file. Then Samba would try the HFS ACL system call and it would succeed. The user would not see the initial failure described in this example.
Managing HP-UX File Access Permissions from Windows NT/XP/2000 Configuring Samba ACL Support on the ACL scheme list for that share. Otherwise, Samba will make many system calls for other ACL schemes before it locates the right one. This prioritization will become even more important in the future when Samba supports more and more ACL types. For HP CIFS Version A.01.08 With HP CIFS Server version A.01.08, the “nt acl support” configuration variable is made share level.
Managing HP-UX File Access Permissions from Windows NT/XP/2000 In Conclusion In Conclusion Samba ACL support is a feature that enables the manipulation of UNIX file permissions or UNIX ACLs from Windows NT/XP/2000 clients. With this feature, almost any modification you want to make to UNIX permissions or VxFS POSIX ACLs can now be done from an NT/XP/2000 client (with the exception of the class entry for VxFS POSIX ACLs).
Managing HP-UX File Access Permissions from Windows NT/XP/2000 In Conclusion 84 Chapter 3
4 Chapter 4 Primary Domain Controller (PDC) Support 85
Primary Domain Controller (PDC) Support Introduction Introduction This chapter describes how to set up, and configure, a HP CIFS Server as a Primary Domain Controller (PDC). The following is a list of recent enhancements for the HP CIFS Server. Those that are new for version A.01.08 have been identified as such. NOTE • Continue the support for joining a Samba server to the Windows NT domain as a member server • New for A.01.
Primary Domain Controller (PDC) Support Introduction • Windows NT administrators may group workstations and servers under the authority of a domain controller • Domain members may be centrally administered by using domains to group related machines. One of the benefits of this is the ability for user accounts to be common for multiple systems. A user may now make one password change which will affect multiple systems accessed by that user.
Primary Domain Controller (PDC) Support Introduction — AS/U 88 • Users on a domain member machine can access network resources within the domain. Some examples of these resources are file and printer shares and application servers • Domain members do not perform the user authentication for user logons. Instead, the member sends the credentials to a domain controller via a secure channel.
Primary Domain Controller (PDC) Support Create the Machine Trust Accounts Create the Machine Trust Accounts A Machine Trust Account for a Windows Client (Client=member server) on a HP CIFS Server acting as a PDC is simply a user account entry created for a machine. It is denoted by the machine name followed by "$". For PDCs not using LDAP (default), machine accounts will have entries in both /etc/passwd (unix user accounts) and /var/opt/samba/private/smbpasswd (Windows user accounts).
Primary Domain Controller (PDC) Support Create the Machine Trust Accounts $ /opt/samba/LDAP/smbldap-tools/smbldap-useradd.
Primary Domain Controller (PDC) Support Create the Machine Trust Accounts objectClass: posixAccount objectClass: sambaAccount cn: client1$ uid: client1$ uidNumber: 1000 gidNumber: 200 homeDirectory: /home/temp loginShell: /bin/false gecos: Samba_Server description: Samba_Server userPassword: {crypt}x pwdLastSet: 1076466492 logonTime: 0 logofftime: 2147483647 kickoffTime: 2147483647 pwdCanChange: 0 pwdMustChange: 2147483647 rid: 1206 primaryGroupID: 1041 lmPassword: E0AFF63989B8FA6576549A685C6AFAF1 ntPasswor
Primary Domain Controller (PDC) Support Configure Domain Users Configure Domain Users The following examples show the commands used to configure Domain Users, Domain Administrators and Domain Guests on a HP CIFS Server configured as a PDC. • If you are a root-level user, create a Domain User in the group named “users”, located in the /sbin/sh directory.
Primary Domain Controller (PDC) Support Configure the HP CIFS Server as a PDC Configure the HP CIFS Server as a PDC When configured to act as a Primary Domain Controller (PDC), the HP CIFS Server should create machine accounts for Windows Clients (member servers). To enable this feature, choose “Primary Domain Controller” when executing samba_setup, then verify the following: 1. The smb.
Primary Domain Controller (PDC) Support Configure the HP CIFS Server as a PDC Map an NT Domain Admin Group to a Unix Group A Samba Server can be configured as a PDC to map a Windows NT domain admin group to the Unix group. Modify the smb.conf file to set the global parameter named domain admin group to point to the Unix admin group and user. Example: [global] domain admin group = root @adm In this example, a group called “adm” should be created by the user in the /etc/group file.
Primary Domain Controller (PDC) Support Join a Windows Client to a Samba Domain Join a Windows Client to a Samba Domain 1. Verify the following parameters in the smb.conf file: Set the security parameter to “user.” Set the workgroup parameter to the name of the domain. Set the encrypt passwords parameter to “yes.” [global] security = user workgroup = SAMBADOM #SAMBA Domain name domain logon = yes encrypt passwords = yes 2.
Primary Domain Controller (PDC) Support Join a Windows Client to a Samba Domain As an example, the resulting entry in the LDAP directory server for a client machine named “client1” would be: objectClass: posixAccount cn: client1$ uid: client1$ uidNumber: 1002 gidNumber: 202 homeDirectory: /home/temp loginShell: /bin/false userPassword: {crypt}x pwdLastSet: 1076466300 logonTime: 0 logofftime: 2147483650 kickoffTime: 2147483650 pwdCanChange: 0 pwdMustChange: 2147483650 rid: 1206 primaryGroupID: 1041 acctFlags
Primary Domain Controller (PDC) Support Join a Windows Client to a Samba Domain uid: client1$ uidNumber: 1002 gidNumber: 202 homeDirectory: /home/temp loginShell: /bin/false gecos: Samba_Server description: Samba_Server userPassword: {crypt}x pwdLastSet: 1076466300 logonTime: 0 logofftime: 2147483650 kickoffTime: 2147483650 pwdCanChange: 0 pwdMustChange: 2147483650 rid: 1206 primaryGroupID: 1041 lmPassword: E0AFF63989B8FA6576549A685C6ADFC1 ntPassword: E0AFF63989B8FA6576549A685C6ADFC1 acctFlags: [W ] display
Primary Domain Controller (PDC) Support Join a Windows Client to a Samba Domain 6. Enter the Samba domain name in the ‘Domain’ field, and click on the ‘Change’ button. Refer to Figure 4-3 below.
Primary Domain Controller (PDC) Support Roaming Profiles Roaming Profiles The HP CIFS Server, configured as a PDC, supports Roaming Profiles with the following features: • A user’s environment, preference settings, desktop settings, etc.
Primary Domain Controller (PDC) Support Configuring User Logon Scripts Configuring User Logon Scripts The logon script configuration must meet the following requirements: • User logon scripts should be stored in a file share called [netlogon} on the HP CIFS Server. • Should be set to UNIX executable permission. • Any logon script should contain valid commands recognized by the Windows client. • A logon user should have proper access permissions to execute logon scripts.
Primary Domain Controller (PDC) Support Home Drive Mapping Support Home Drive Mapping Support A HP CIFS Server provides user home directories and home drive mapping functionality by using the following two global parameters in the smb.
Primary Domain Controller (PDC) Support Home Drive Mapping Support 102 Chapter 4
5 Domain Member Server Support This chapter describes the process for Joining a HP CIFS Server to a Windows NT or Samba Domain.
Domain Member Server Support Join a HP CIFS Server to a Windows NT, Windows 2000 or Samba Domain Join a HP CIFS Server to a Windows NT, Windows 2000 or Samba Domain Step-by-step Procedure 1. Choose “Domain Member Server” when executing samba_setup. When prompted, you will need to add your domain Member Server machine account to the PDC. For Windows NT: Go to the Windows NT PDC and create a machine account for the HP CIFS Member Server by performing the following steps: a.
Domain Member Server Support Join a HP CIFS Server to a Windows NT, Windows 2000 or Samba Domain [global] security = domain workgroup = NTDOM #Window NT or Samba Domain name password server = DOMPDC encrypt passwords = yes NOTE workgroup: This parameter specifies the domain name of which the HP CIFS Server is a member. security: When the HP CIFS Server joins a domain as a member, this parameter must be set to “domain”.
Domain Member Server Support Join a HP CIFS Server to a Windows NT, Windows 2000 or Samba Domain 106 Chapter 5
6 LDAP Integration Support This chapter describes the HP CIFS Server with LDAP integration. It includes benefits of LDAP, procedures to install, configure and verify the HP Netscape Directory Server, HP LDAP-UX Integration product and HP CIFS Server software.
LDAP Integration Support 108 • “Overview” on page 109 • “Network Environments” on page 111 • “Summary of Installing and Configuring” on page 115 • “Installing and Configuring Your Netscape Directory Server” on page 116 • “Installing LDAP-UX Client Services on an HP CIFS Server” on page 118 • “Configuring the LDAP-UX Client Services” on page 119 • “Enabling Secure Sockets Layer (SSL)” on page 124 • “Migrating Your data to the Netscape Directory” on page 127 • “Extending Samba subschema int
LDAP Integration Support Overview Overview Lightweight Directory Access Protocol (LDAP) provides a framework for the development of a centralized management infrastructure. LDAP supports directory enabled computing by consolidating applications, services, user accounts, Windows account and configuration information into a central LDAP directory. Samba customer sites with large numbers of users and servers may want to integrate the HP CIFS Server with LDAP support.
LDAP Integration Support Overview NOTE While the HP CIFS Server may operate satisfactorily with other LDAP products, HP only provides LDAP support for the HP CIFS Server with HP LDAP-UX Integration, J4269AA, and HP Netscape Directory Server, J4258C, product configurations. NOTE The HP CIFS Server does not support the SSL feature for the CIFS server to the LDAP directory in the release version A.01.11.
LDAP Integration Support Network Environments Network Environments The HP CIFS Server supports many different network environments. Features such as WINS, browser control, domain logons, roaming profiles, and many others continue to be available to support a diverse range of network environments. LDAP integration provides one more alternative solution for Samba user authentication.
LDAP Integration Support Network Environments NOTE The HP CIFS Server does not support the Microsoft Active Directory Services (ADS) configurations. Advance Server for UNIX/9000 (ASU) Servers With LDAP integration, the centralized management of user data helps you to migrate ASU to CIFS Server. ASU PDC servers can migrate users to /etc/passwd entries using the migration help package available at http:// software.hp.com.
LDAP Integration Support Network Environments The CIFS Authentication with LDAP Integration With LDAP integration, multiple HP CIFS Servers can share a single LDAP directory server for a centralized user database management. The HP CIFS Server can access the LDAP directory and look up the windows user information for user authentication.
LDAP Integration Support Network Environments 5. The CIFS Server receives data attributes including the password information from the LDAP directory server. If the password and challenge information matches with information in the client response package, the Samba user authentication succeeds. Then, the UNIX authentication is conducted. 6. If both Samba and UNIX authentication is successful, the CIFS Server returns a user token session ID to the Windows PC client.
LDAP Integration Support Summary of Installing and Configuring Summary of Installing and Configuring The following summarizes the steps you take when installing, configuring, verifying and activating the HP CIFS Server with the LDAP support: • Install the Netscape Directory Server, if not already installed. See “Installing the Netscape Directory Server” on page 116. • Configure the Netscape Directory Server, if not already configured. See “Configuring the Netscape Directory Server” on page 116.
LDAP Integration Support Installing and Configuring Your Netscape Directory Server Installing and Configuring Your Netscape Directory Server This section describes how to set up and configure your Netscape Directory Server to work with LDAP-UX Client Services and the HP CIFS Server. See Preparing Your LDAP Directory for HP-UX Integration at http://docs.hp.com/hpux/internet, for more information on directory configuration.
LDAP Integration Support Installing and Configuring Your Netscape Directory Server Step 2. Enter the host name of the Netscape Directory Server where you want to store your user data. Step 3. Enter the port number of the previously specified directory server. The default port number is 389 Step 4. Enter the Distinguished Name (DN) and password of the administrator. This user has operator permissions. For example, you can enter “admin” as the administrator DN. Step 5. Enter the base DN.
LDAP Integration Support Installing LDAP-UX Client Services on an HP CIFS Server Installing LDAP-UX Client Services on an HP CIFS Server Use swinstall(1M) to install the LDAP-UX Client Services software, the NativeLdapClient subproduct, on an HP CIFS Server. See the LDAP-UX Client Services B.03.20 Release Notes for more details on the installation procedures. The LDAP-UX Client Services software is available at http://www.software.hp.com. You must install the LDAP-UX Client Services version B.03.
LDAP Integration Support Configuring the LDAP-UX Client Services Configuring the LDAP-UX Client Services You need to configure the LDAP-UX Client Services if it is not already configured. This section describes major steps to configure LDAP-UX Client Services with the Netscape Directory Server 6.02 or later version. For detailed information on how to configure the LDAP-UX Client Services, see the “Configure the LDAP-UX Client Services” section of LDAP-UX Client Services B.03.
LDAP Integration Support Configuring the LDAP-UX Client Services Quick Configuration You can quickly configure the LDAP-UX Client Services by selecting the default value for most of the configuration parameters as follows: Step 1. To be consistent with the Samba organizational unit defaults, you must edit the /opt/ldapux/migrate/migrate_common.ph file to change the default group objectclass under $RFC2307BIS structure from ou=Group to ou=Groups. Step 2.
LDAP Integration Support Configuring the LDAP-UX Client Services Step 7. If you are creating a new profile, add all parent entries of the profile DN to the directory (if any). If you attempt to create a new profile and any parent entries of the profile do not already exist in the directory, setup will fail. For example, if your profile will be cn=ldapuxprofile, dc=cup, dc=hp, dc=com, then the base path, cup.hp.com, must exist in the directory or setup will fail.
LDAP Integration Support Configuring the LDAP-UX Client Services Table 6-1 shows the configuration parameters and the default values that they will be configured with.
LDAP Integration Support Configuring the LDAP-UX Client Services $ /opt/ldapux/bin/ldapsearch -T -b “cn=schema” -s base \ “(objectclass=*)”|grep -i posix Ensure that the posixAccount objectclass is displayed in the output when you run the ldapsearch command. The output is as follows: objectClasses: ( 1.3.6.1.1.1.2.
LDAP Integration Support Enabling Secure Sockets Layer (SSL) Enabling Secure Sockets Layer (SSL) The HP CIFS Server provides Secure Sockets Layer (SSL) support to secure communication between CIFS servers and SSL enabled LDAP directory servers. If you plan to use SSL and it is not already in use for LDAP, you need to enable it on the Netscape Directory Server and LDAP-UX clients. When you have enabled the LDAP server and clients, then you can configure the HP CIFS Server to use SSL.
LDAP Integration Support Enabling Secure Sockets Layer (SSL) For detailed instructions on how to configure the administration server to connect to an SSL enabled directory server, see Managing Servers with Netscape Console available at http://docs.hp.com. Configuring the LDAP-UX Client to Use SSL If you plan to use SSL, you need to install the Certification Authority (CA) certificate on your LDAP-UX Client and configure the LDAP-UX Client to enable SSL.
LDAP Integration Support Enabling Secure Sockets Layer (SSL) subsection of the “Installing LDAP-UX Client Services” chapter in LDAP-UX Client Services B.03.20 Administrator’s Guide at http://docs.hp.com.
LDAP Integration Support Migrating Your data to the Netscape Directory Migrating Your data to the Netscape Directory HP recommends that all UNIX user accounts either in the /etc/passwd file or NIS database files are migrated to the Netscape Directory Server. The LDAP-UX Integration product provides migration scripts to accomplish the task in an automated way. These scripts are located in /opt/ldapux/migrate directory. The two shell scripts, migrate_all_online.sh and migrate_all_nis_online.
LDAP Integration Support Migrating Your data to the Netscape Directory NOTE Before you run the migration scripts, you must edit the /opt/ldapux/migrate/migrate_common.ph file to change the default group objectclass under $RFC2307BIS structure from ou=Group to ou=Groups. By doing this, it can match with the Samba organizational unit defaults. An Example The following example shows the necessary steps to import your data into the LDAP directory using the migration script, migrare_all_online.sh: Step 1.
LDAP Integration Support Migrating Your data to the Netscape Directory Migrating Individual Files The following perl scripts migrate each of your source files in the /etc directory to LDIF. These scripts are called by the shell scripts, described in the section “Migrating All Your Files” on page 127. The perl scripts obtain their information from the input source file and output LDIF.
LDAP Integration Support Migrating Your data to the Netscape Directory Table 6-2 Migration Scripts (Continued) (Continued) Script Name Description Migrates groups in the /etc/group file. migrate_group.pl migrate_hosts.pl a Migrates hosts in the /etc/hosts file. migrate_networks.pl Migrates networks in the /etc/networks file. migrate_passwd.plb Migrates users in the /etc/passwd file. migrate_protocols.pl Migrates protocols in the /etc/protocols file. migrate_rpc.
LDAP Integration Support Migrating Your data to the Netscape Directory b. Netgroup - The NIS optimization maps ‘byuser’ and ‘byhost’ are not utilized. -Each triple is stored as a single string. -Each triple must be enclosed by parentheses. For example, “(machine, user, domain)” is a valid triple while “machine, user, domain” is not. c. When migrating services data into the LDAP directory, You keep in mind that only multiple protocols can be associated with one service name, but not multiple service ports.
LDAP Integration Support Extending Samba subschema into Your Directory Server Extending Samba subschema into Your Directory Server You now need to extend the Netscape Directory Server schema with the sambaAccount subschema from the HP CIFS Server to your Netscape Directory Server. Ensure that you have configured your LDAP directory and LDAP-UX Client Services, and migrated your data to the LDAP directory before extending the schema. The sambaAccount subschema is the /opt/samba/LDAP/98samba.
LDAP Integration Support Extending Samba subschema into Your Directory Server $ /opt/ldapux/bin/ldapsearch -T -b “cn=schema” -s base \ “(objectclass=*)”|grep -i samb You need to ensure that the output displays the sambaAccount objectclass when you run the ldapsearch command. The output is shown as follows: objectClasses: ( 1.3.1.5.1.4.1.7165.2.2.
LDAP Integration Support Configuring the HP CIFS Server Configuring the HP CIFS Server You must set up and configure your HP CIFS Server to enable the LDAP feature support. LDAP Configuration Parameters The following is the list of new global parameters available for you to configure the HP CIFS Server to enable the LDAP feature. These parameters are set in the /etc/opt/samba/smb.conf file under global parameters.
LDAP Integration Support Configuring the HP CIFS Server Table 6-3 Global Parameters (Continued) (Continued) Parameter Description ldap filter Specifies the RPC 2254 compliant LDAP search filter. The default is to match the login name with the uid attribute for all entries matching the sambaAccount objectclass. For example, ldap filter = (&(uid=%u)(objectclass=sambaAccount)).
LDAP Integration Support Configuring the HP CIFS Server Configuring LDAP Feature Support After installing the HP CIFS Server, the existing configuration continues to operate as currently configured. To enable the LDAP support, you must configure the relative LDAP configuration parameters in the /etc/opt/samba/smb.conf file by using the SWAT tool or the editor. NOTE HP recommends that new installation customers run the samba_setup program to set up and configure the HP CIFS Server.
LDAP Integration Support Installing your Samba Users in the Directory Installing your Samba Users in the Directory This section describes how to install and verify your samba users in your LDAP directory. Adding Credentials When you use the HP CIFS Server A.01.11 with the LDAP feature support, the smbpasswd command manipulates user accounts information on the LDAP directory rather than the /var/opt/samba/private/smbpasswd file.
LDAP Integration Support Installing your Samba Users in the Directory Before you run this script, you must edit the /opt/samba/LDAP/import_smbpasswd.pl script to set the $DN, $ROOTDN, $rootpw and $LDAPSERVER local site variables with the LDAP base DN, your Directory Manager name, password and directory server name. Consider the following example which sets the LDAP base DN to “cup.hp.
LDAP Integration Support Installing your Samba Users in the Directory -w password of the directory manager Example The following example uses the ldapsearch utility to check that the user entry johnl contains the sambaAccount objectclass: $ /opt/ldapux/bin/ldapsearch -b “dc=cup,dc=hp, dc=com” -ssub \ -D “cn=Directory Manager” -w dmpasswd “uid=johnl” The output is shown as the follows: dn: uid=johnl,ou=People,dc=cup,dc=hp,dc=com objectclass: top objectclass: account objectclass: posixAccount objectclass:
LDAP Integration Support LDAP management Tools LDAP management Tools The HP CIFS Server provides LDAP management tools for you to maintain users, groups and passwords in the Netscape Directory Server. Samba LDAP Tools The following lists Samba LDAP tools available for you to maintain users and groups data in the Netscape Directory Server. These tools are located in the /opt/samba/LDAP/smbldap-tools directory: 140 smbldap-groupadd.pl adds a new group (objectclass: posixGroup) smbldap-groupdel.
LDAP Integration Support LDAP management Tools You must edit the /opt/samba/LDAP/smbldap-tools/smbldap_conf.pm configuration file with appropriate configuration values before you attempt to run these tools. You can use the tool option, -?, for the detailed usage of each tool. For more information on how to use these tools, refer to /opt/samba/LDAP/smbldap-tools/FILES and /opt/samba/LDAP/smbldap-tools/README. NOTE In order to run these management tools, perl on HP-UX 11.
LDAP Integration Support LDAP management Tools NOTE You can use the -w option to specify the LDAP directory manager password when you run LDAP management tools. Without using the -w option, the HP CIFS Server will look up the password value of the $bindpasswd attribute in the /opt/samba/LDAP/smbldap-tools/smbldap_conf.pm configuration file. NOTE You may edit the script configuration file, /opt/samba/LDAP/smbldap-tools/smbldap_conf.pm, to set the LDAP parameters.
LDAP Integration Support LDAP management Tools groupname Specify the name of the group. The group data information will be added to the LDAP directory. An Example The following commands add the new group name “group1” with the group id “200” to the Netscape Directory Server: cd /opt/samba/LDAP/smbldap-tools ./smbldap-groupadd.pl -g 200 group1 The smbldap-groupdel.pl Tool You can use this tool to delete a group entry from the Netscape Directory Server. This tool will delete the posixGroup information.
LDAP Integration Support LDAP management Tools The smbldap-groupshow.pl Tool You can use this tool to view a group entry with the posixGroup information in the Netscape Directory Server. Syntax smbldap-groupshow.pl [option] groupname where option can be any of the following: -w specifies the LDAP directory manager password -S use the /etc/opt/samba/smb.
LDAP Integration Support LDAP management Tools Syntax smbldap-useradd.pl [options] username where options can be any of the following: Chapter 6 -a specifies a Windows user. With this option, both posixAccont and sambaAccount will be added to the LDAP directory. Without this option, only posixAccount information for the user will be added. -W specifies a Windows workstation. With this option, both posixAccount and sambaAccount will be added to the LDAP directory.
LDAP Integration Support LDAP management Tools -F specifies the profile directory. -H specifies Samba account control bits. -S use the /etc/opt/samba/smb.conf file to get LDAP parameters -Z use the secure SSL connection to the LDAP directory server -? shows help messages. username Specify the name of the new user. The user service data will be added to the LDAP directory. NOTE The -a option with the user name must be the last parameter.
LDAP Integration Support LDAP management Tools -g modifies the Group id (GID) -l modifies the login name -s modifies the shell information -c gecos -d modifies the home directory -x creates rid and primaryGroupID in hex instead of decimal -w specifies the LDAP directory manager password -A can change the user password -B must change the user password -C specifies the SMB home share, such as \\PDC-SRC\homes -D specifies the home drive letter associated with home share, such as H: -E mo
LDAP Integration Support LDAP management Tools cd /opt/samba/LDAP/smbldap-tools ./smbldap-usermod.pl -u 200 johnl The smbldap-userdel.pl Tool You can use the smbldap-userdel.pl tool to delete a user entry in the Netscape Directory Server. This tool will delete both posixAccout and sambaAccount information from the LDAP directory. Syntax smbldap-userdel.
LDAP Integration Support LDAP management Tools where option can be any of the following: -w specifies the LDAP directory manager password -S use the /etc/opt/samba/smb.conf file to get LDAP parameters -Z use the secure SSL connection to the LDAP directory server -? shows help messages username Specify name of the user entry. An Example The following commands shows the user entry data of the user “johnl” in the Netscape Directory Server: cd /opt/samba/LDAP/smbldap-tools ./smbldap-usershow.
LDAP Integration Support LDAP management Tools The following commands add or modify both samba password and posix password of the user name “johnl” to the Netscape Directory Server: cd /opt/samba/LDAP/smbldap-tools ./smbldap-passwd.
LDAP Integration Support Limitations with the LDAP Feature Support Limitations with the LDAP Feature Support Chapter 6 • HP only supports the HP CIFS Server with LDAP integration that works with the HP LDAP-UX Integration product, J4269AA, and the HP Netscape Directory Server, J4258CA. • With the LDAP feature enabled, the HP CIFS Server only looks up Windows user information in the LDAP directory. It does not use the smbpasswd file at all if the user information is not found in the directory.
LDAP Integration Support Limitations with the LDAP Feature Support 152 Chapter 6
7 Configuring HA HP CIFS HP CIFS has two High Availability configurations: Active-Standby and Active-Active.
Configuring HA HP CIFS An “active-standby” High Availability configuration is a configuration where, under normal conditions, one node of the MC/ServiceGuard cluster is running the MC/ServiceGuard package and one or more other nodes are in a “wait” mode, waiting to run the package if anything goes wrong on the first node. Only one node can run the package at any given time. Hence the names in this type of HA configuration are: “active” for the first node and “stand by” for the other node(s).
Configuring HA HP CIFS Overview of HA HP CIFS Server Active-Standby Overview of HA HP CIFS Server Active-Standby Highly Available HP CIFS Server allows the HP CIFS Server product to run on a MC/ServiceGuard cluster of nodes. MC/ServiceGuard allows you to create high availability clusters of HP 9000 Server computers. You must set up an MC/ServiceGuard cluster before you can set up an HA HP CIFS Server. For instructions on setting up an MC/ServiceGuard cluster, refer to the Managing MC/ServiceGuard manual.
Configuring HA HP CIFS Installing Prerequisites Installing Prerequisites HA HP CIFS Server must be installed and configured on both the primary and alternate cluster nodes. Before creating a Highly Available HP CIFS Server package, however, you must set up your MC/ServiceGuard cluster according to the instructions in the Managing MC/ServiceGuard manual. To do so, perform the following: 1. Following the instructions, configure the disk hardware for high availability. 2.
Configuring HA HP CIFS Install the HA HP CIFS Server Install the HA HP CIFS Server Follow the steps below to load the HA HP CIFS Server software. 1. Install the HP CIFS Server using SD on the primary and alternate nodes. If the HP CIFS Server is already installed and configured on the primary node, stop it using the /opt/samba/bin/stopsmb command and skip to Step 3 below. 2. On the primary node: Run the /opt/samba/bin/samba_setup script to configure the installed files.
Configuring HA HP CIFS Install the HA HP CIFS Server IMPORTANT This is important to ensure the IP address of the HP CIFS server doesn’t change when a failover occurs. If the IP address changed on failover, clients might experience problems. 5. Check that the RUN_SAMBA parameter in the /etc/rc.config.d/samba file is set to 0 on all nodes.
Configuring HA HP CIFS Configure a Highly Available HP CIFS Server Configure a Highly Available HP CIFS Server To configure the HA HP CIFS Server product, you must complete the steps below. These steps are described in detail in the following sections. 1. Move data to the HP CIFS share volume. 2. Edit the samba.conf package configuration file. 3. Edit the samba.cntl control script. 4. Create the MC/ServiceGuard Binary Configuration File.
Configuring HA HP CIFS Configure a Highly Available HP CIFS Server NOTE If you plan to use a username mapping file, HP recommends that you configure its location under the /etc/opt/samba directory. This way, when changes are made, all nodes will be updated. Below is an example of copied data from the required HP CIFS Server directories to the logical volumes in the volume group vgsamba.
Configuring HA HP CIFS Configure a Highly Available HP CIFS Server 1. Set the PACKAGE_NAME variable. PACKAGE_NAME Sambapkg 2. Create a NODE_NAME variable for each node that will be running the package. The first NODE_NAME variable should specify the primary node. All other NODE_NAME variables should specify alternate nodes in the order in which they are to be tried. NODE_NAME NODE_NAME node1 node2 3. Set the RUN_SCRIPT and HALT_SCRIPT variables to the full path name of the control script.
Configuring HA HP CIFS Configure a Highly Available HP CIFS Server 2. Create a separate LV[n] and FS[n] variable for each volume group and file system that will be mounted on the server, for example: LV[0]=/dev/vgsamba/lvol1;FS[0]=/opt/share1 LV[1]=/dev/vgsamba/lvol2;FS[1]=/home/share2 LV[2]=/dev/vgsamba/lvol3;FS[1]=/etc/opt/samba Add additional LV variables, if required. 3. Specify the relocatable IP address and the address of the subnet to which the IP address belongs. IP[0]=15.13.171.20 SUBNET[0]=15.13.
Configuring HA HP CIFS Configure a Highly Available HP CIFS Server test_return 51 } 6. Use the following as a template for customer_defined_halt_cmds: function customer_defined_halt_cmds { # ADD customer defined halt commands.
Configuring HA HP CIFS Configure a Highly Available HP CIFS Server /etc/cmcluster/samba/samba.conf. The actual cluster and HA HP CIFSHP CIFS Server package configuration file names on your system may be different. To configure the MC/Service Guard Binary file, you must complete the following tasks: 1. Use the cmcheckconf command to verify the contents of your cluster and package configuration. cmcheckconf -C /etc/cmcluster/cluster.conf \ -P /etc/cmcluster/samba/samba.conf 2.
Configuring HA HP CIFS Special Notes for HA HP CIFS Server Special Notes for HA HP CIFS Server There are several areas of concern when implementing Samba in the MC/ServiceGuard HA framework. These areas are described below: • Client Applications HA HP CIFS Server cannot guarantee that client applications with open files on a HP CIFS Server share, or applications launched from HP CIFS Server shares, will transparently recover from a switchover.
Configuring HA HP CIFS Special Notes for HA HP CIFS Server Easier options would be to set wide links to no or to be sure that every file or directory that you point to is on a logical shared volume. • Encrypted Passwords If you have your Samba server configured with encrypt passwords set to yes, then you have to use an smbpasswd file. By default, this file is in /var/opt/samba/private, but you can specify a different path with the smb passwd file parameter.
Configuring HA HP CIFS Special Notes for HA HP CIFS Server If you configure your Samba server with a [printers] share to automatically share all the printers on your HP-UX system, then you will need to be certain that all your MC/ServiceGuard nodes have the same HP-UX printers defined. Otherwise, when a failover occurs, the list of shared printers for the Samba server will change resulting in problems on clients using those printers.
Configuring HA HP CIFS Overview of HA HP CIFS Server Active-Active Overview of HA HP CIFS Server Active-Active Highly Available HP CIFS Server allows the HP CIFS Server product to run on a MC/ServiceGuard cluster of nodes. C/ServiceGuard allows you to create high availability clusters of HP 9000 Server computers. You must set up an MC/ServiceGuard cluster before you can set up an HA HP CIFS Server. For instructions on setting up an MC/ServiceGuard cluster, refer to the Managing MC/ServiceGuard manual.
Configuring HA HP CIFS Overview of HA HP CIFS Server Active-Active Installing Highly Available HP CIFS Server HA HP CIFS Servers must be installed and configured on all cluster nodes in the Active-Active configuration. All cluster nodes act as “primary” nodes and, at the same time, as “alternate” nodes for others. If there is no failover, each cluster node runs one of the packages. If a failover occurs, a cluster node will pick up the failed package in addition to its original package.
Configuring HA HP CIFS Overview of HA HP CIFS Server Active-Active primary group ID, and password on both cluster nodes. If this isn’t the case, you cannot use Samba as an Active-Active server for this MC/ServiceGuard cluster. 5. Check that the RUN_SAMBA parameter in the /etc/rc.config.d/samba file is set to 0 on both nodes.
Configuring HA HP CIFS Overview of HA HP CIFS Server Active-Active When complete, each HPUX system will have a package using the NetBIOS name for each node in the cluster, though only the package with its own NetBIOS name will be active until a failover occurs. For example, if you have a three node cluster, you will have three packages on each of the three HPUX systems. There will be three cluster directories: 1. /etc/cmcluster/samba/sambapkg1 2. /etc/cmcluster/samba/sambapkg2 3.
Configuring HA HP CIFS Overview of HA HP CIFS Server Active-Active 2. Create a file /etc/opt/samba/smb.conf. (For example, /etc/opt/samba/smb.conf.hp_server1) with the following lines: [global] workgroup = ha_domain netbios name = ha_server1 interfaces = XXX.XXX.XXX.XXX/xxx.xxx.xxx.xxx bind interfaces only = yes log file = /var/opt/samba/ha_server1/logs/log.%m lock directory = /var/opt/samba/ha_server1/locks Replace the "XXX.XXX.XXX.XXX/xxx.xxx.xxx.
Configuring HA HP CIFS Overview of HA HP CIFS Server Active-Active Below is an example of copied data from the required HP CIFS Server directories to the logical volumes in the volume group vgsamba. The same can be done for vgasambapkg2.
Configuring HA HP CIFS Overview of HA HP CIFS Server Active-Active ...depending on which package you are currently working on. 2. Create a NODE_NAME variable for each node that will run the package. The first NODE_NAME should specify the primary node. All other NODE_NAME variables should specify the alternate nodes in the order in which they will be tried. NODE_NAME NODE_NAME ha_server1 ha_server2 ...for Sambapkg1, NODE_NAME NODE_NAME ha_server2 ha_server1 ...for Sambapkg2, etc. 3.
Configuring HA HP CIFS Overview of HA HP CIFS Server Active-Active SUBNET 15.13.2.0 6. The following initialization will cause package failover to occur if there is a node or network failure, even if the HP CIFS Server monitor script is not being used. PKG_SWITCHING_ENABLED NET_SWITCHING_ENABLED YES YES 7. If NODE_FAIL_FAST_ENABLE is set to NO, the node is not brought down when the package goes down. NODE_FAIL_FAST_ENABLED NO Edit the samba.cntl Control Script To configure the samba.
Configuring HA HP CIFS Overview of HA HP CIFS Server Active-Active 4. Specify the relocatable IP address and the address of the subnet to which the IP address belongs: IP[0]=15.13.171.20 SUBNET[0]=15.13.168.0 for sambapkg1, IP[0]=15.13.171.21 SUBNET[0]=15.13.168.0 ...for sambapkg2, etc. 5. If you want to use the HP CIFS Server monitor script, set the NFS_SERVICE_NAME variable to the value of the SERVICE_NAME variable in the package configuration file samba.conf.
Configuring HA HP CIFS Overview of HA HP CIFS Server Active-Active 7. Use the following as a template for customer_defined_halt_cmds: function customer_defined_halt_cmds { #ADD customer defined halt commands. if [ ! -f ${SMBD_PID_FILE} ] then print "\tERROR: Kill of smbd.pid failed." print "\tERROR: ${SMBD_PID_FILE} could not be found." else SMBD_PID=`cat ${SMBD_PID_FILE}` findproc $SMBD_PID if [ "$pid" = "" ] then print "\tERROR: Kill of smbd.pid failed." print "\tERROR: ${SMBD_PID} could not be found.
Configuring HA HP CIFS Overview of HA HP CIFS Server Active-Active Make sure that all processes/applications that access the file systems mounted by sambapkg are shutdown in the customer_defined_halt_cmds subroutine. This will allow the filesystems to be unmounted and failed over to the adoptive node. Package failover may not occur if any of the filesystems mounted by the sambapkg cannot be unmounted. Edit the samba.mon Monitor Script To configure the samba.
Configuring HA HP CIFS Overview of HA HP CIFS Server Active-Active pid=`/usr/bin/ps -e | /usr/bin/grep "$1" | grep "mbd" | /usr/bin/sed -e 's/^ *//' -e 's/ .*//'` } # # Function startnmbd # startnmbd() { # start the nmbd logger -t "${NETBIOS_NAME}.mon" "${NETBIOS_NAME} nmbd daemon is not running. Restarting daemon." nmbd -D -l ${LOG_FILE} -s ${CONF_FILE} } startsmbd() { # start the nmbd logger -t "${NETBIOS_NAME}.mon" "${NETBIOS_NAME} smbd daemon is not running. Restarting daemon.
Configuring HA HP CIFS Overview of HA HP CIFS Server Active-Active echo "ERROR: ${NETBIOS_NAME} nmbd not running!" exit 1 fi fi fi if [ ! -f ${SMBD_PID_FILE} ] then sleep 1 print "\tERROR: ${SMBD_PID_FILE} could not be found!" exit 1 else SMBD_PID=`cat ${SMBD_PID_FILE}` findproc $SMBD_PID if [ "$pid" = "" ] ; then if [ "$MAX_SMBD_RETRYS" -gt 0 ] ; then startsmbd if [ "$MAX_SMBD_RETRYS" -ge 1 ] ; then (( MAX_SMBD_RETRYS = MAX_SMBD_RETRYS - 1 )) fi else sleep 1 echo "ERROR: ${NETBIOS_NAME} smbd not running!"
Configuring HA HP CIFS Overview of HA HP CIFS Server Active-Active 1. On alternate nodes create a cluster package directory: mkdir /etc/cmcluster/samba/sambapkg1 or sambapkg2, sambapkg3..n Copy the package scripts from the primary node. rcp primary_node:/etc/cmcluster/samba/sambapkg1/* \ /etc/cmcluster/samba/sambapkg1 2. Use the cmcheckconf command to verify the contents of your cluster and package configuration.
Configuring HA HP CIFS Special Notes for HA HP CIFS Server Special Notes for HA HP CIFS Server There are several areas of concern when implementing Samba in the MC/ServiceGuard HA framework. These areas are described below: • Client Applications HA HP CIFS Server cannot guarantee that client applications with open files on a HP CIFS Server share, or, applications launched from HP CIFS Server shares, will transparently recover from a switchover.
Configuring HA HP CIFS Special Notes for HA HP CIFS Server set to yes, then you have to use an smbpasswd file. By default, this file is located in the path /var/opt/samba/private but you may specify a different path with the smb passwd file parameter. Another important security file used with domain level security is the machine account file, .mac. Since this file will be updated periodically (as defined in smb.
Configuring HA HP CIFS Special Notes for HA HP CIFS Server To do so, configure /var/opt/samba/locks/WINS.DAT to be a symbolic link to a WINS.DAT file on a logical shared volume. HP does not recommend putting the entire /var/opt/samba/locks directory on a logical shared volume, because the locking data may not be correctly interpreted after a failover.
8 HP-UX Configuration for HP CIFS This chapter describes HP-UX tuning procedures for the HP CIFS Server.
HP-UX Configuration for HP CIFS • HP CIFS Server Memory and Disc Requirements • HP CIFS Process Model • Overview of Kernel Configuration Parameters • Configuring Kernel Parameters for HP CIFS The following information should be considered as general guidelines and not a rigid formula to determine the resource requirements of a HP CIFS server running on HP-UX 11.0.
HP-UX Configuration for HP CIFS HP CIFS Process Model HP CIFS Process Model The SMB daemon process, smbd, handles all SMB requests from a client. One such process is launched for each connected client. Each SMBD process handles one and only one client. Therefore, if there are 2048 connected clients, there will be 2048 SMBD processes. Such a large number of processes will demand system resources, requiring adjustment of certain kernel configuration parameters.
HP-UX Configuration for HP CIFS Overview of Kernel Configuration Parameters Overview of Kernel Configuration Parameters The kernel configuration parameters, maxuser, nproc, ninode, nflocks and nfile are described below. These are the kernel parameters that you must adjust to support a large number of clients on HP CIFS. 188 • maxusers: the name of this kernel parameter is a misnomer as it does not directly control the number of UNIX users that can logon to HP-UX.
HP-UX Configuration for HP CIFS Configuring Kernel Parameters for HP CIFS Configuring Kernel Parameters for HP CIFS The first step in configuring HPUX to be able to support a large number of clients on a HP CIFS server is to adjust the maxusers kernel parameter. The second step involves adjusting nproc, nfile, nflocks and ninode individually so as to allow a large number of users to be connected simultaneously. 1.
HP-UX Configuration for HP CIFS Configuring Kernel Parameters for HP CIFS • nfile: when an SMBD process is launched, it will, right at the beginning, take up 23 entries in the system file table. This does not include any other files that the client will open and operate on. At a minimum, therefore, the value of nfile, should be equal to the anticipated number of simultaneous clients times (23 + the anticipated number of files simultaneously opened by each client).
HP-UX Configuration for HP CIFS Configuring Kernel Parameters for HP CIFS Memory Requirements Each smbd process will need approximate 1/2 MB of memory. For 2048 clients, therefore, the system should have at least 1 GB of physical memory. This is over and above the requirements of other applications that will be running concurrent with HP CIFS.
HP-UX Configuration for HP CIFS Configuring Kernel Parameters for HP CIFS 192 Chapter 8
Glossary A C ACL Access Control List, meta-data that describes which users are allowed access to file data and what type of access is granted to that data. ACLs define “access rights.” In this scheme, users typically belong to “groups,” and groups are given access rights as a whole. Typical types of access rights are read (list), write (modify), or create (insert.) Different file systems have varying levels of ACL support and different file systems define different access rights.
Glossary Integrity I S Integrity Integrity ensures that file system data is not modified by an intruder. An intruder can not intercept a file system data packet and modify it without the network file system discovering and rejecting the tampering. Samba An open source product that first appeared in the mid-1990's.
Index Symbols /etc/nsswitch.conf, 122 /etc/nsswitch.ldap, 122 A Access Control Lists, 49 configuring, 80 VxFS, 51 ACLs. See Access Control Lists active-standby HA, 155 adding ACE entries, 58 B base DN, 121 boot, 118 browsing description, 16 documentation, 16 C Change Notify, 45 CIFS protocol, 4 Common Internet File System.
Index M maxusers, 188 N name service, 122 NativeLdapClient subproduct, 118 nfile, 188 nflocks, 188 ninode, 188 NIS and Samba documentation, 16 nproc, 188 NSS, 122 NT ACLs, 51 directory translations, 53 file permission translations, 53 O object class posixDUAProfile, 120 posixNamingProfile, 120 obtaining CIFS/9000 software, 24 Open Source Software, 6 OSS.