HP CIFS Client A.02.02.
© Copyright 2006 Hewlett-Packard Company, L.P Legal Notices The information in this document is subject to change without notice. Hewlett-Packard makes no warranty of any kind with regard to this manual, including, but not limited to, the implied warranties of merchantability and fitness for a particular purpose.
Contents Preface: About This Document.........................................................................6 Intended Audience....................................................................................................................6 New and Changed Documentation in This Edition........................................................................6 Publishing History.....................................................................................................................
Requirements and Limitations Using Kerberos.........................................................................24 Kerberos Key Distribution Center and CIFS Servers.............................................................24 Tickets Not Acquired.....................................................................................................24 Using Kerberos with the HP CIFS Client......................................................................................24 Step 1.
Description........................................................................................................................39 See Also...........................................................................................................................39 cifslist....................................................................................................................................39 Synopsis.............................................................................................
Preface: About This Document The latest version of this document can be found on line at: http://www.docs.hp.com This document describes how to install, configure, and troubleshoot HP CIFS Client on HP-UX platforms. The document printing date and part number indicate the document's current edition. The printing date will change when a new edition is printed. Minor changes may be made at reprint without changing the printing date. The document part number will change when extensive changes are made.
Chapter 3 CIFS Security and Authentication Use this chapter to understand the CIFS security and authentication methods. Chapter 4 Updating HP CIFS Client A.01.* to A.02.* Use this chapter to describe configuration parameter and command option differences between HP CIFS Client A.01.* and A.02.*. This chapter also provides the update procedures so that you can plan and upgrade your CIFS Client.
1 Introduction to the HP CIFS Client This chapter provides a HP CIFS Client description. It contains the following sections: • Introduction to HP CIFS. • HP CIFS Client Description. • HP CIFS Client Features. Introduction to HP CIFS HP CIFS provides HP-UX with a distributed file system based on the Microsoft Common Internet File System (CIFS) protocols. HP CIFS implements both the server and client components of the CIFS protocol on HP-UX.
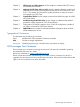
Figure 1 CIFS Paradigm PAM NTLM The HP-UX PAM subsystem gives system administrators the flexibility of choosing any authentication service available on the system to perform authentication. The framework also allows new authentication service modules to be plugged in and made available without modifying the applications. The PAM framework, libpam, consists of an interface library and multiple authentication service modules.
• Support for Microsoft Distributed File System (MS DFS) • Support for Dynamically Loadable Kernel Module (DLKM) • Support for SMB over TCP using port 445 CIFS UNIX Extensions CIFS UNIX Extensions enable the CIFS Client and Samba server to implement standard UNIX file system features.
NOTE: Automounting a CIFS filesystem using the HP ONC+ AutoFS service is only supported on HP-UX release 11i v1 and v2. If you have the HP-UX 11i v1 system, you must install the ONC software package, Enhanced AutoFS, available at http://software.hp.com to enable the AutoFS 2.3 support. AutoFS doesn't support HP CIFS Client on HP-UX release 11.0. Support for Internationalized Clients The CIFS Client is designed to work with a variety of internationalized clients and servers.
The HP CIFS Client supports the following DFS servers: • Windows NT • Windows 2000/2003 • HP CIFS Server For information on how to set up DFS on a CIFS server, consult your CIFS server documentation. The following describe the major features of DFS: • High data availability Multiple copies of read-only shares can be mounted under the same logical DFS name to provide alternate locations for accessing data. If one of the copies becomes unavailable, an alternate is automatically selected.
SMB Over TCP This feature eliminates the use of the NetBIOS Session Service in CIFS client-server connections. This is the default on current Windows clients. SMB-over-TCP is turned off by default in the HP CIFS Client. This feature is not supported by Windows NT servers. For detailed information on how to configure this feature in networks with and without NT servers, see the smbOverTCP parameter in “Configuration File” (page 47).
2 Installing, Configuring, and Using the HP CIFS Client This chapter describes the procedures for installing HP CIFS Client software on your system. It contains the following sections: • “Overview of HP CIFS Client Installation and Configuration” (page 14). • “Step 1: Checking HP CIFS Client Installation Prerequisites” (page 14). • “Step 2: Installing HP CIFS Client and PAM Software” (page 15). • “Step 3: Configuring the HP CIFS Client” (page 15).
Refer to the HP CIFS Client release notes for information about patch dependencies. 4. You must log in as a user with root privileges o perform the installation. NOTE: If you are currently using an A.01.* version of the HP CIFS Client, read the “Migrating from version A.01.* to A.02.* of HP CIFS Client” (page 28) before installing any A.02.* version. Step 2: Installing HP CIFS Client and PAM Software You must have root privileges to install software on your HP-UX system.
the CIFS Client console is configured with the parameter clientCharMapFile, which selects any one of the many character mapping files provided with the product. Character translations for communications with CIFS Servers can be done either in Unicode or through the configuration parameter serverCharMapFile, which also is used to select a character mapping file. Use of Unicode is turned on and off with the useUnicode parameter. The default settings in cifsclient.
1. Start the daemon. Normally the system administrator, logged in as root, enters this command at system startup: $ cifsclient start CIFS Client started; process id: 12783 To check status at any time: $ cifsclient status path: /opt/cifsclient/sbin/cifsclientd version: FILESET HP CIFS CLIENT: Version: A.02.01 Compiled on HP-UX B.11.
This fails because the user has not yet logged into the CIFS Server buildsys. $ cifslogin buildsys joe Remote user joe's password: ***** This succeeds. you can use cifslist command to verify the results. The cifslist command without any option displays servers with shares and mountpoints information, it uses the \\server\share format for mounted objects.
buildsys buildsys joe lucy joe lucille L L For more detailed information on how to use the cifslist command to view the internal tables of HP CIFS Client, see “Commandline Utilities” (page 34). Mounting and Logging in in One Step The root user has the option to mount a CIFS filesystem and log in to the CIFS Server in one step, eliminating the need to explicitly issue the cifslogin command.
The CIFS Client mount database file is /var/opt/cifsclient/cfgdb.ppl. The path to this file is not configurable. This file is generated automatically and must not be manually edited. Name Resolution: NetBIOS Name Service, WINS, DNS, IP Configuration When the CIFS Client attempts to mount a CIFS server, it must first establish a NetBIOS connection to the server, hence the server specified in the mount or cifsmount command must be the CIFS server's NetBIOS (Windows) name.
Table 2 HP CIFS Client Files and Directories File/Directory Description /opt/cifsclient/ Base directory for all CIFS Client core files and administrative files. /opt/cifsclient/bin/ CIFS Binaries. cifsmount Mounts CIFS Shares from CIFS Servers. Can only be used by root user. cifsumount Unmounts CIFS shares. Can only be used by root user. cifsgettkt Utility to help set up Kerberos, see “Using Kerberos with the HP CIFS Client” (page 24) for details.
3 CIFS Security and Authentication This chapter provides a description for CIFS Security and Authentication Methods using Windows NT LanManager (NTLM), NTLMv2 and Kerberos. It contains the following sections: • “Introduction” (page 22). • “User Login Procedures” (page 23). • “Introduction To Kerberos” (page 24). • “Using Kerberos with the HP CIFS Client” (page 24). • “CIFS Client Kerberos Authentication Policies” (page 26). • “Packet Signing” (page 27).
If you attempt to use the traditional Windows NT LAN Manager (NTLM) protocol, set the authenticationMethod parameter to ntlm. In this case, the CIFS Client determines which NTLM version to use based on the ntlmEncryptionVersion configuration. Valid entries for the ntlmEncryptionVersion parameter are ntlm or ntlmv2. For CIFS servers with which Kerberos is not used, if you want to use only NTLMv2 password encryption, set the ntlmEncryptionVersion parameter to ntlmv2.
NOTE: 4. Automatic login using user database is not supported with Kerberos Guest User This feature enables all users on the HP CIFS Client host who are not logged into a mounted CIFS server to access the server's mountpoints, with the privileges of a guest user. Please also see the detailed information on the guestRemoteUser parameter in Chapter 7. To set up guest user capabilities, set the configuration parameters guestRemoteUser and guestPassword to those of a valid account on the server.
These HP-UX resources explain the essentials of Kerberos (in the respective Overview chapters in each manual). This level of detail may be sufficient for most installations. • Configuration Guide for Kerberos Client Products on HP-UX: http://docs.hp.com/hpux/onlinedocs/T1417-90005/T1417-90005.html • Installing, Configuring and Administering the Kerberos Server on HP-UX 11i: http://docs.hp.com/hpux/onlinedocs/T1417-90001/T1417-90001.
To set up the HP-UX Kerberos client, consult the Configuration Guide cited above in step 1. The following HP-UX man pages also contain useful information: kerberos(9), krb5.conf(4), kpasswd(1), kinit(1), klist(1), kdestroy(1). Once you have set up these elements of your Kerberos infrastructure, you can use the following checks to verify that everything is working. Do not proceed to step 3 without performing this verification.
Ticket Lifetime Maximum ticket lifetime is controlled by the configuration of the KDC. For cifslogin, the CIFS client requests a lifetime of 30 days for a TGT. Thus, the actual lifetime of a TGT issued to a CIFS client is the lesser of 30 days and the configured maximum at the KDC. For automatic login, the expiration time of a user's ST is equal to the expiration time of the TGT in the system cache.
4 Migrating From HP CIFS Client A.01 to A.02 HP CIFS Client A.02.* provides new features and requires only minimal configuration changes to update in most cases. However, there are some configuration parameter and command option differences between HP CIFS Client A.01.* versions and HP CIFS Client A.02.* versions. This chapter describes these differences and provides update procedures so that you can plan and upgrade your CIFS Client.
you may skip this step (use cifslist -M to check). You can view this list as a reference when re-creating mount database entries under version A.02. $ cifslist -M > A.01_migration_files/A.01.udb.mounts.list 5. Preserve CIFS Client database to the backup directory . If you skipped steps 3, 4 above, you may skip this step as well. $ mv cifsclient.udb A.01_migration_files/A.01.ubd NOTE: The CIFS Client database is encrypted, using among other elements, the inode of the database in the HP-UX filesystem.
Configuration Differences Between HP CIFS Client A.01.* and A.02.* Comments in Configuration File In HP CIFS Client A.01.*, multiple comment tags were recognized. In HP CIFS Client A.02.*, the # character starts a comment; any text between a # character and the end of a line is a comment. Configuration Parameter Differences This section describes configuration parameter differences between HP CIFS Client A.01.* and A.02.* shown as follows.
The following is a list of new configuration parameters for the Global section in HP CIFS Client A.02.*: • corefileLimit • networkInterfaces • bindUdpExplicitly • pagePoolInitialSize The following is a list of new configuration parameters for the nfs3 specific basis in HP CIFS Client A.02.*: • cacheFiles • cacheOpenFiles • changeMicrosecondFileTimes • nfsKernelCacheTime • preferredPort The following is a list of new parameters for the cifs specific basis in HP CIFS Client A.02.
cifsmount Table 4-2 shows a list of cifsmount command option differences between A.01.* and A.02.*. Table 5 cifsmount A.01.* A.02.
Table 8 cifslogin A.01.* A.02.* Username given in the command line -U username -D domain comments Can specify the username with or without -U option in A.02.*. New parameter in A.02.*, overrides the configured value. cifsdb Table 4-6 shows a new cifsdb command implemented in A.02.*. Table 9 cifsdb A.01.* A.02.* comments cifsdb cifsdb -d cifsdb cifsdb -d Command Option Differences Between HP CIFS Client A.01.* and A.02.
5 Commandline Utilities This chapter provides details for the CIFS Client Commandline Utilities. The HP CIFS Client software package consists of the following programs: cifsclient Stop and start the CIFS client. cifsmount Mount a directory from a remote server. cifslogin Authenticates a user to the remote server. cifsumount Disconnect a local mountpoint from the server, if it is not mounted elsewhere.
rmTmpKerbCredFiles, has been set to no. The files are located in /var/opt/cifsclient/krb5_tmp. kdestroy [-a] Destroy all of the invoking user's CIFS Client Kerberos credentials files, using kdestroy(1). To destroy a single CIFS Kerberos credentials file, use kdestroy(1) directly, specifying the -c {filename} option. CIFS Client Kerberos credentials files are located in /var/opt/cifsclient/krb5_tmp.
Synopsis cifsmount [] /// Description The cifsmount command is used to mount remote shares on the local file system. It mounts the share from server in the local file system at . The mountpoint must exist. You are prompted for a password and the program uses the combination username/password to log in to the server. If you are already logged in to the given server, the password prompt is skipped.
CIFS Client's user database file. It is possible to get the HP CIFS hash values of the passwords (which is functionally equivalent to the passwords themselves) out of this file, although the file itself is not sufficient. You can use this option safely only if you are the only one who has physical or root access to your machine or if you trust everyone who has this access. The HP CIFS Client does not store unencrypted passwords in the user database.
-u Enables plain text passwords. The HP CIFS Client refuses to send passwords in plain text to the server by default because this is a security risk. There are tools available that sniff the network for plain text passwords. If you really must send the password in plain text (e.g., because your server does not allow password encryption), you can enable it with this option. It is ignored if you are already logged in at the server. -f Forces login.
cifsumount -a Description The cifsumount command is used to unmount any shares mounted with cifsmount. Shares can only be unmounted by the user that mounted the share at the given mountpoint or the superuser. The second variant (with the -a option) unmounts all mounts that are currently served. In HP CIFS Sever A.02.*, unmounting the last mount to a server does not logout any of the users logged in at the server.
-s Sets string used to separate table entries (recognized only when used with -r). Sample cifslist Output This section provides examples of cifslist output including the options, -x, -u and -m.
er721142 hpntc43 root root john cifsuser WORKGROUP L LS cifslist —m The following is an example output for the cifslist -m command: $ cifslist -m Mounted Object Mountpoint State ------------------------------------------------------------\\er721142\pub /mnt/cifs_linux/00 M \\er721141\pub /mnt/cifs_nt/00 M \\hpntc43\pub /mnt/cifs_nt/01 MS In the above example, HP CIFS Client uses the \\server\share foramt for mounted objects.
See Also cifsmount, cifslogin, cifslist mount_cifs, umount_cifs Mounts and unmounts CIFS file systems. This section describes the usage of the mount and umount commands when the CIFS filesystem is specified for the FS type Synopsis mount -F cifs [-ar] [-o fs_specific_option[,...]] [server:/share mount_point] umount -aF cifs | mount_point Description The mount command mounts file systems. Only a superuser can mount file systems. Other users can use mount to list mounted file systems.
ignored if you are already logged in. Must be used with the password option. password=passwd Password for username given in commandline. Use this option only if you really have to, because all commandline parameters may show up in the output of the ps command. This makes it possible to pass a dynamically generated password to the server. Password is ignored if the user is already logged in at the server. Must be used with the username option.
6 Troubleshooting and Error Messages This chapter includes information about problems that you may encounter when using the HP CIFS client and explanations of error messages that might occur with HP CIFS commands. • “Troubleshooting FAQs” (page 44). • “Troubleshooting Kerberos in the HP CIFS Client” (page 44). • “Troubleshooting cifsmount or mount in the HP CIFS Client” (page 45). • “CIFS Client Log File and Log Levels” (page 46).
• Basic Kerberos functionality If you suspect that basic functionality of your Kerberos infrastructure is not working properly, repeat the verification checks in step 2. • If you wish to set authenticationMethod for specific servers to a value different from the global setting in the default Server section of the configuration file, you can create server-specific options in the servers section.
fuser(1M)) or cifsclient fuser [-v] mountpoint command against the given mountpoint and each of its subdirectories. This is useful for determining which processes are accessing the mount, in the event that mounting fails with a "device busy" message. Terminate these processes tied to the mountpoint, then invoke the cifsmount or mount command to succeed. CIFS Client Log File and Log Levels The CIFS Client produces a log file of its activities, in the directory /var/opt/cifsclient/debug.
7 Configuration File The default configuration file should work without modifications. Please be sure you understand the effects of any changes before you decide to modify the configuration file. The configuration file is parsed by the HP CIFS Client daemon at startup and when edited. Although it is re-read by the running daemon, not all configuration changes will work immediately. Most options are read into internal variables when they are used.
The configuration file itself is a dictionary (the surrounding curly braces are optional because other properties are not allowed). The keys at the top level are the names of the configuration variables. Properties that have been parsed as strings may be interpreted in one of the following ways: • string • number • enumeration • boolean String needs no further explanation. Numbers are interpreted in decimal, unless they are prefixed with 0 (meaning octal), or 0x (meaning hexadecimal).
[8] rare Logging of rare conditions. Used only during debugging. [9] cacheDebug Debugging of the cache's operation. Used only during debugging. [10] cifsTrace Logging of all CIFS commands issued and the respective return values. Very useful together with netbiosTrace for debugging, but should really be turned off during normal operation. [11] oplock Debugging of opportunistic lock mechanism. Used only during debugging. [12] warn Warnings of any kind, mostly used by the configuration file parser.
# netbiosDebug, # netbiosTrace, # nfsTrace, # rare, # cacheDebug, # cifsTrace, # oplock, warn, # smbSequence, # debugAttributes, smbConnect, # uiTrace, # nbnsTrace, # diskarb, # disk arbitration # authentication, ); The log file records only errors or warnings. But, many log levels can be enabled for checking activities of various modules within the CIFS Client. If you report a problem to HP, your support representative may ask you to enable one or more log levels.
pidFile HP CIFS Client can maintain a file with the process id of the daemon, if desired. If this variable is defined, it is interpreted as the path of the file where the pid should be stored. If this varible is not defined, no such file is created. usersMayStoreSessionData The system administrator can control whether users can store passwords in the user database, cifsclient.udb, through the usersMayStoreSessionData parameter.
networkInterfaces = ("192.168.1.21/24", "192.168.2.23/24") bindUdpExplicitly If this variable is set to yes, HP CIFS Client binds UDP ports to all networks explicitly. Otherwise, it binds to address 0.0.0.0, a wildcard for all network interfaces installed. Binding explicitly may be required on operating systems which do not handle the source IP address of broadcasts correctly if there are multiple network interfaces.
lookupStrategy As you probably know, the HP CIFS Client maps between NFS requests and SMB/CIFS requests. On the NFS side, files are referenced by unique identifiers, called NFS file handles. On the HP CIFS side, files are referenced simply by their path. The HP CIFS Client must be able to determine the path given to an NFS file handle. There are two strategies available to do this: • pseudoInode This strategy derives the NFS file handle as a hash value from the path.
nfsSockRxBuf This integer variable sets the receive buffer size of the socket used to communicate with the kernel. If the value given is out of the acceptable range for your machine, the HP CIFS Client automatically limits the range. Increase the buffer size if you have extremely slow writes. nfsSockTxBuf This integer variable sets the transmit buffer size of the socket used to communicate with the kernel. It is not be necessary to set an explicit buffer size.
specified is not available, HP CIFS Client reverts to a random free port. The default is 138. lookupTryNetbios This boolean variable configures whether NetBIOS broadcast is enabled. WINS is feature of the NetBIOS name server. To enable WINS lookup, you must set this variable to yes and specify the nbnsWinsIp variable with the IP address of the WINS server. The CIFS servers to which you want to connect must be registered with the WINS server. By default, this parameter is set to yes.
scopeID This string variable defines the NetBIOS name scope of the client. If it is not defined, no scope ID is used. If you do not know what a scope ID is, you do not need one. rmTmpKerbCredFiles When kerberos authentication is used, the CIFS Client uses a temporary file to store users credentials during login processing. There is one temporary credentials file per user per server.
encryption password is used for logins to the server. If the value is set to ntlmv2, then NTLMv2 is used. The default setting is ntlm. smbPacketSigning This string variable specifies which option is used by the HP CIFS Client to perform packet signing. The valid entries for this parameter are enbled, required and disabled. By default, this parameter is set to enabled.
server-by-server basis. See “CIFS UNIX Extensions” (page 10) for details. caseSensitive This is a boolean variable (possible values yes or no) which specifies whether filenames on the server are case sensitive. By default, they are case sensitive in order to be consistent with the UNIX file system. If you use a case mapping different from none (see next parameter), you must set this parameter to no.
permissions are not relevant for whether a user can access a file. They are relevant after files are copied from a CIFS share to the local disk since the cp command preserves attributes. dirModeMask This variable can be used to limit the UNIX permissions given to directories by the CIFS. The default setting is 0777. Do not change unless you know what you are doing.
attributes read-only, hidden and system are taken into account. linkMode defines the actual state that these attributes must have. It is 6 by default, which means that hidden and system must be set, but not read-only. The configuration value is calculated as the sum of the following components: Table 10 Title 1 read-only 2 hidden 4 system 32 archive linksAreUnicode If this boolean variable is set to yes, the HP CIFS Client stores faked links in Unicode format on the server.
lock The number of pages to read ahead if an oplock was granted. noLock The number of pages to read ahead of no oplock was granted. useWriteBack This variable defines whether cache write- back techniques should be used. Write back is insecure (in terms of error recovery) if used with NFS2, but it may increase performance notably. The value is a dictionary with the following keys: lock Boolean value which configures whether write back should be used when an oplock has been granted.
setattrTrans2SetFile Suppresses the command trans2/setfileinfo to be used for setting file attributes. This SMB command does not work properly on Windows. setattrTrans2SetPath Suppresses the command trans2/setpathinfo to be used for setting file attributes. This SMB command does not work properly on Windows. setattrSetFile2 Suppresses the use of SET_INFORMATION2 for setting attributes. setattrCoreWithTime Suppresses the use of the core SET_INFORMATION command for setting modification dates.
setDirDates Suppresses setting directory modification dates when files are created or deleted in a directory. This may be useful if the server sets the date automatically when directories are modified. fileModeMask This integer variable defines the file permissions. fileModeMask is 0777 by default. Do not change unless you know what you are doing. The UNIX permissions are not relevant for whether a user can access a file or not.
The option disableSmbs is an exception: all disabled SMBs add up to give the final list of disabled SMBs. The array is searched from the first to the last entry. If an entry matches, the corresponding configuration is used and the search is aborted.
8 PAM NTLM This chapter provides a description of PAM NTLM. Introduction PAM NTLM ( NT Lan Manager) is a Pluggable Authentication Module (PAM) that enables HP-UX users to be authenticated against Windows servers during system login. PAM is an authentication framework in UNIX, used to authenticate users logging into a UNIX system. PAM loads a dynamically loadable module (shared library) that performs the actual authentication. PAM can also be configured to use multiple shared library modules.
PAM NTLM Features • PAM NTLM supports authentication and password management. • PAM NTLM uses a subset of the Samba smb.conf file as its configuration file. See the PAM NTLM Post-installation Instructions below for further information. • PAM NTLM supports username mapping to map a local UNIX user name to a remote CIFS domain user name to use for authentication. See the PAM NTLM Configuration section for more detailed information.
Configuring the system to use the PAM NTLM Module This task consists of editing the global HP-UX PAM configuration file /etc/pam.conf. IMPORTANT: You may not be able to log into the system if PAM is not correctly configured. Make sure that you understand the PAM framework before you modify pam.conf. For information on PAM, see these sections of HP-UX manpages: pam.conf(4), pam_unix(5).
Example 1 Sample file for HP-UX version B.11.23 The following sample pam.conf file is for version B.11.23 of HP_UX : ===================================================================== # PAM configuration # # Authentication management # Note: For PA applications, /usr/lib/security/libpam_unix.so.1 is a # symbolic link that points to the corresponding PA PAM module. # # login auth sufficient /usr/lib/security/$ISA/libpam_ntlm.so.1 login auth required /usr/lib/security/$ISA/libpam_unix.so.
Example 2 Sample file for HP-UX versions B.11.00 and B.11.11 The following sample pam.conf file is for versions B.11.00 and B.11.11 of HP-UX: ================================================================ # # PAM configuration # # Authentication management # login auth sufficient /usr/lib/security/libpam_ntlm.1 login auth required /usr/lib/security/libpam_unix.1 try_first_pass su auth required /usr/lib/security/libpam_unix.1 dtlogin auth required /usr/lib/security/libpam_unix.
Using NIS Distribution of the User Map File The user map file is enabled to be distributed via NIS in a similar manner to the distribution of /etc/passwd to NIS clients. To use this feature: 1. Convert the master user map file into an NIS map file named domainusermap.byname on the NIS master server. NOTE: The NIS map file name domainusermap.byname is the default name that PAM NTLM uses for the NIS map file.
Index C CIFS description, 8 protocol, 8 cifsclient, 17, 34 cifsclient.cfg, 15 cifslist, 34, 39 cifslogin, 34, 37 cifslogout, 34, 39 cifsmount, 34, 36, 42 cifsumount, 34, 38 Common Internet File System.